In our How to Paint Everything series, we take a look at how to paint different models, armies, and materials, and different approaches to painting them. In this article, Charlie Brassley teams up with Kevin “Fowler” Fowler to suggest a few ways of painting Sector Fronteris terrain for 40K (and Necromunda!).
What is Fronteris terrain?
Out on the fringes of inhabited space, people need houses and they need them yesterday. They need something rugged and easy to build. They’d also like some basic amenities like communication, threat detection, and ideally, the galaxy’s most impractical landing pad.
Fronteris terrain occupies an odd spot in the 40K terrain catalogue if you’re a competitive player, as discussed by Rob in the initial review, since it’s trickier to use than generic ruins. For narrative play, however, it’s incredible. The ability to easily represent isolated outposts, complete with buildings that are clear strategic objectives, is absolute gold. All this terrain builds quickly and easily, which just leaves you with the task of painting it. If you’re not sure how you’d like to go about that, we’re hoping the various techniques in this article will give you some ideas.
Charlie B’s method
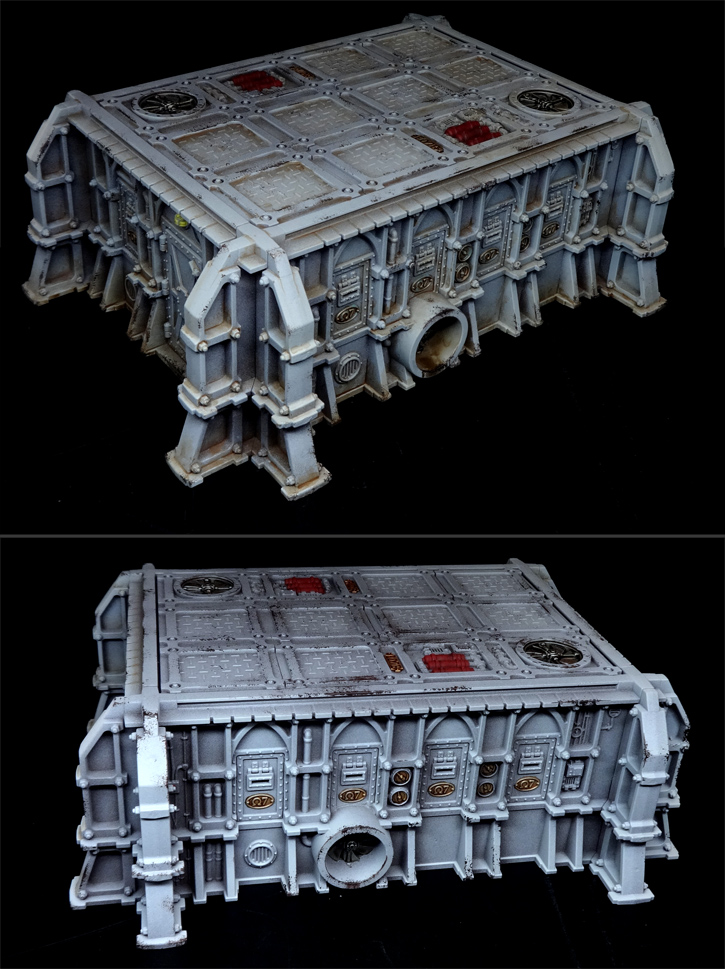
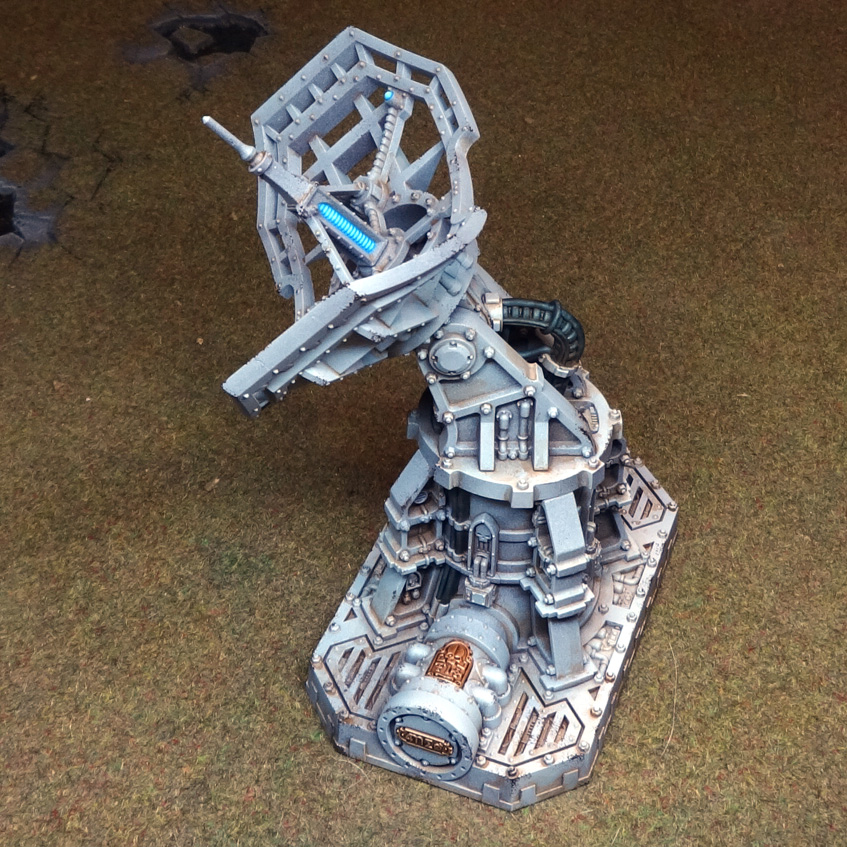
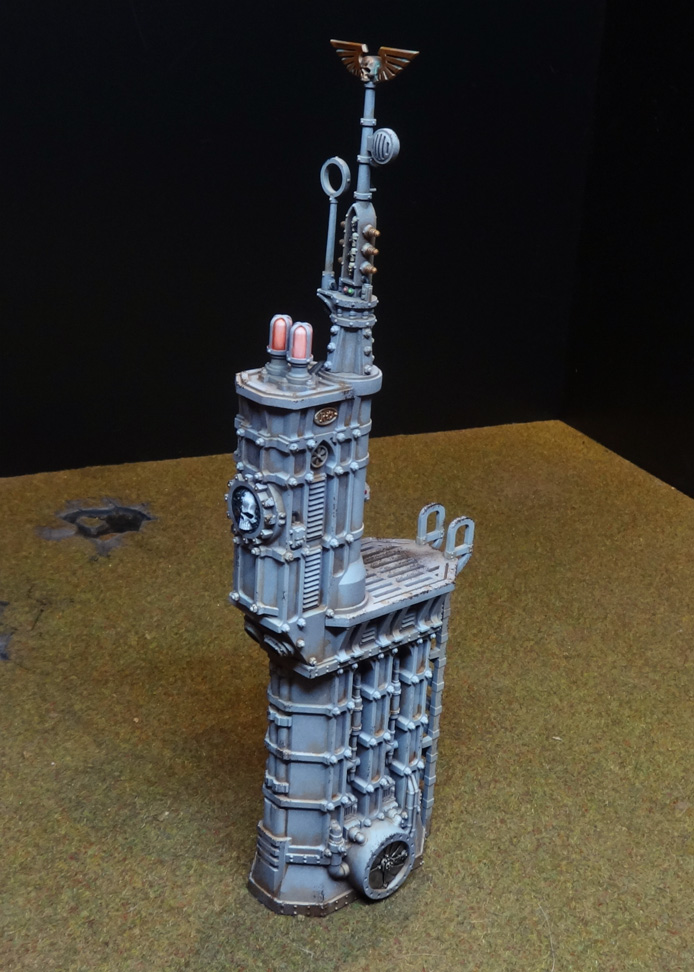
This method is easily adapted to different colour schemes, since the basic principle is quite transferrable: prime with a dark brown, zenithal spray with your main colour, and do some very quick detailing. It’s blisteringly fast… or at least it was, until I decided to add a grime stage that takes me ages, but which I think really lifts it. I haven’t yet had time to try this same method with alternate colours, but I’ve still got two more Fronteris buildings on sprue so I guess I’ll report back later.
Here’s how the method looks when finished:
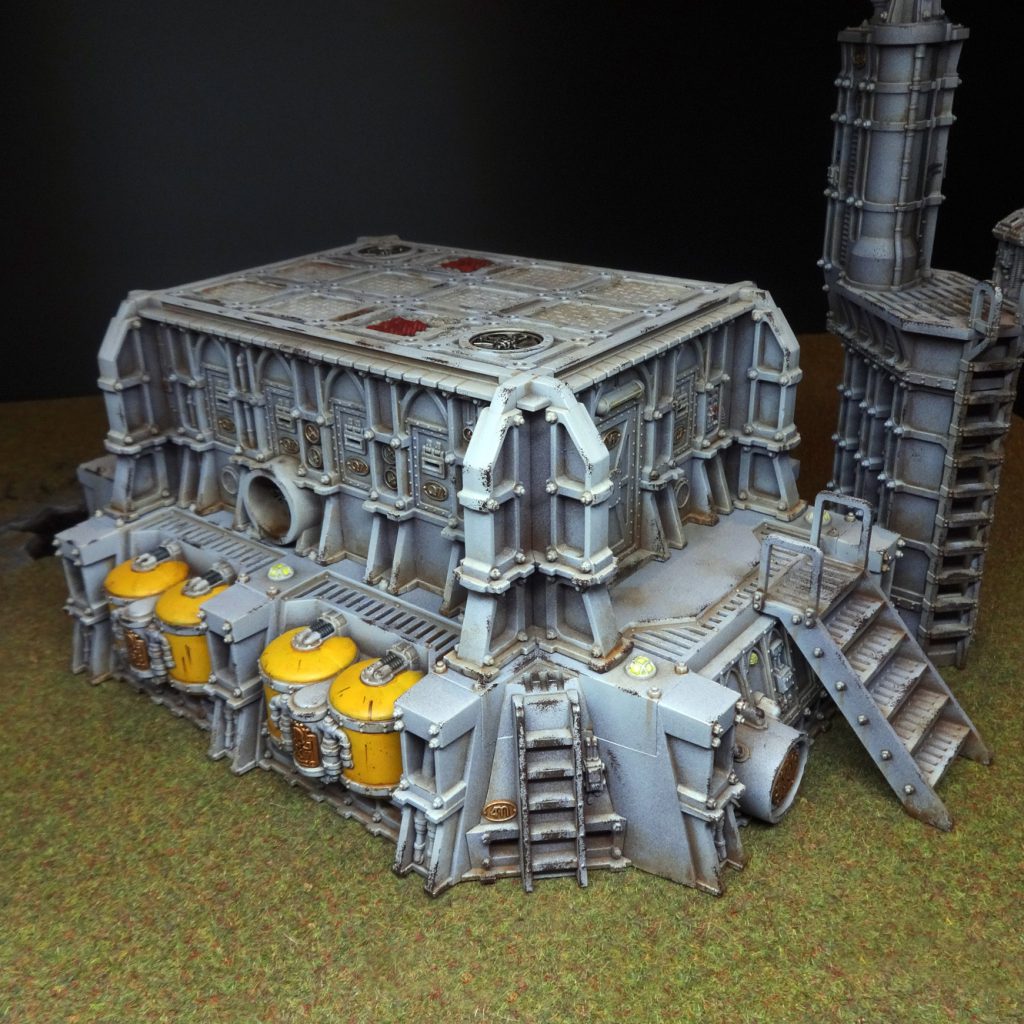
Here’s a step-by-step…


Use Citadel Contrast paint for quick detailing
Citadel Contrast Paint is an absolute godsend for detailing terrain, since it flows so smoothly. I used Black Templar to do any wiring I felt needed picking out, and also used Flesh Tearers Red to do any small fuel tanks and fire extinguishers. For larger flatter details I’d stick with a regular paint for greater consistency – like the Averland Sunset I used on the fuel tanks of the “landing pad.”
(As a brief aside, I should probably explain those quotation marks. The thing is, landing pads are a total bastard to produce as a miniature kit, because a real one would be large enough to actually land on and would also be, well, at ground level. Mostly to reduce crashes and make it practical to load cargo. So… basically a bit of flooring with no impact in-game. Fortunately, this piece of terrain also totally works as an underground bunker entrance, a supply depot, a fuel depot, and even a missile silo. Fantastic bit of terrain.)
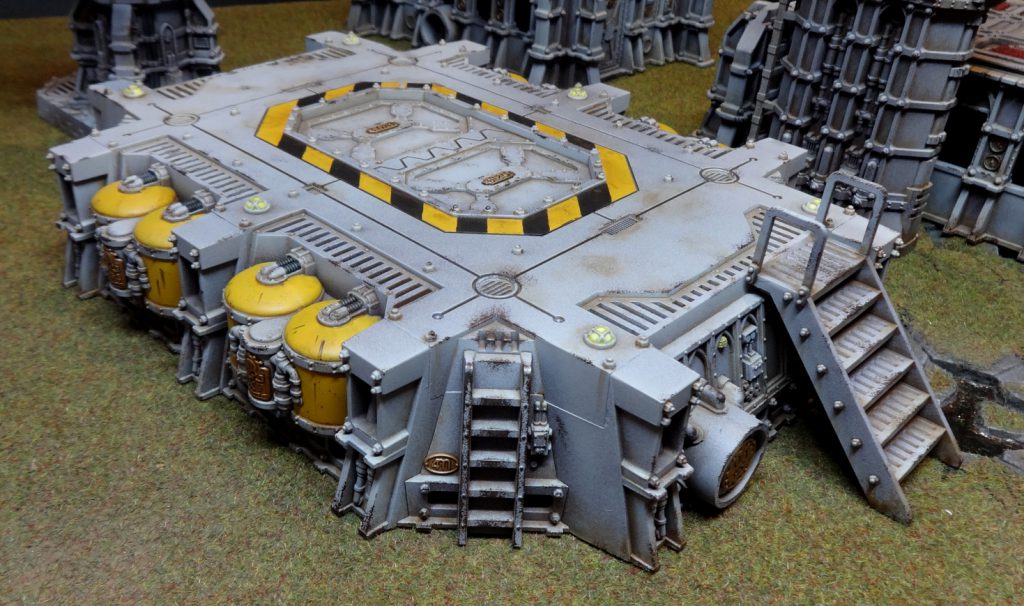
Use white + glazes for the lights
Something not covered by the steps above is how I painted the lights. I painted mine by putting dabs of white paint in the middle of each panel, then following up with a glaze of Citadel’s Yriel Yellow, or some other bright colour. I used various reds, greens and blues for other lights. The key thing is to choose a very, very saturated colour, and for it to go over a white basecoat so that it reads as brighter than everything else.
Grime
Here’s the big time sink. If you’re wanting to get terrain on the table fast, I’d skip it. It should also be noted there’s a number of ways of adding grime; one could in theory just slosh a shade over the whole mini, but the staining this creates would have a very marked effect on a light colour like Grey Seer. You could also use an enamel wash, but that’s a very grimy and imprecise method, so for me, a thinned and carefully applied recess shade of Army Painter’s Dirt Splatter was the move. Here’s a comparison:
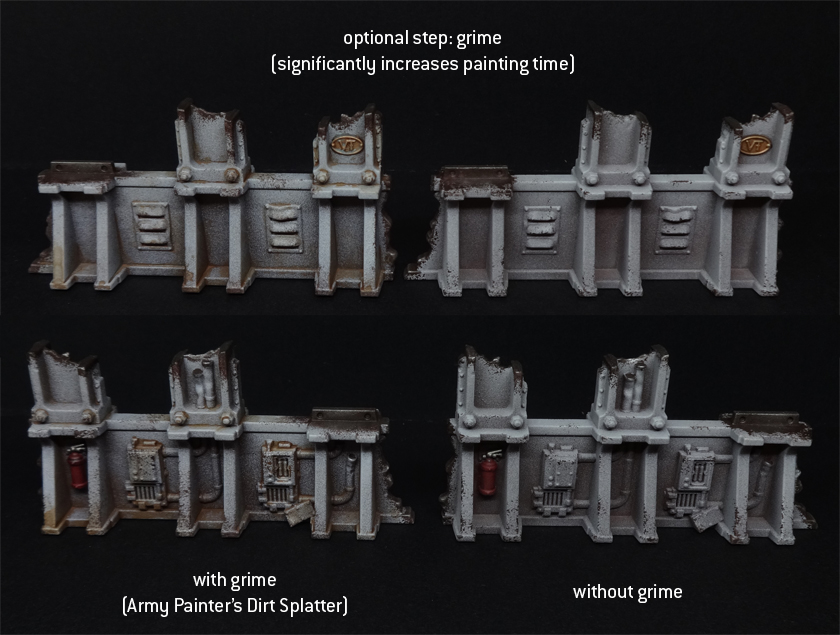
There’s a fair bit of technique being used here, ranging from wet blending to finger painting, because a part of me will always be a toddler. Essentially I slosh a 50-50 mix of water/dirt splatter into the recesses and flat surfaces, i.e. where dust would gather. I then quickly clean my brush and feather the edge with a glaze of pure water before it’s had a chance to dry. For areas that need very subtle fades, I’ll dab an even more watered down mix on and then smudge it with my fingers, or do a lot of water feathering. Finger smudging was my absolute go-to when it came to doing downward streaks – see the rivets at the corner of the landing pad for an example.
Bare metal
A few details, like extractor fans, were done in bare metal. A basecoat of a darkish silver like Citadel Leadbelcher or Army Painter Gunmetal will do fine here, followed by a wash of Agrax Earthshade, then a final wash of Nuln Oil. That should give it an oily feel without going for hardcore rust. These things are intact, functional buildings – at least, that’s how I’ve painted them.
Final notes on the zenithal prime
A note for anyone who isn’t familiar with the word ‘zenithal’ or the technique I’m talking about: ‘zenithal’ just means the paint is being sprayed from above to create some basic shading. You can apply a zenithal layer of colour using a variety of methods, from rattle cans (my choice, since it’s the fastest) to airbrushing, and even drybrushing.
I fully intend to use this method with other colours; I think the key thing is that the zenithal colour contrasts enough with the initial primer. A brown primer should work with most things, but will really show up on light blues and yellows. Again, I’m eager to have a crack at that to see how it turns out. Who knows, maybe with the richer main colour I won’t need to put so much effort into the grime stage? (I am Jack’s lack of optimism.)
A final cautionary word: if you’re using a cold zenithal colour, make sure your primer is a warm colour. My first stab at this method involved using Mechanicus Standard Grey then zenithal Grey Seer and it looked extremely ineffectively cold and flat. To be honest brown is such a good catch-all that I can’t see myself using anything else.
Fowler’s Method
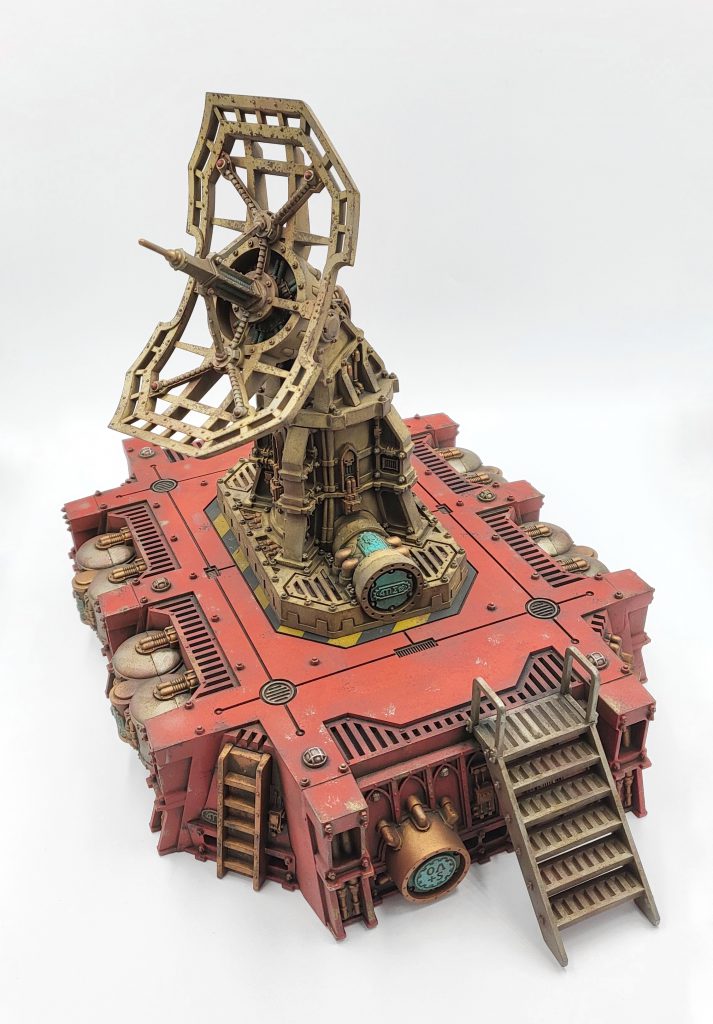
Eagle-eyed readers may say “hey Fowler, isn’t that just your Sector Mechanicus scheme?”… and they would be mostly right! I wanted to knock this piece out quick to get it down to the Goonhammer Open, so I made some adjustments to paint this up even faster. The main event here is red. I primed the landing pad with a red-brown rattlecan and basecoated with Badger Scorching Red. You could use Mephiston Red spray to achieve a very similar effect (though I would recommend a lighter brown primer with that can). The Vox Antenna was primed with a bone color, Wraithbone would do the trick. The landing pad was heavily drybrushed with Evil Sunz Scarlet. Silver details got Army Painter Gunmetal and gold stuff was painted with AP True Copper (GW Balthasar Gold is a match here). Some sign and detail bits were painted with Golden High Flow Acrylic Teal (my favorite).
Hazard stripes are Badger Craven Yellow and GW Corvus Black – my new favorite combo!
Alright, now let’s get to the fun part!
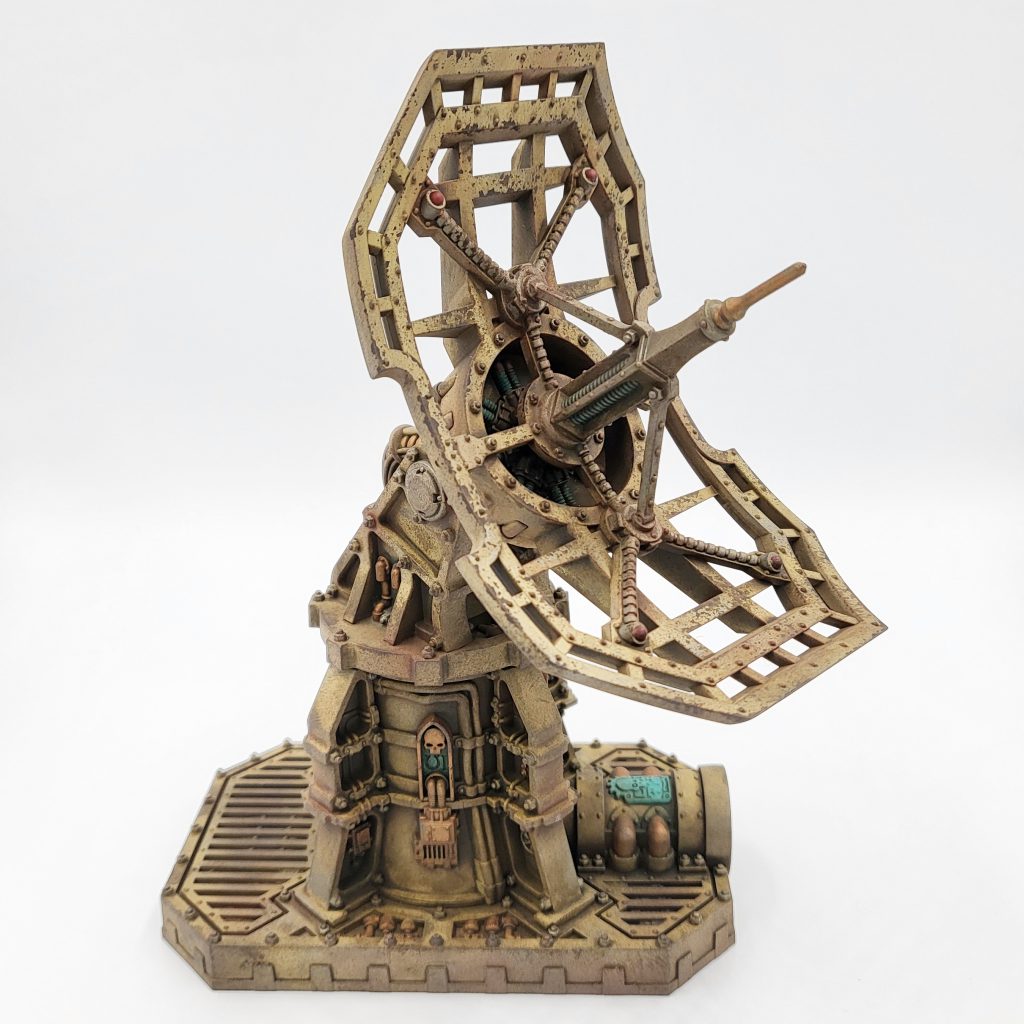
First up, I sponged Army Painter Shining Silver randomly. I didn’t want to overdo this too much as I wanted the end result to be pretty grimy. Next up I sponged Golden High Flow Acrylic all over – focusing on spots that had silver in the previous step. This is a very slightly transparent brown color. I like using it for building grime as you can be a bit more controlled with it. Over the bone color, it stains very nicely! It’s worth spending some time to spend time building some grime on the vents (like on the radar dish above) and metal details like the stairs.
GRIME TIME! At this point I airbrushed Ammo by Mig streaking grime all over. You could also apply this by brush, use a dipwash like AP quickshade, or make your own dingy dark brown wash to cover the whole piece. The end result is plenty dirty, but I did a fair bit of cleaning up to let some of the base color show though. After this, I hit the whole thing with matte varnish.
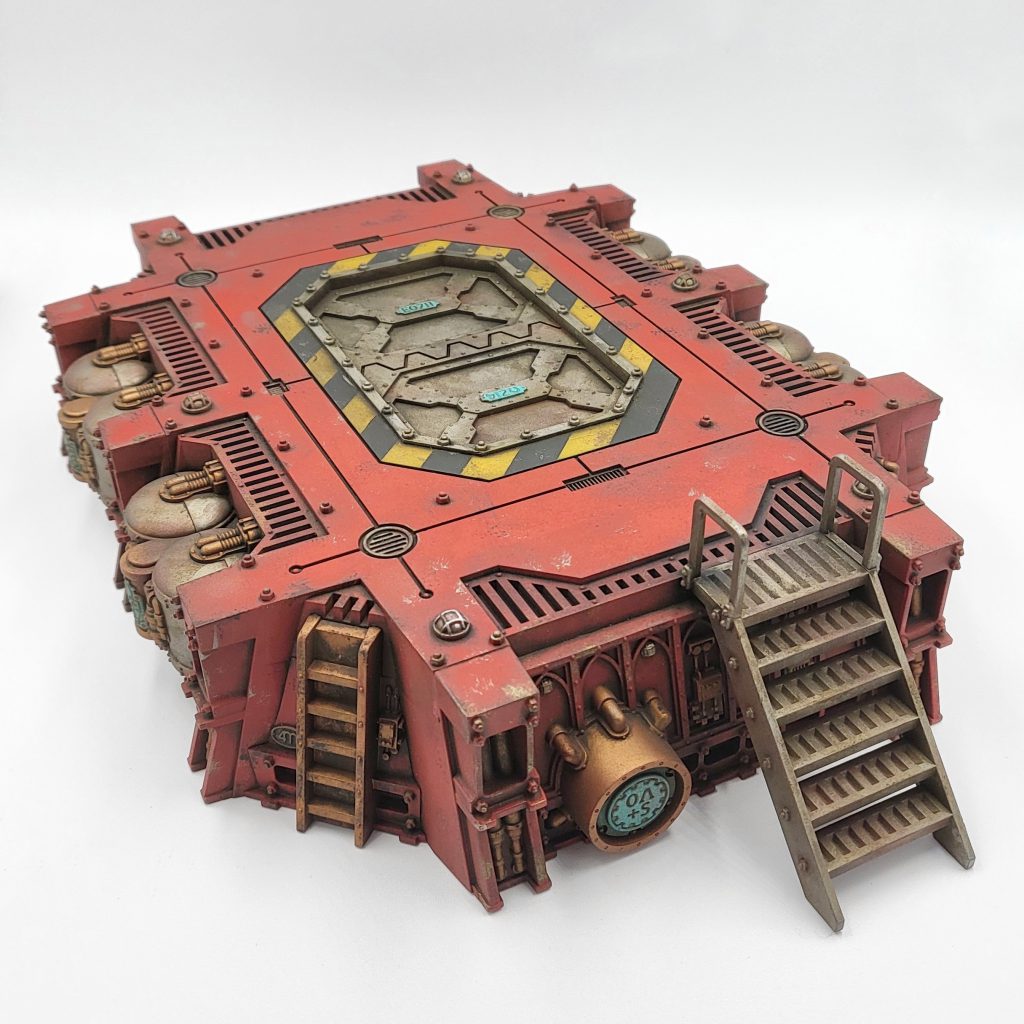
Lastly, I used weathering powders to add some extra interest. In this case I used black, light rust, dark rust, and a little bit of verdigris (around the gold details). I am a firm believer in sealing weathering powder in with varnish to make them a bit more… nuanced? Is that the right word? Occasionally spritzing some varnish also locks the powder in AND strengthens your end result – but you don’t have to seal them up if you prefer not to. Last up, I hit some of the light details with a dab of silver paint and GW Spiritstone Red gem paint to stand out a bit more.
The short version of this scheme is very easy to knock out and scales up nicely across a big set of terrain! You don’t need an airbrush or enamels, just swap in what you have on hand and experiment with it.
Head out to the frontier
Hopefully you’re now ready to take your prefab buildings, set up a quaint two-grox town somewhere remote and picturesque, and then defend it from the inevitable raiding parties. As always, if you have any questions or feedback, or you just want to share your own sweet Fronteris terrain paint jobs with us, drop us a note in the comments below or email us at contact@goonhammer.com.


You must be logged in to post a comment.