I’ve kinda lost track of how many times I have iterated upon my salamanders scheme, it’s probably close to ten times by now. As such this is purely a snapshot in time, just like the various times I’ve done this write-up in the past but with a new generation of HTPEs in the works here at Goonhammer I thought it was a good time to get a ore up to date version of this army out there!
Table of Contents
The Main Scheme
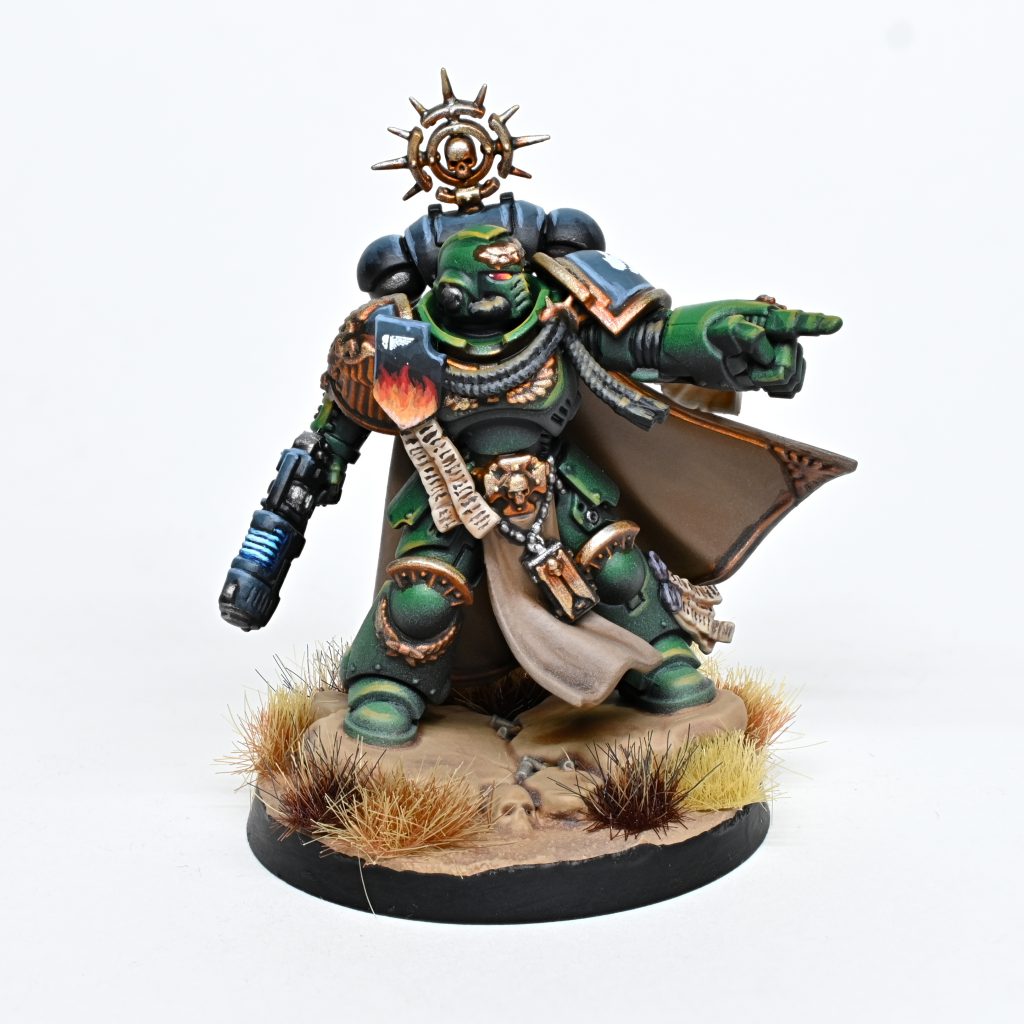
Getting into the thick of things I start with a airbrushed zenithal green over the models, I quite like the definition this gives and also offers some effort saving. Priming black is probably the lowest effort colour to prime as there are a million different ones that all work great, then going over that with a wide-angle zenithal of nocturne green it gives a bit of a transition and a base for the worst colour in the entire scheme. Warpstone glow is just objectively a terrible colour that only mad people (IE me) use as the main part of a scheme, even through the airbrush I find this will take 4-8 coats to look good and never thins quite how I want it to.

After the airbrush booth comes the conventional brushwork, and something you will probably immediately notice is that even a character like this only has five different colours as the post green basecoats.
This is primarily because I am lazy.
The other answer is that washes and highlight colours will do more then enough to differentiate the different materials, particularly with how most marine units are actually surprisingly limited in how many different textures are used. Most can be broken down into the following based in my scheme:
- Green – The main armour I airbrushed
- Black – The secondary armor panels, rubber, tassels, etc
- Rakarth – The various bits of parchment
- Steel legion – Cloaks and cloth
- Iron hands steel – Self explanatory
- Retributor – Gold! Marines love their trim and gold
There are a few other details I will roll out but I can leave that for its own section of the article!

The washes are mostly straightforward, but you will find that I love using contrasts on metals to give them a kind of saturation that they really benefit from, in this case I use snake bite on the gold and basilicanum on the steel. Otherwise the next weird choice I have is to use drakenhof to recess shade the green as it can read as darker and more itegrated then something like nuln oil due to fun colour theory stuff I only vaguely grasp in a intuitive way. I think the others should be pretty logical, parchment gets washed sepia, the cloaks with extremely thinned agrax, and finally the seals get painted in with shyish.
After that we get into the highlights, and I recommend starting with the blue/black as its the easiest to clean up after at this stage. The recipe for it is pretty simple but does glaze in the transition of thunderhawk, you can do mixes and its fine too thought! The edge highlights and shoulder pad recess lines are just conventional line highlights of russ and fenrisian grey.
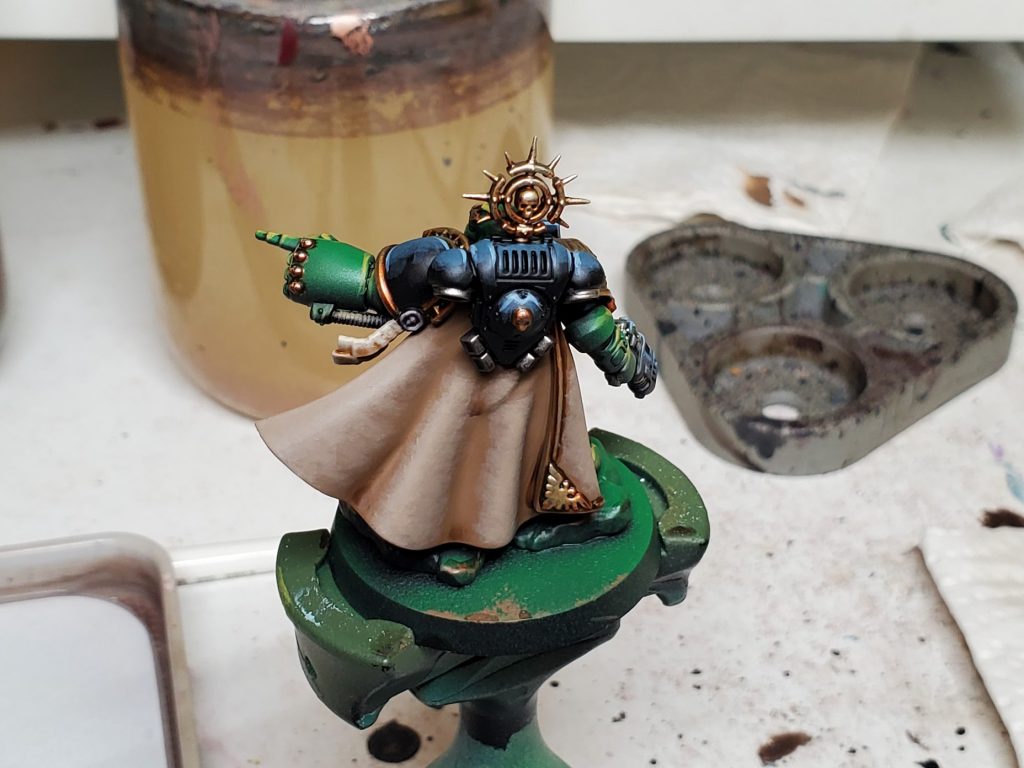
Once that highlight is out of the way the rest of the scheme goes by quick, this cloak was probably the most time consuming single thing remaining as its glazed up with baneblade brown intentionally using a small brush to add the texture organically.
The rest are just conventional layer highlights, the green armor has a couple of slightly interesting choices of elysian green and zamasi desert for the highlights to shift towards yellow remaining saturated without getting florescent or cartoony like moot would.
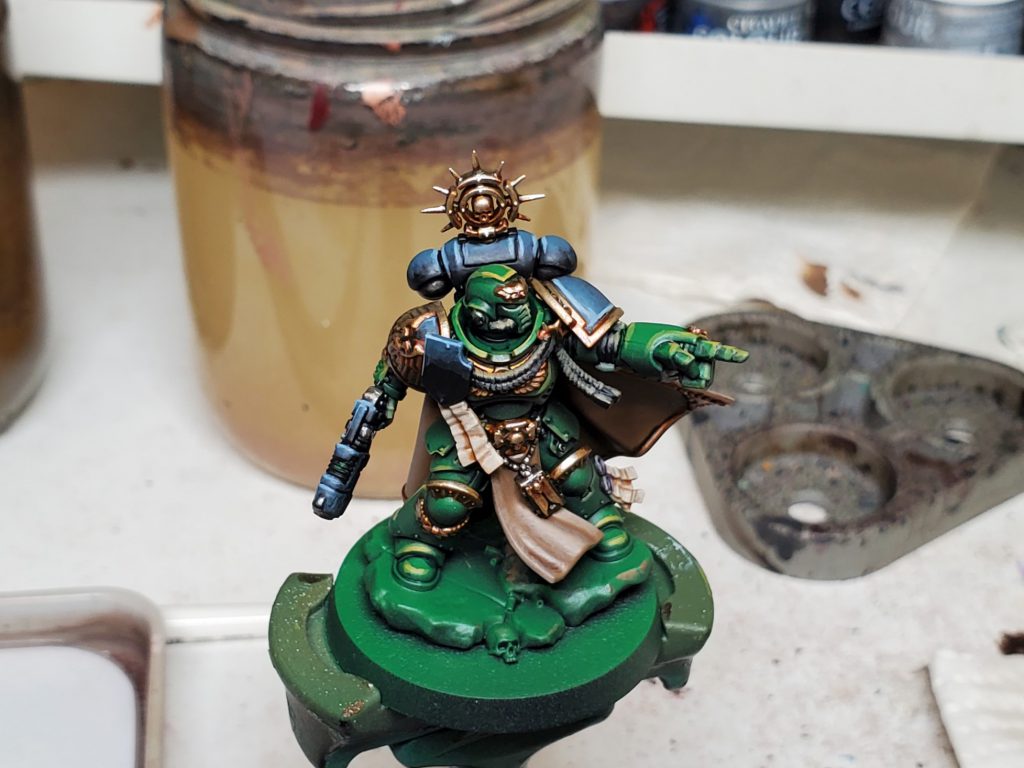 The non armor black gets differentiated from armor by using warm highlights of stormvermin that gets a bit of tau light ochre mixed in for each increasingly bright highlight. It adds a bit of a organic or rubbery texture to the black that I think helps split it off pretty well, but you could of course start with a grey as a basecoat for further differentiation.
The metals are both share a final highlight colour that gets mixed gradually into the main highlight in the form of stormhost silver, then respectively the steel gets revisited with the base coat of iron hands while the gold gets highlighted with liberator gold.
The parchment is glazed or layered depending on the size of the area with flayed one flesh and the seals get a area highlight of warpfiend and slaanesh grey, those could be glazed or transitioned in but usually they are small enough that you can get away with just the one coat of each.

Next up is the details! The simplest is using wyld wood to sketch in the text on the parchment, I often get the inconsistency of written text by moving my brush in the opposite way to what would be comfortable. IE if I normally pull the brush towards myself to draw a straight line, I would draw it away and get a bit of organicly shaped text with a minimum of effort, though I would suggest adding sentence breaks by lifting off intentionally!
The eye lenses follow the typical style for doing lenses and have a reasonably simple set of colours too. I start with khorne red as the base, then add a single layer each of wazdakka, wild rider, fire dragon and flash gitz working towards the brightest point. Sometimes on a bigger lense I will add a transition mix between each colour but you can get away without that on a surprising number of things. Next up for the reflection I use a simple white to draw it in, its worth mentioning that I use the same basic recipe for screens and targeting laser just replacing the white reflection with flash gitz!
I have a couple of ways of doing the flames, the first is the simple way where I start by sketching in the first few shapes in a coat of Mephiston then the rest of the colours are just progressively smaller rough ‘c’ shapes of evil suns, fire dragon, ungor, and pallid wych. Placing the little ‘c’ shapes in various directions gets the idea across enough while still keeping it down to a minute or two a model total, but for centerpieces or characters I’ll draw in the distinct flames carefully and add transitional mixes wherever I feel it is too stark.
In this case the model has a plasma which follows my standard blue plasma colours, base coat baharroth, wash thinned ultramarines contrast then use thicker coats of it to shade the ‘cool’ areas of the coils. Then just build in the brightest bits by slowly mixing white into the base coat until you use just the slightest touch of pure white.

Apply any transfers you want to, then move on to the base which I mostly like to keep simple, apply a coat of vallejo grey sand then paint everything other then shell cases in zandri dust that gets drowned in sepia once dry.
You can leave things there but I like to both knock down the sand to something more realistic and tie the model into it by carefully airbrushing a thin layer of vallejo model air yellow brown to just apply a filter to the lowest parts of the model.
After varnishing the last steps are painting the rim and tossing clusters of plants on, for these I use Gamers Grass Burned 6mm, Beige 4mm, Dry 6mm, and Brown 4mm.
Common Details
So there are a bunch of extra bits and bobs that can make there way onto a marine that wasn’t present on this particular captain, and I thought it made sense to put them off into their own section!
‘Forged’ Power Weapons
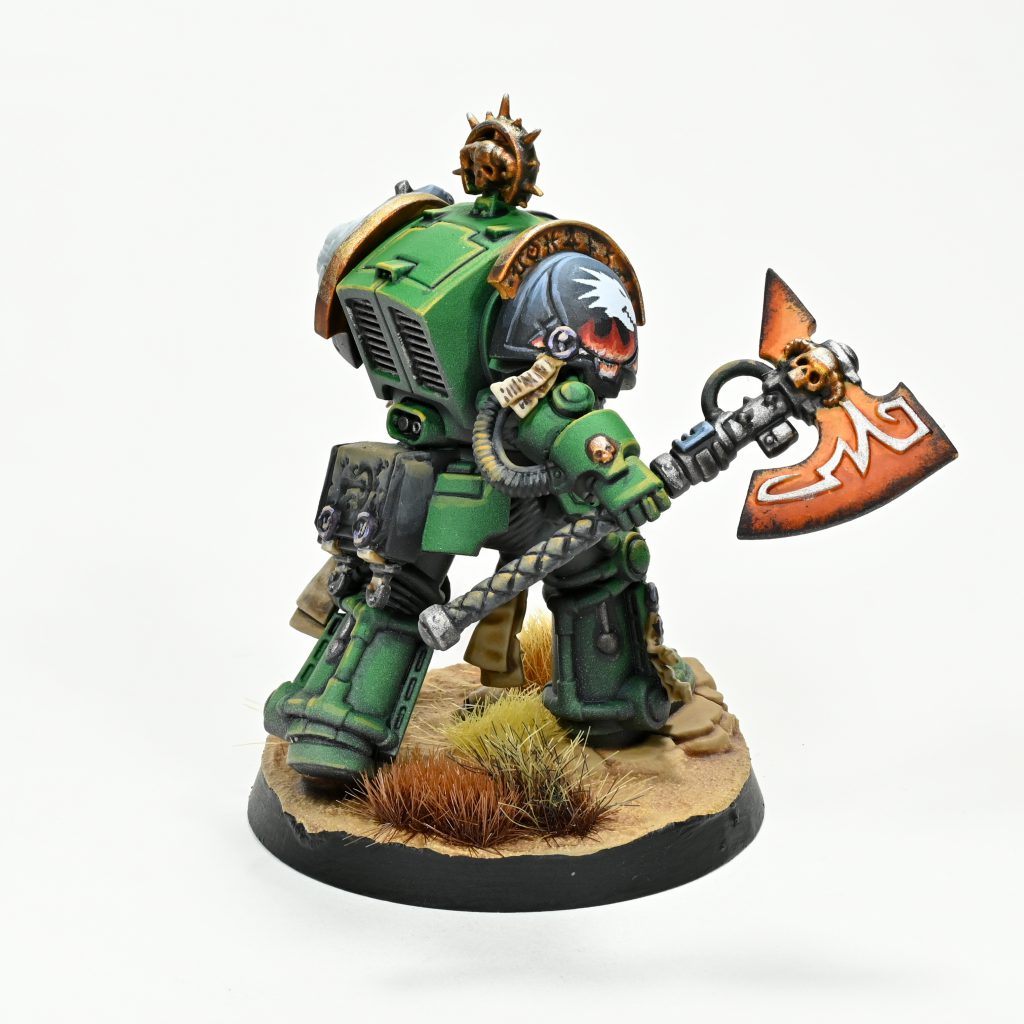
This is way less effort then the first impression you get of the final product. Start with a base coat of tau light ochre then layer a bit of ungor towards the center you can do a mixed transition but I find you can often get away without it. That’s because I do a sequence of glazes of gryph-hound straight from the pot towards the edges, essentially just layered one atop each other in narrower bands before drybrushing/stippling on the black at the edges.
White/Stone Iconography
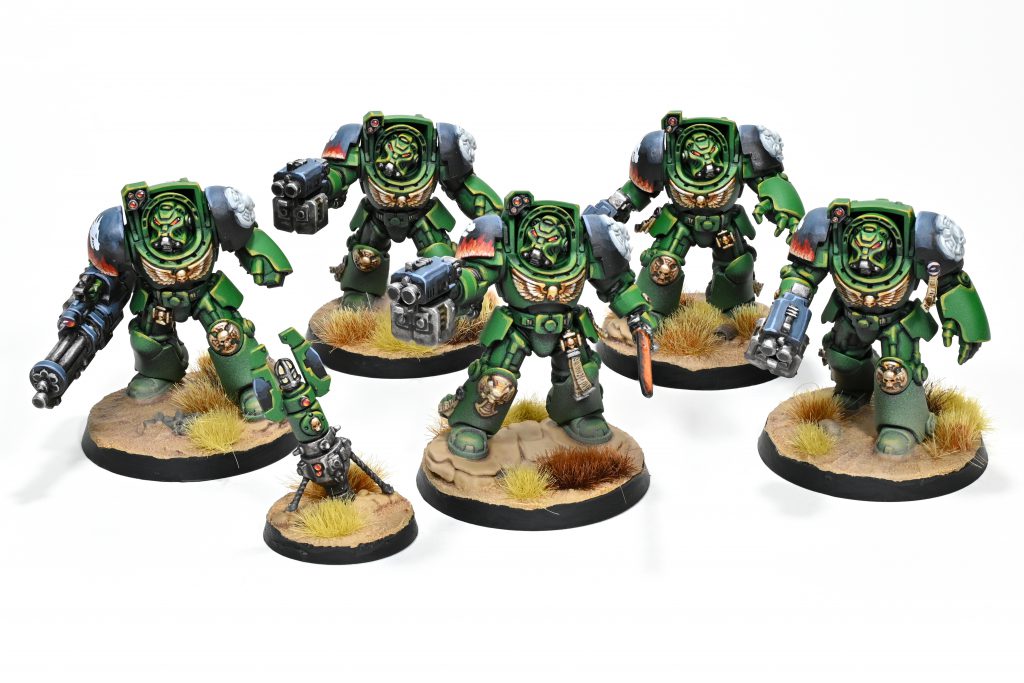
This is keeping things really basic, start with grey seer wash it apothecary white then highlight with ulthuan grey while gradually mixing in white.
Bone
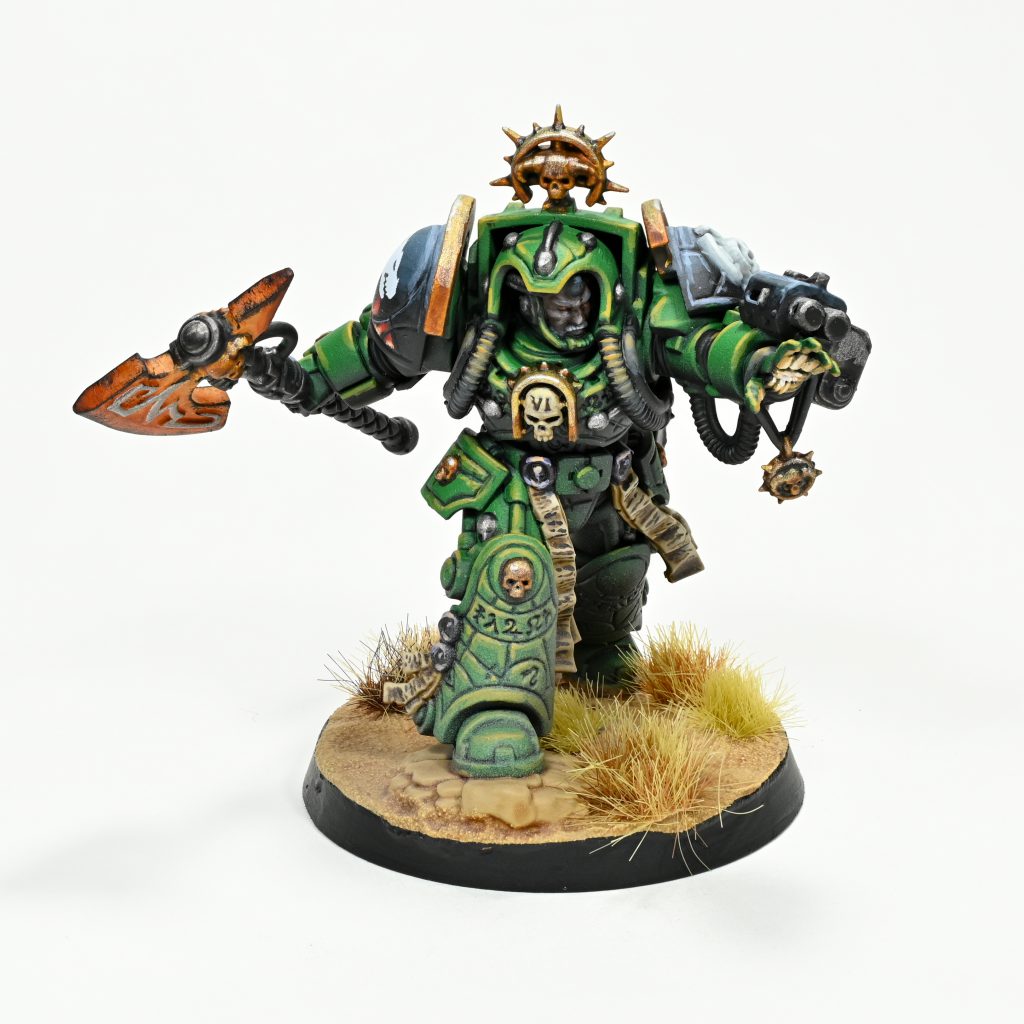
Also nice and simple here, start with zandri dust wash it with thinned agrax earthshade then glaze in highlights with ushabti bone.
Skin Tones
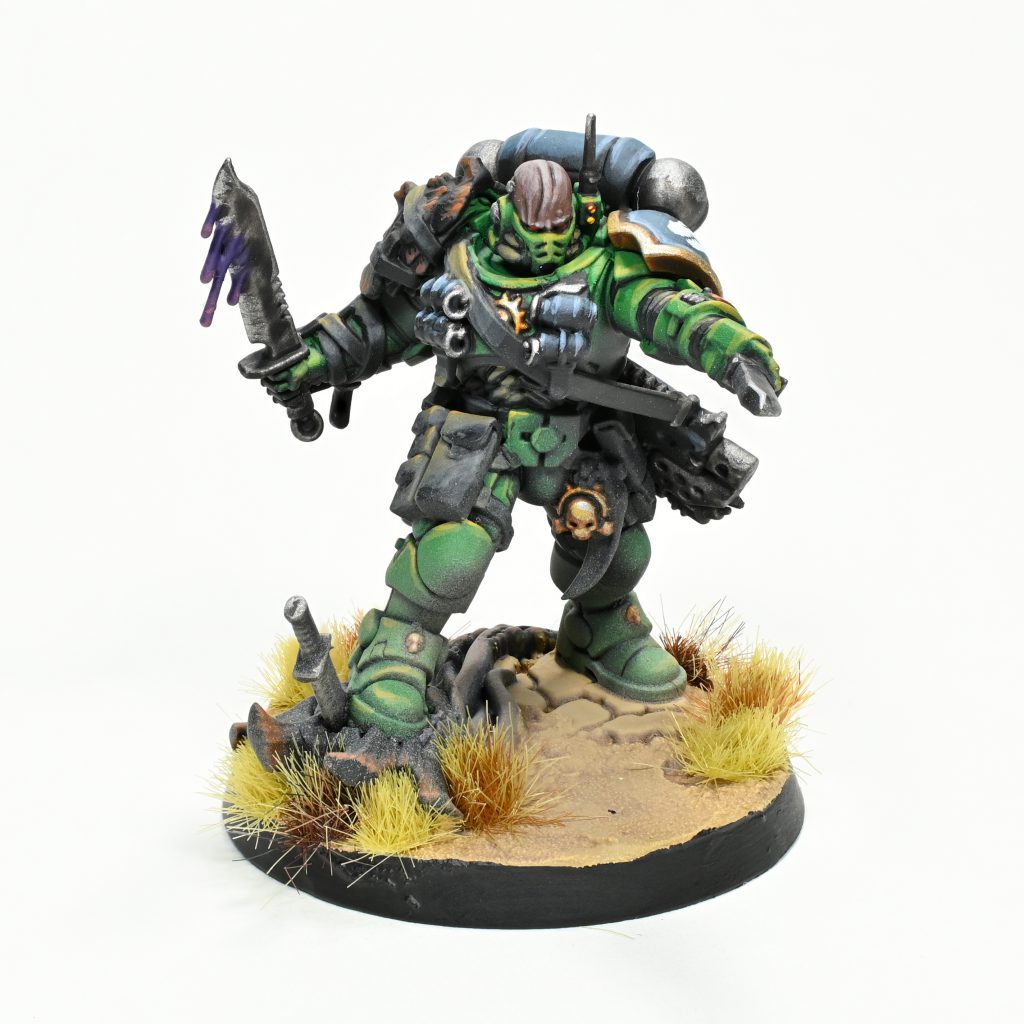
I’m not super fond of the old lore of having salamanders be all coal black skinned demonic looking dudes as there has been some problematic bits of that, so my tendency is to instead have my marines have a slight ashen complexion over top a convectional skin tone and red eyes. I usually start by using a base coat that looks a like a normal skin tone, say catachan flesh, knight questor, bugmans, or any other colour humans might be then wash it in targor rageshade (perhaps a questionable name for the colour GW hmm?) and then highlight by mixing administratum grey into the base coat from before. The eyes are just whatever red I think fits, usually mephiston or khorne though.
There’s a million ways to do skin for salamanders, and I am not entirely comfortable with this one as it can sometimes compress the range of tones from a distance, so I am sure I will come back and iterate on this again!
Vehicle Lights and Tracks
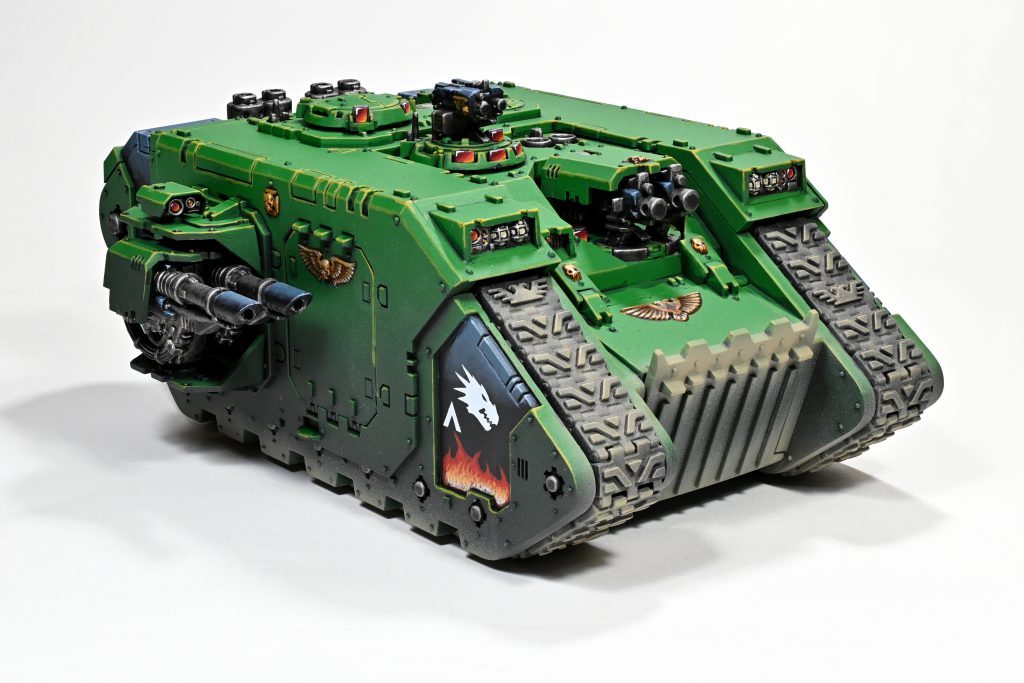
The lights start with morghast bone, then I paint them in as lenses using screaming skull slowly getting white mixed into it. The tracks are nice and simple too, coat them in cygor brown then heavily drybrush them with zandri dust then tie them into the desert with the filter of yellow brown.
Missiles
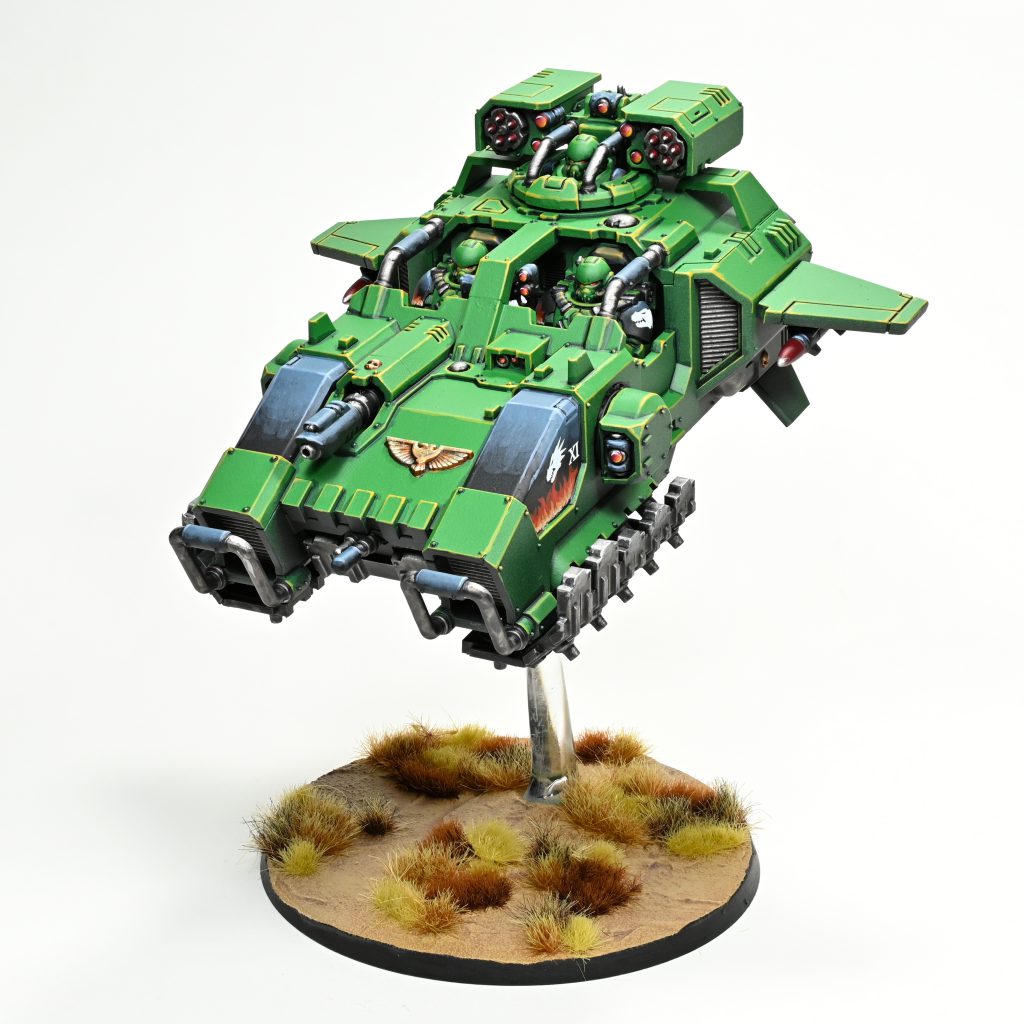
I just apply a coat of flesh terrors red over the metal and then drybrush it with the metal highlights, absolutely dead simple!
Have any questions or feedback? Drop us a note in the comments below or email us at contact@goonhammer.com.


