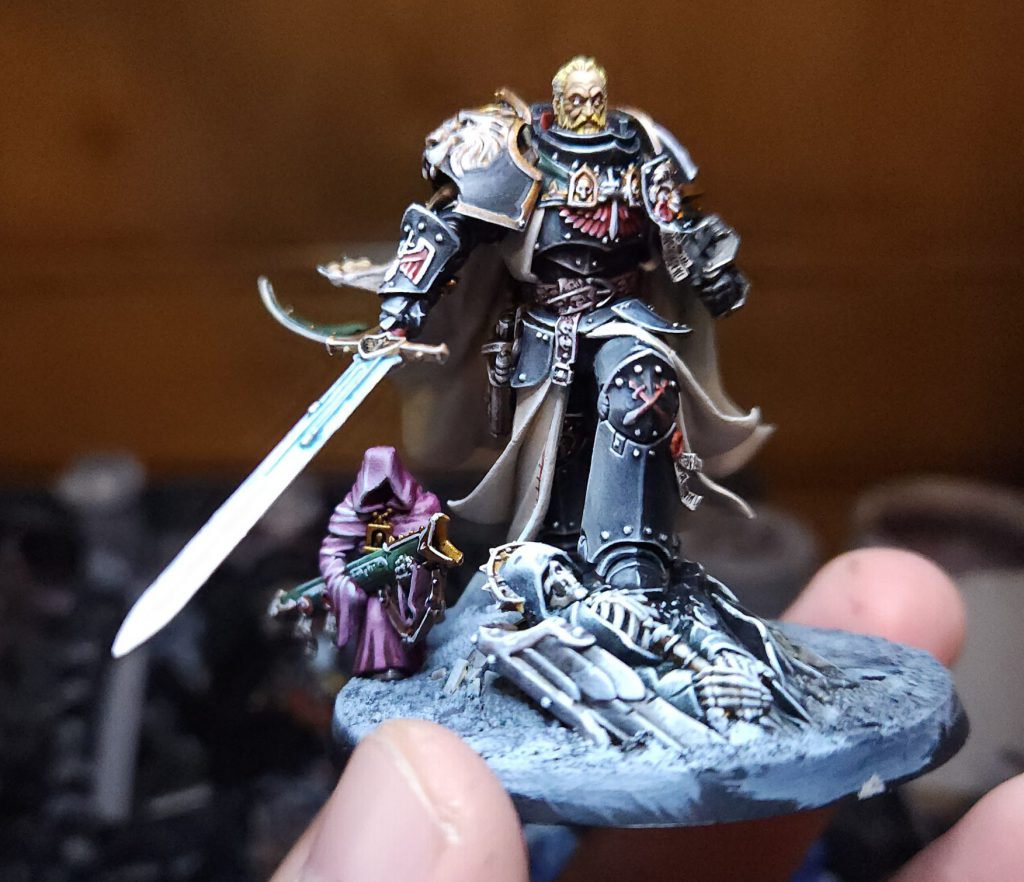
This article is part of a larger series on how to paint Dark Angels space marines. For more on painting Dark Angels, you can return to that series by clicking this link.

Ten thousand years later and the Lion finally delivers on that promise to return with the smokes he left to go grab. The new model is by far the superior Imperial Primarch in Warhammer 40,000, and there’s a lot of cool stuff going on with him. I opted to paint my Lion with black armor, more reminiscent of his Heresy look.
Assembly
While the Lion looks great, I found him to be a frustrating model to work with. There are a lot of cloaks here, and they all have some kind of join that’s going to leave a massive seam if you don’t cover it with greenstuff and sand it down.
In retrospect I wish I’d set the hero rock more toward the flat side; there was barely enough room for the attendant with the scabbard with the positioning I chose and I didn’t realize until it was already way too late in the process to correct it.
Subassemblies and Priming
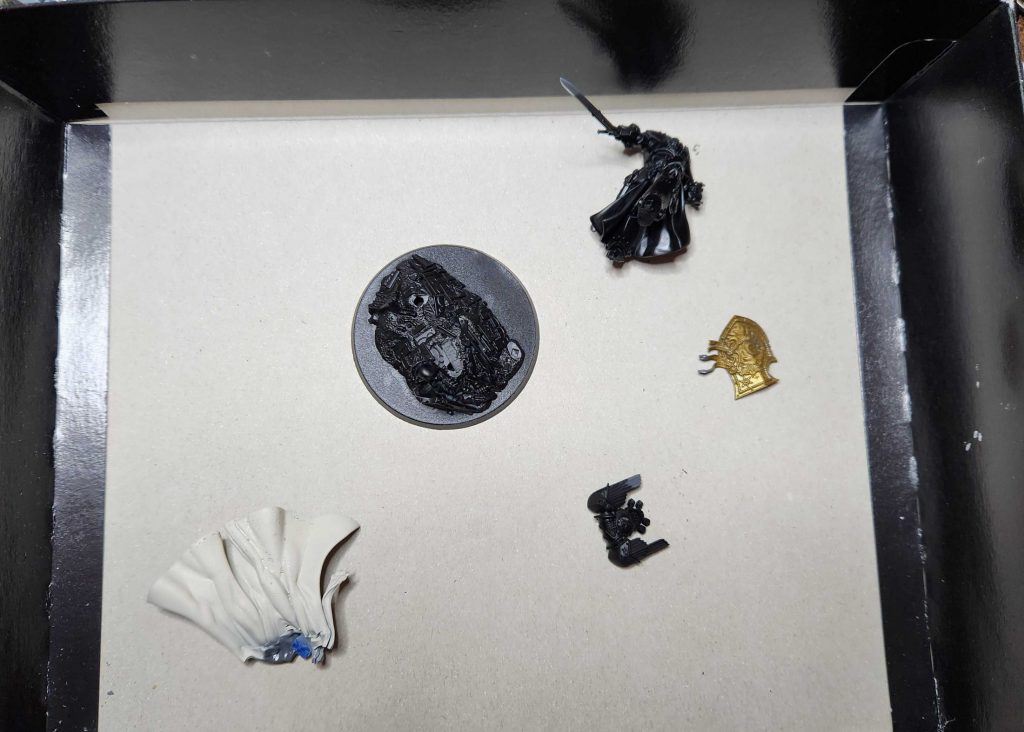
I split the Lion into six subassemblies: The main body, his cape, his backpack, and his shield, as those were the parts that more or less layer on top of each other to create trouble and also were easy to separate. I also kept his head separate and primed it with Wraithbone, as it was easy to slot into the model later.
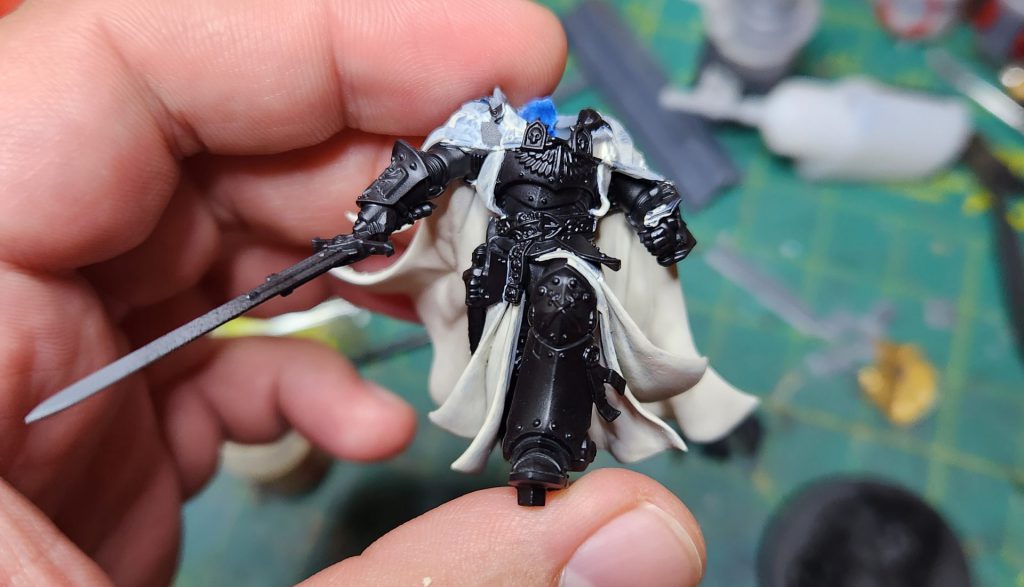
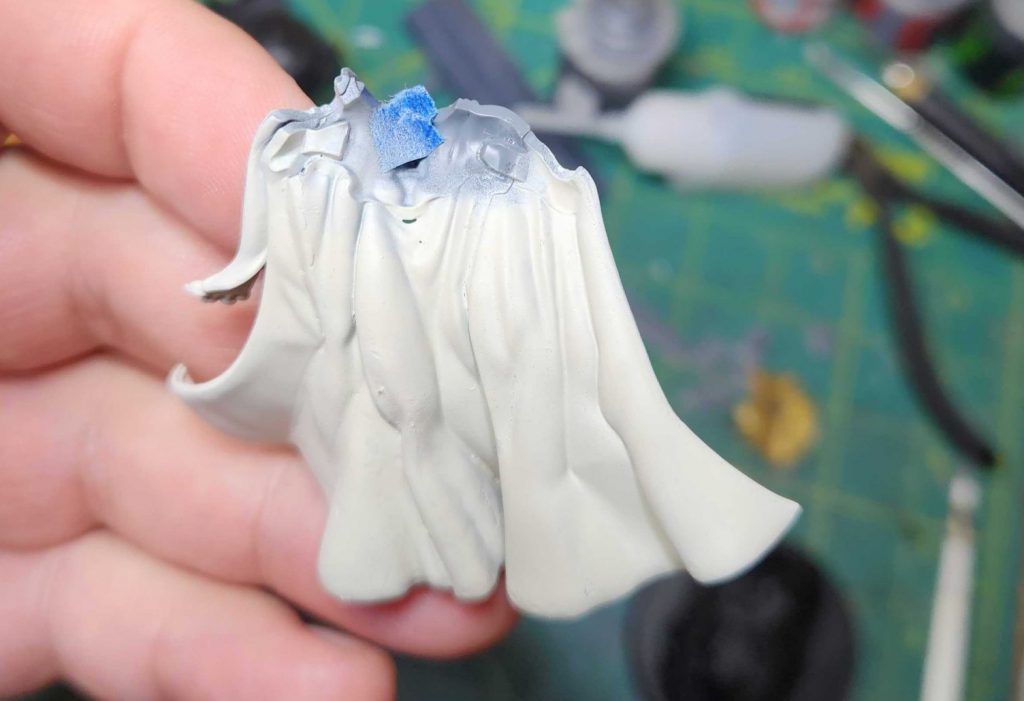
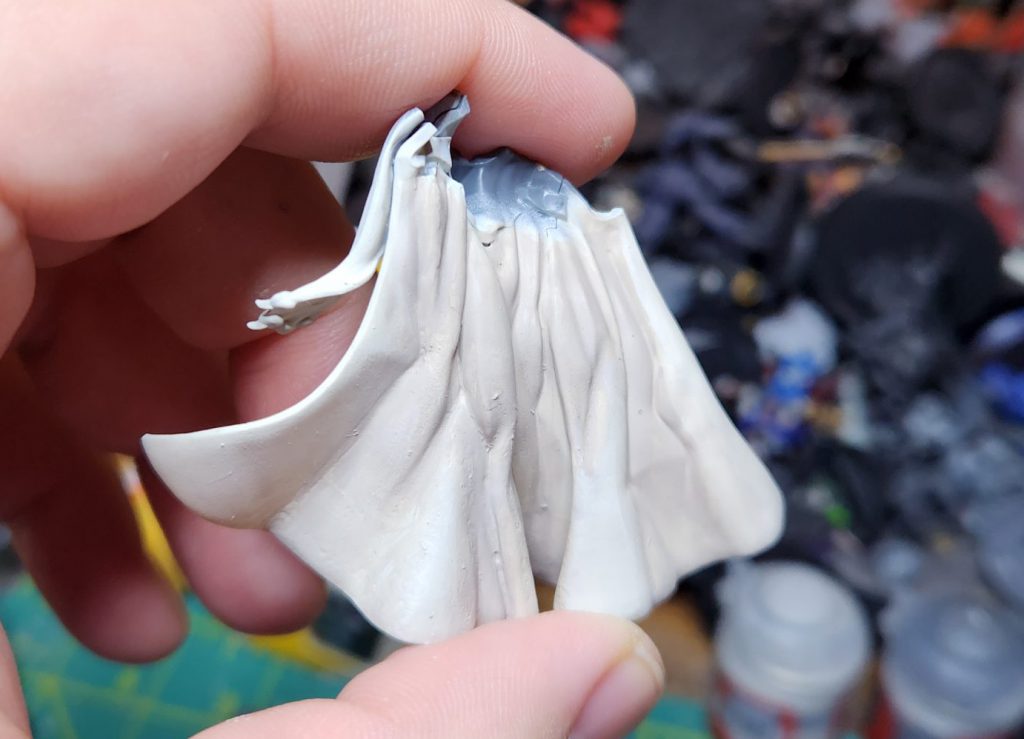
As I was planning to paint the armor black, I primed the body, backpack, and base black. Painting under the cape would have been a nightmare so I chose to keep the back cape separate during my priming process, which also made it easy to prime Wraithbone. Finally the shield I primed with Retributor Armour spray.
The Body
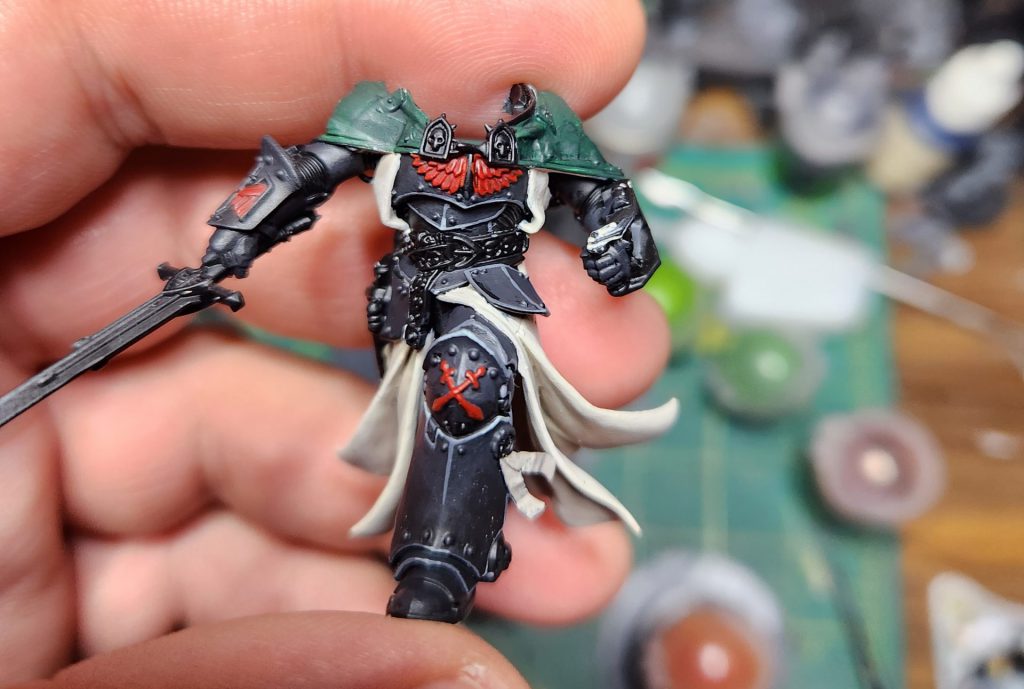
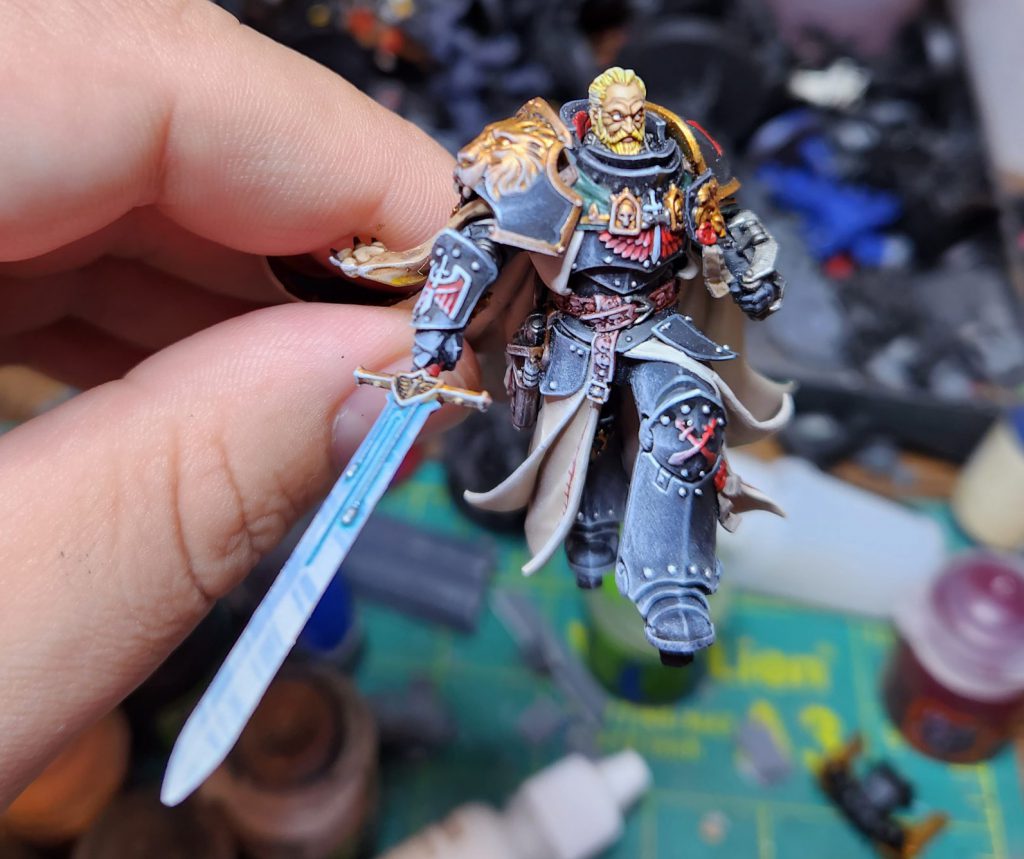
The Lion’s body mostly followed my process for painting black armor at this point – I’d come back and do some more complex work later when I did the OSL for the sword, though. That is, I painted the armor in progressively lighter mixes of Abaddon Black and Corvus Black, going up to straight Corvus Black in the lightest spots.
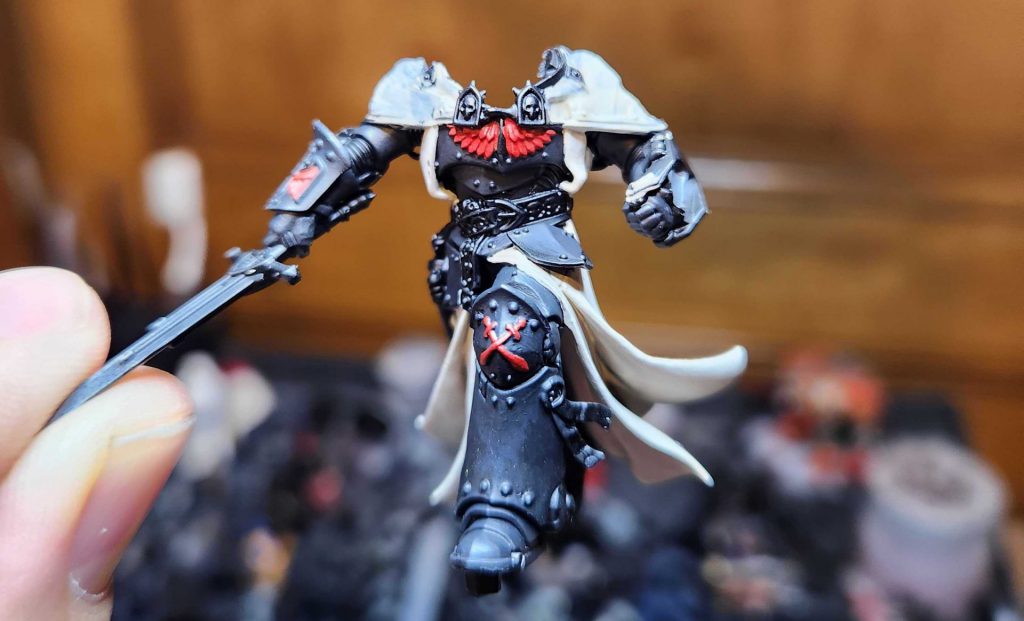 At this point I also laid down some base colors for the markings and robes. The aquila and swords were painted Mephiston Red while the robes were painted with Rakarth Flesh. The red parts will get washed with Carroburg Crimson and highlighted again with Mephiston Red and Evil Sunz Scarlet.
The robes were shaded in their recesses using mixes of Rakarth Flesh and Agrax Earthshade, producing a series of tan glazes I used to progressively darken between the folds and in the dropped areas.
At this point I painted the front part of the cape, starting with Caliban Green and shading that with Nuln Oil and mixes of Nuln Oil and Caliban Green. Highlights were done with Waaagh! Flesh, though this part mostly gets covered by the Lion’s pauldrons. I also started edge highlighting at this point, doing Mechanicus Standard Grey with Celestra Grey for the top edges and corners.
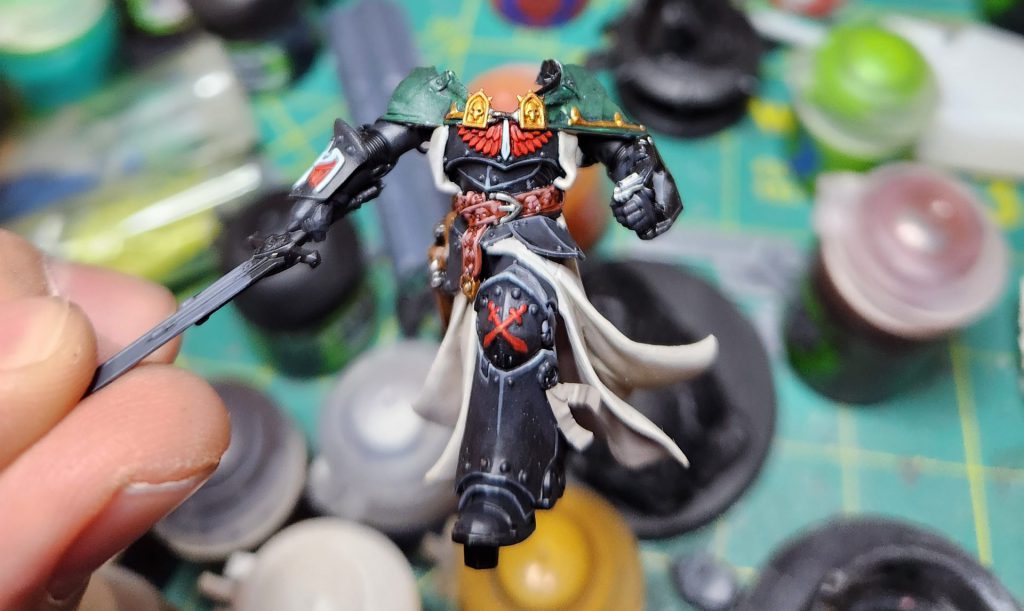
There were a few details left to cover before I started working on other parts. I painted the interior armor of the elbow and other metal bits with Leadbelcher and the gold bits with Retributor Armour. The chest sword and vambrace sword/wings were painted with Reaper Ghost White, a nice bluish offwhite. The belt was painted with Word Bearers Red. The metal parts got a wash of Nuln Oil, while the belt and gold parts were washed with Agrax Earthshade before being highlighted back up. The gold was highlighted with Retributor and Runefang Steel, while the belt was highlighted with Word Bearers Red and xome mixes of that with Reaper Polished Bone.
At this point I tackled other parts of the model but we’ll come back to this when it’s time to do the OSL and the sword.
The Cape
now for another daunting part of the model – this large cape. Fortunately, I went with the lighter color inside – it’s way easier to do green gradients than it is to do white/bone-colored one smoothly.
For the inside of the cape, I used the same method as the robes – mixing Rakarth Flesh and Agrax Earthshade to make progressively darker tan glazes that I’d paint into the recesses of the cape. The final effect ended up being pretty subtle, but I’d rather something subtle and smooth here – too stark and it’d look bad.
The back of the cape was easier to paint, but took a lot more work. I started by laying down a basecoat of Caliban Green, then shaded that up with Waaagh! Flesh, hitting the raised parts. I blended that up further to a mix with Warpstone Glow. I shaded the recesses with a mix of Caliban Green and Nuln Oil, though Coelia Greenshade probably does this same job just as well.
The pelt I painted Rakarth Flesh and then washed with Seraphim Sepia before deciding I wanted something more yellow, so I washed that with Iyanden Yellow contrast paint, though I left the pads of the feet and the inner flesh untouched in this regard. I shaded the inner flesh like skin, working up to a mix of Kislev Flesh and Reaper Polished Bone, while the fur I highlighted with a mix of Averland Sunset and Reaper Polished Bone before doing some of the final hairs with a small brush and Dorn Yellow.
The Sword
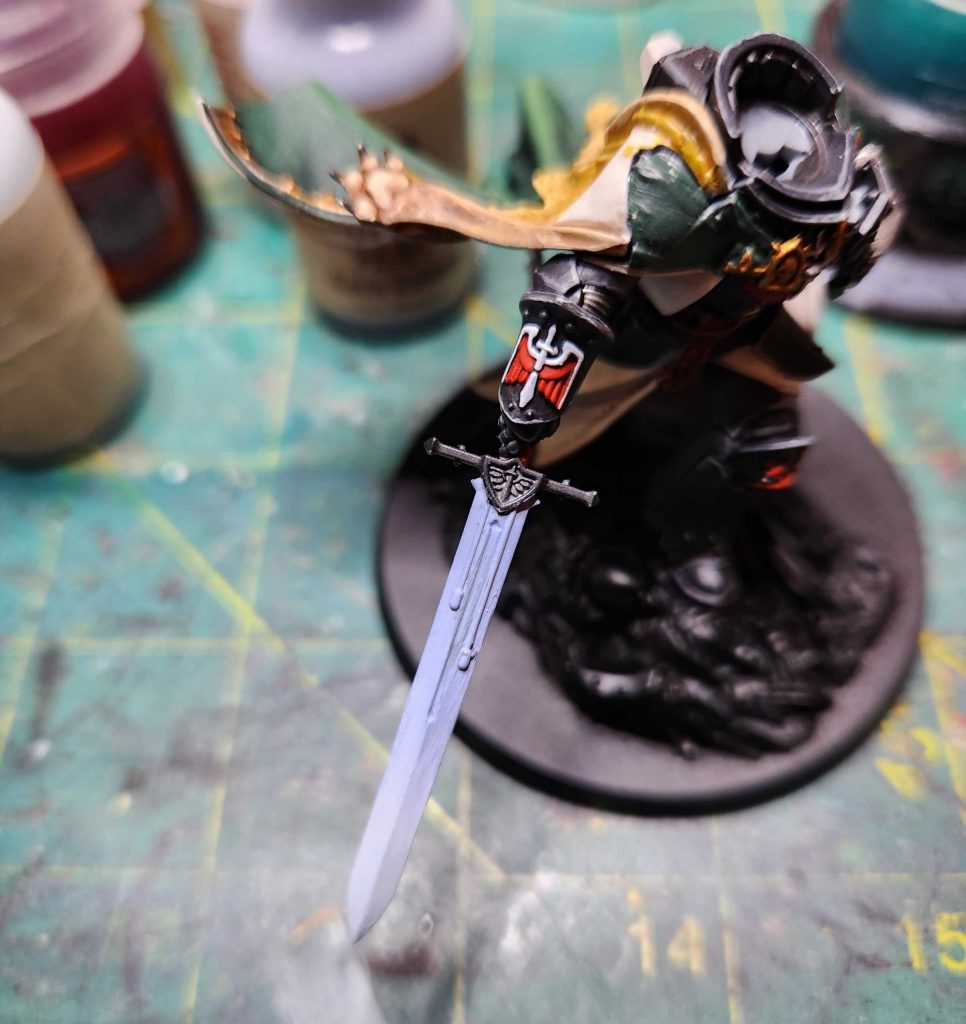
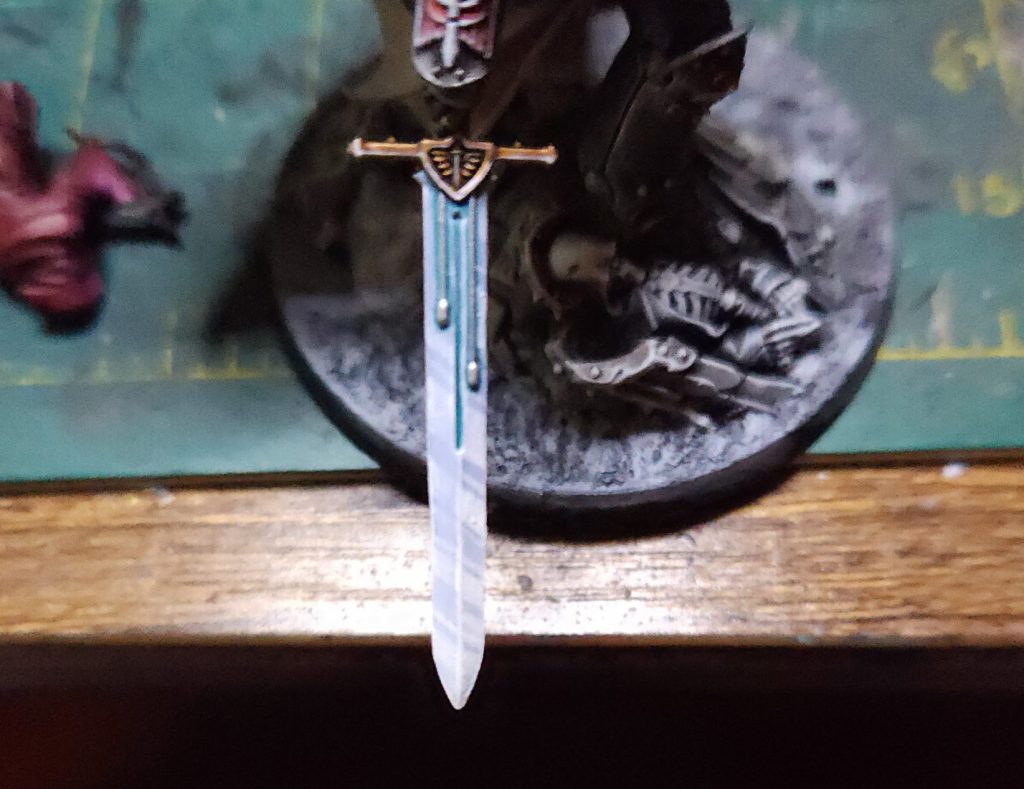
It took me a while to figure out what I wanted to do with the sword but I settled on a white blade, gleaming with light in the darkness. So I started with Reaper Snow Shadow and blended that up to Reaper Ghost White.
I washed the recesses of the sword with Aethermantic Blue then came back and edge highlighted the sword with Reaper Pure White. Then I added a series of reflective lines down the blade using a mix of Reaper Pure White and Ghost White, making these brighter toward the tip of the sword. At this point is when I really decided I wanted to go back and add the OSL effects, so we’ll tackle that after we do the head.
The Head
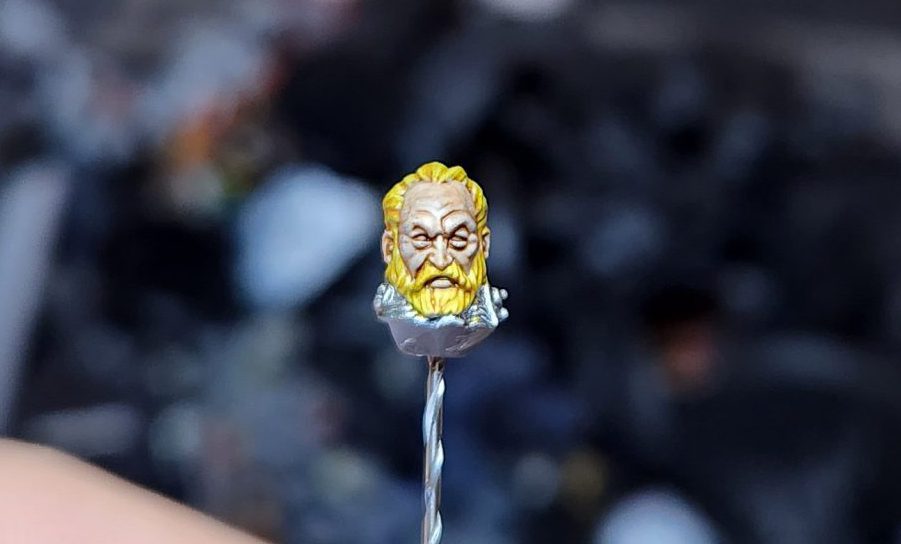
There were a number of good options for the Lion’s head in the box and while I really liked that hooded helmet, I felt the Charles Dance-looking unmasked head had the kind of knightly Arthurian vibes I was going for. I started by painting the head with a thin layer of Kislev Flesh, then shaded that with Agrax Earthshade and highlighted that up with Kislev and Reaper Polished Bone. The hair was washed with Iyanden Yellow and then a bit of Seraphim Sepia in the recesses, and highlighted back up with Flash Gitz Yellow.
I further highlighted the hair with Dorn Yellow and a bit of Reaper Pure White, which is how I did the white hair around the temples. I also hit the eyes with a spot of Reaper Pure White. This is an area where I’m torn – it’d have maybe looked better with black spots in the eyes but in my experience that usually risks making the model look doofy and also doesn’t read as well on the actual table. The neck is Leadbelcher washed with Nuln Oil.
Putting it Together
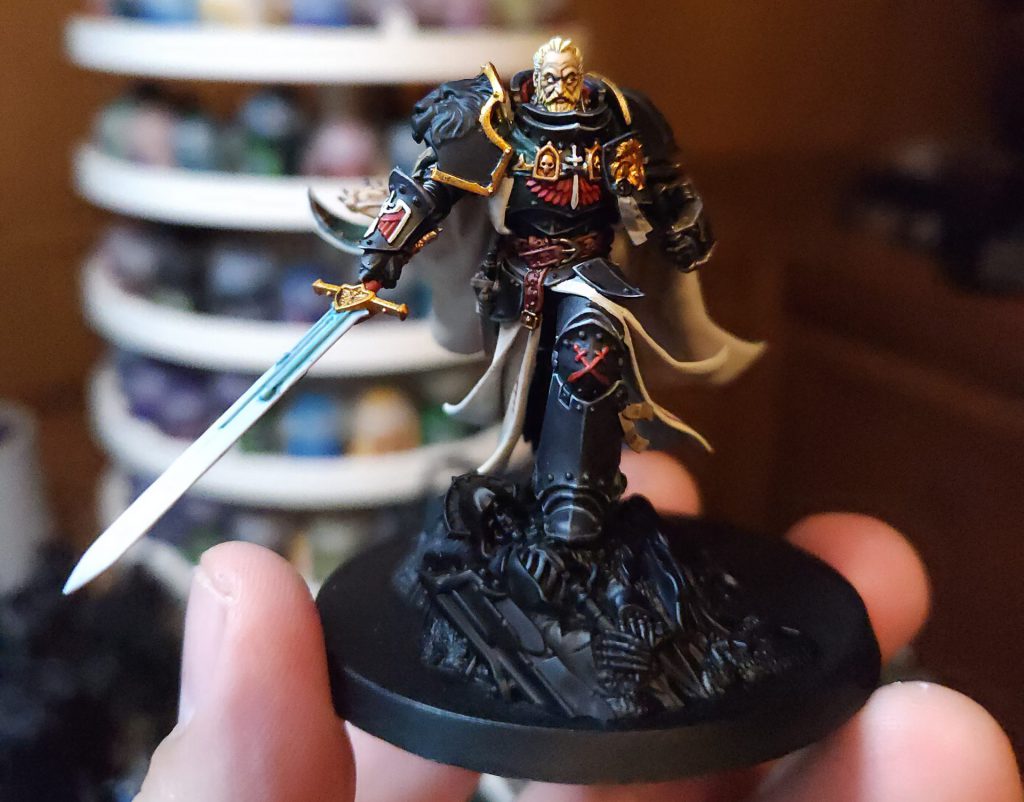
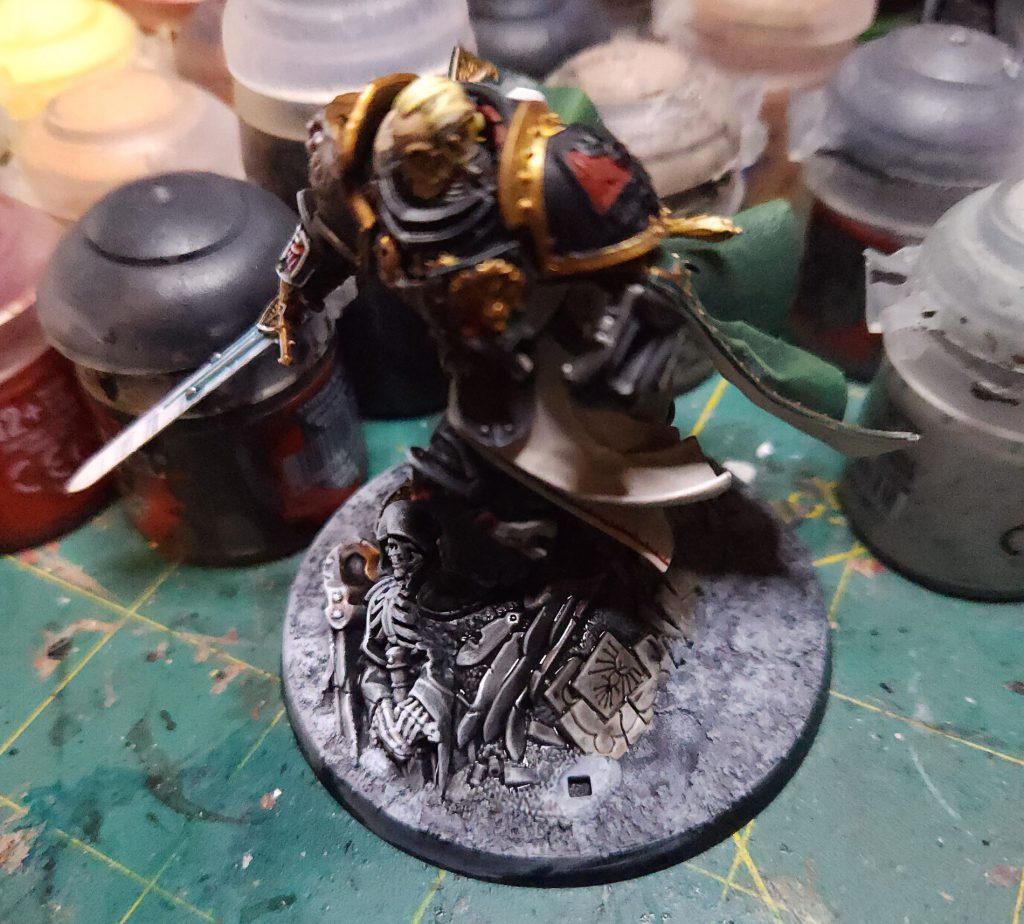
At this point I put the head in and added the cape, covering the shoulders with the pauldrons and adding the jousting shield. I still hadn’t glued the model to the base – that would come much later – but this helped me get a good feel for where the sword would be in relation to everything else, which was important for OSL. This photo also helped me understand how the shading would look, since my desk lamp is casting light from roughly the same direction, albeit higher up than the sword.
The Shield
The shield was done entirely separately, but now’s a good time to cover it. I painted the interior portions of the shield with Blood Angels Red Contrast paint, then shaded the bottom half with Flesh Tearers Red. The gold parts I re-hit with Retributor Armour, and I’d come back and wash those with Agrax Earthshade before highlighting with Retributor and Liberator Gold. The inner parts of the shield would later get an edge highlight with Evil Sunz Scarlet.
The Base
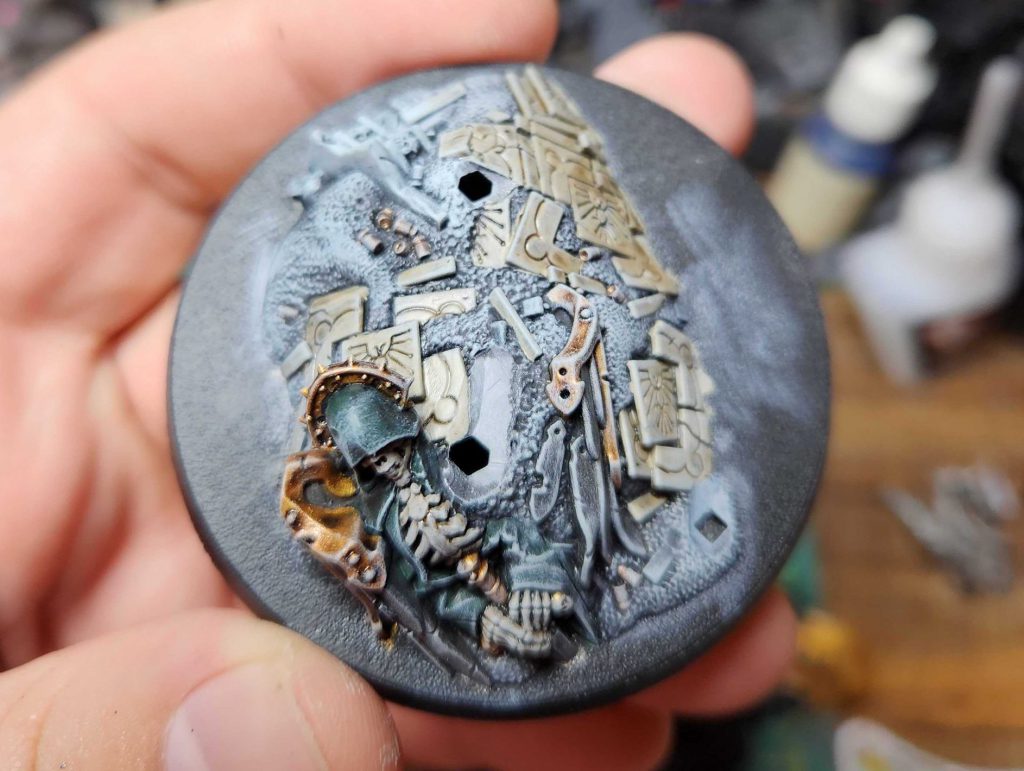
The base came next, and I mostly just painted the stuff on here how I felt. Zandri Dust washed with Agrax for the stone tiles, Balthasar Gold for the copper, washed with Agrax. I drybrushed the whole thing with Celestra Grey after to give the base a dusty feel, and I’d likewise drybrush the base of Jonson’s feet with the same color.
The OSL
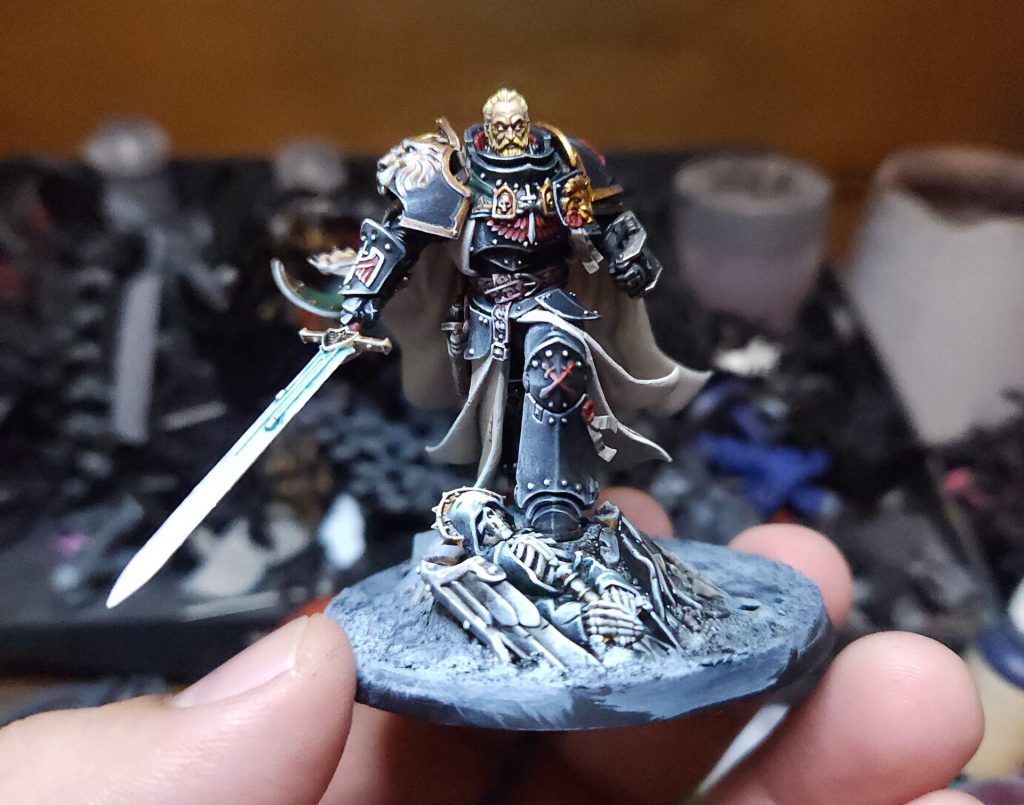
At this point it was finally time to add the OSL. I wanted white light radiating off the blade, and that’d mean both adding light to some spots and shadow to others. Note that this happens after I do all the other colors – washes and highlights – so if you missed some things, just assume I painted them in-between. It’s mostly a lot of details – rivets in Leadbelcher and Runefang Steel, gold in Retributor washed with Agrax and highlighted again with Retributor.
This basically starts by lightly drybrushing my highlight color – Reaper Ghost White – onto the parts of the model that will be getting the light. This helps do the edge highlights and gives me a good starting point. After this, I’ll come back and do blends with Reaper Ghost White and Corvus Black for the armor, getting much smoother transitions for the highlights. I’ll do the same thing on the base.
Shadows are just as important as highlights for OSL and I use Nuln Oil to add shadows to parts of the model which will be obscured from the light, such as on the far side of the left greave, behind the rivets on the vambrace, and under these blocks on the base. The contrast here between the bright and dark parts will help the effect – which is more subtle than colored OSL – stand out when it’s all said and done.
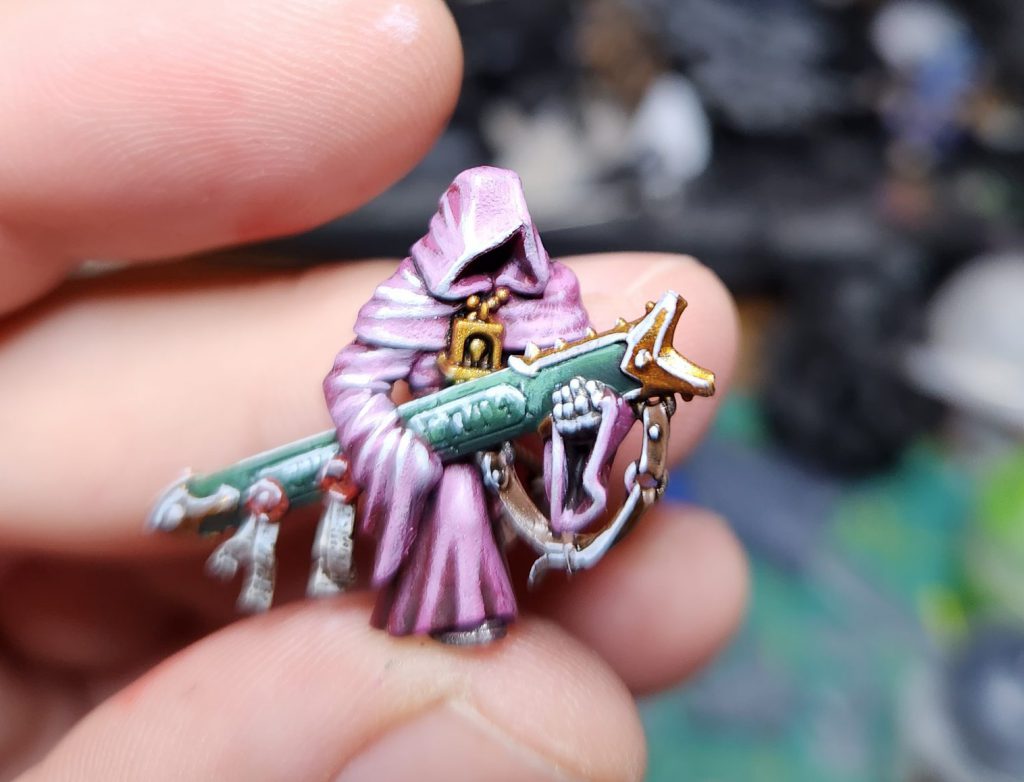
The attendant watchers get their own highlights based on their final placement. Their robes are Screamer Pink, washed with Nuln oil and highlighted with Screamer mixed with Reaper Ghost White back up to a near Ghost-White shade on the OSL-lit parts.
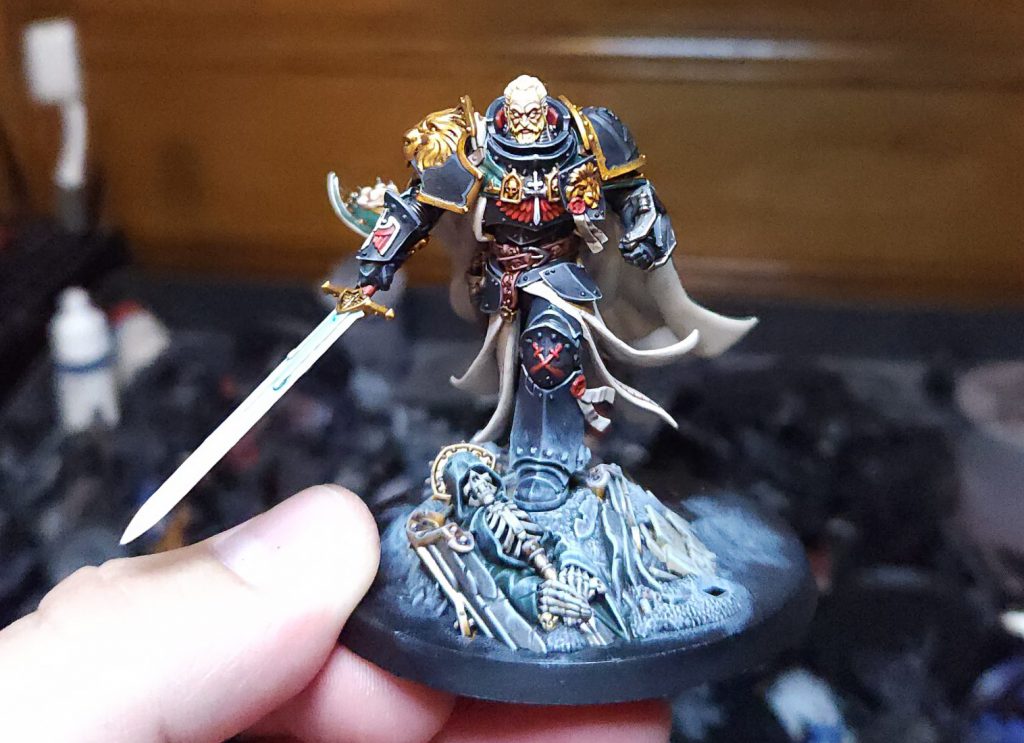
At this stage the Lion is looking pretty good. I’ve added Astrogranite to his base, added more Nuln Oil shading to the darkened spots like the other side of the chest and left greave, and done highlights against the base texture as well.
At this point the only thing left to do is add the watchers to the base and add any missing highlights and fill in any missing details. I add a bit of shadowing with Nuln behind where the Watcher is walking behind the Lion’s sword.
I’m not gonna lie, the desk lamp is really helping out here – with a more forward-facing light source the effect is more subtle, but it looks solid and in any top-down, harsh light the effect looks even better.
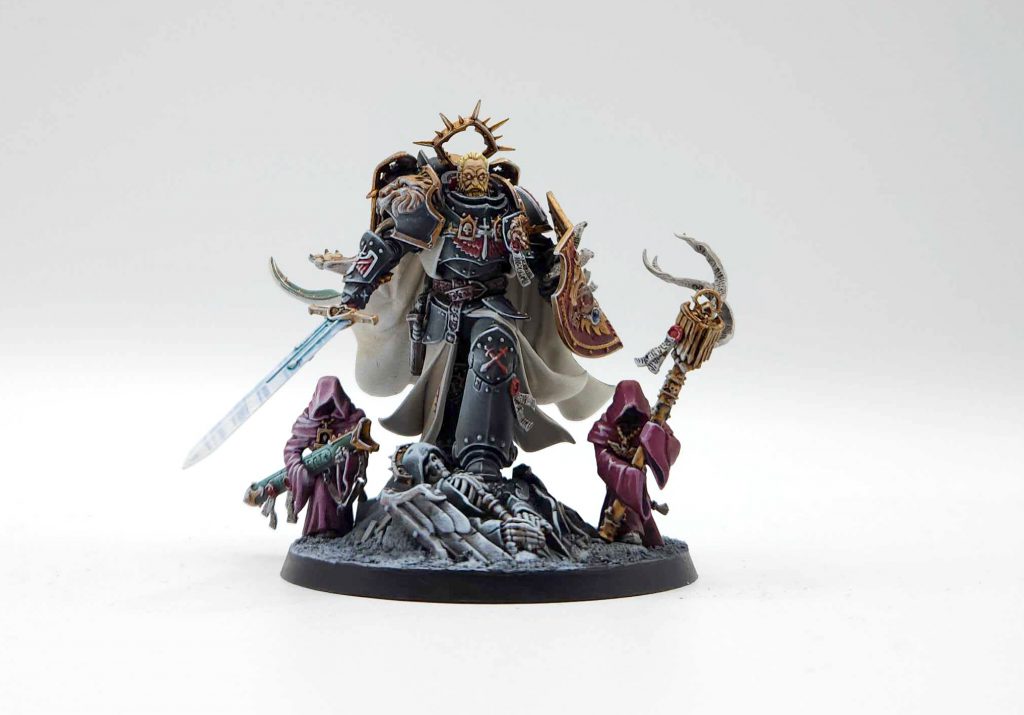
Overall I’m happy with the result. The Lion was pretty fun to paint, and had a mix of great details and flat surfaces – he’s not overly busy like Guilliman and lacks the insane amount of gold trim – but I’ve had my fill now of painting bone-colored robes.
This article is part of a larger series on how to paint Dark Angels space marines. For more on painting Dark Angels, you can return to that series by clicking this link.


