This article is part of a larger series on how to paint Dark Angels space marines. For more on painting Dark Angels, you can return to that series by clicking this link.

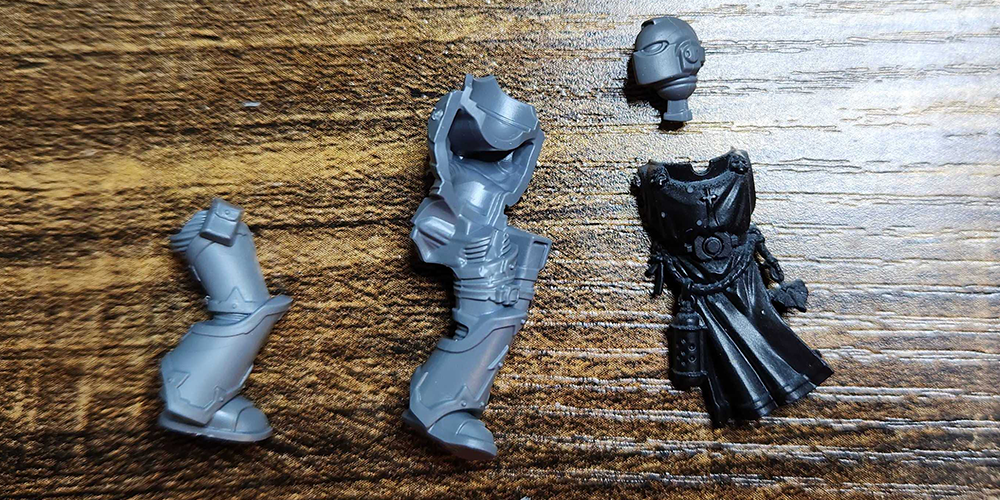
Longtime readers of the site will know that I’m a Chaos guy. Always have been. So when it came time to work on Dark Angels, I was champing at the bit to do some more Fallen. I had previously done a single fallen for my Black Legion to represent Vortigern of the Ezekarion but I was eager to do a second for this how to paint article. Making Fallen is as much a conversion project as a painting one, so this time around I combined the legs and back torso from a plastic Chaos Space marine with the front robe of a Dark Angels marine and a Ravenwing biker head from the 2012 Dark Vengeance box.
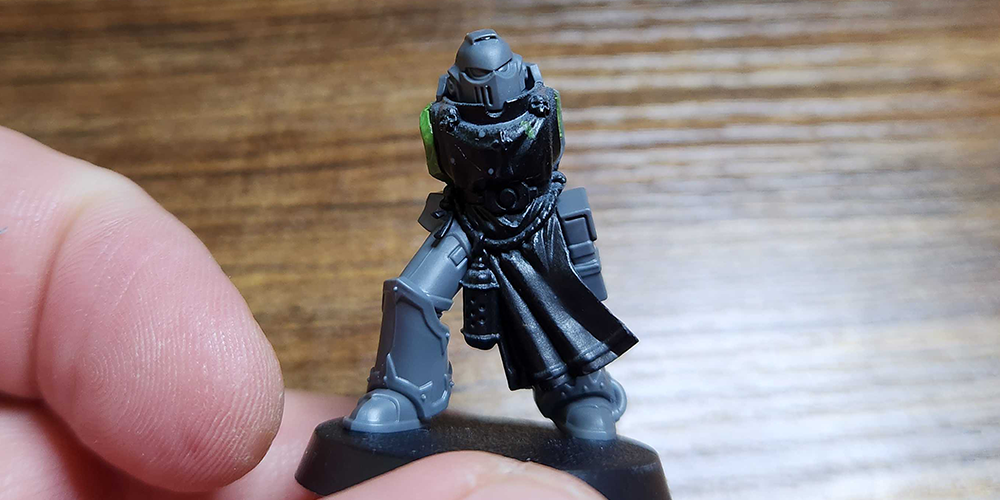
I had to move the dark Angels icon on a chain back to accommodate for his leg and push around the knot on his right hip, but otherwise this was a pretty good fit, especially with some green stuff to fill in the gaps. The only area that really needed filling proper was the upper torso, where the chest was not wide enough to match perfectly to the Chaos Space Marine torso, but this was an easy green stuff fill.
I’m very happy with the result. After this I gave him a standard Dark Angels backpack and regular Chaos Space Marine arms and shoulderpads. This is just a rank-and-file guy in my Black Legion, after all.
Now it’s on to the painting. A lot of these steps come from my quick guide to painting bone-colored robes and tabards, because this is the model I used to build that tutorial.
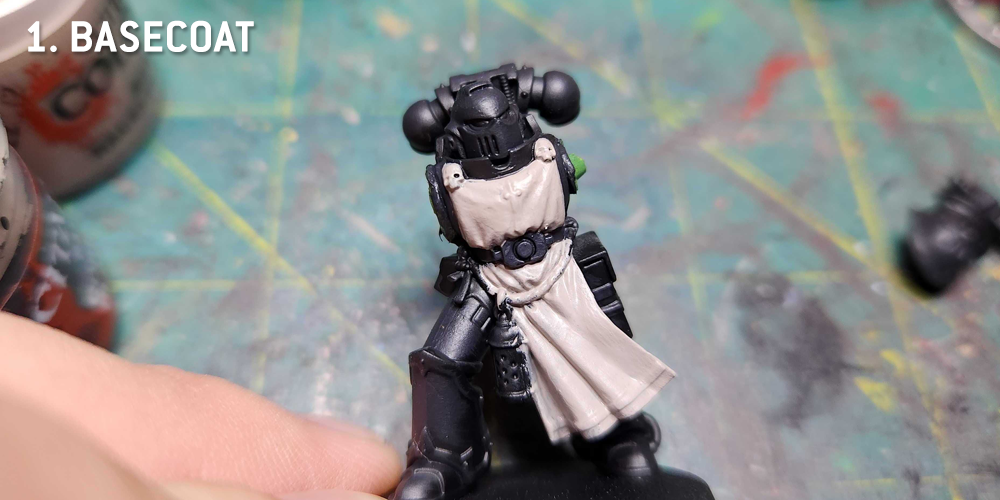
Step 1: Basecoat
I started by priming my model black, then painting the armor. I’ve done this on several different Dark Angels models now, but my standard process for painting black armor is to start with Abaddon Black and then highlight up to Corvus Black, doing wet-blend mixes, though progressive drybrushing layers will also work just fine if you’re lazy. I sometimes do an extra layer of 4:1 Corvus Black:Mechanicus Standard Grey to do an extra layer of highlights.
Next up is the robes. Here I use Rakarth Flesh for my basecoat, doing a couple of thin coats to work over the black primer.
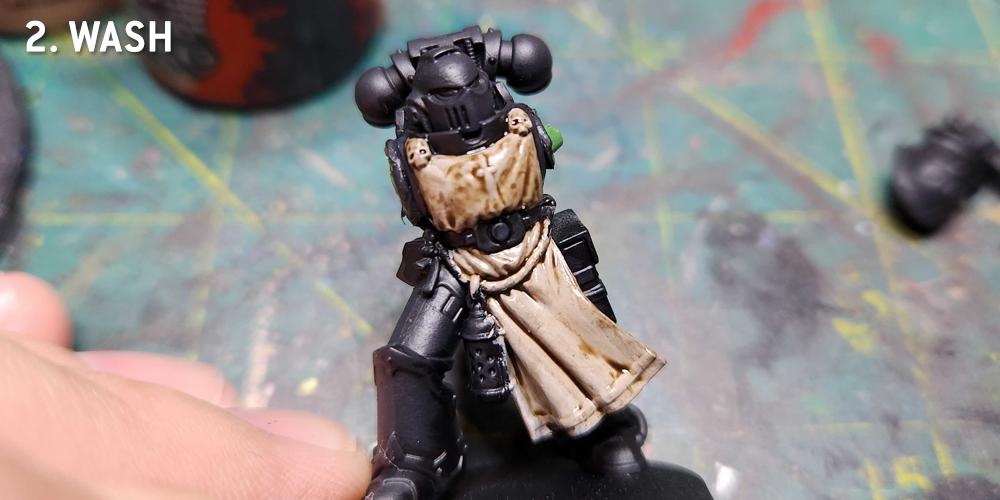
Step 2: Washes
Next up comes washes. I wash the robes with Agrax Earthshade. You could also skip wash painting in this step and use mixes of Agrax and your bone colors for fills between folds. This will darken the whole thing but will also help you understand where your folds are going to be. I sometimes use Nuln Oil to shade the black armor a bit and soften those transitions.
Step 3: Robe Blends and Highlights
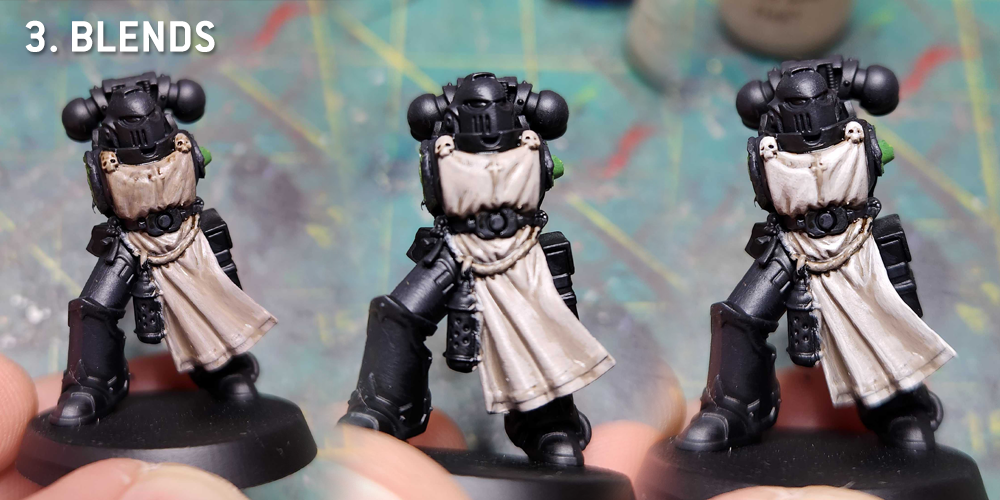
Now it’s time to do some blending on the robes. I start working with Rakarth Bone and Agrax Earthshade as a mix, working up to full Agrax. Then I work in Reaper Polished Bone in the mix and continue to highlight up until I’m painting pure Reaper Polished Bone.
Step 4. Details and Edge Highlighting
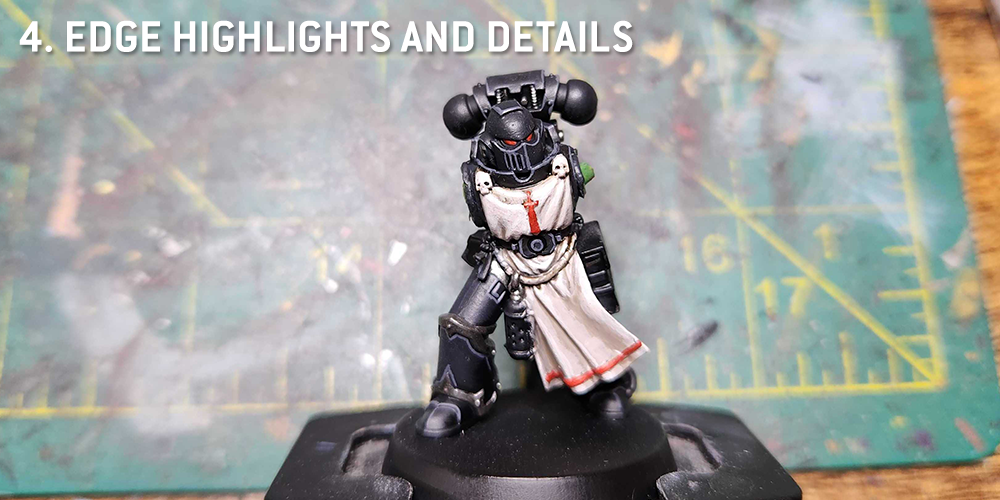
Now it’s time to do the edge highlights – these are done with Mechanicus Standard Grey, and in addition to highlight edges around the helmet and backpack, I also do a thin line inisde the trim on the armor panels. The Trim itself I’ll paint Leadbelcher on the body – my black legion follow more of a 2nd edition scheme, so regular marines seldom have gold trim unless they’re champions. That puts this guy more in line with the pre-Heresy scheme anyways. The red bits are painted with Mephiston Red. The lenses are Mephiston Red highlighted with Evil Sunz Scarlet.
Step 5. More Details and Washes
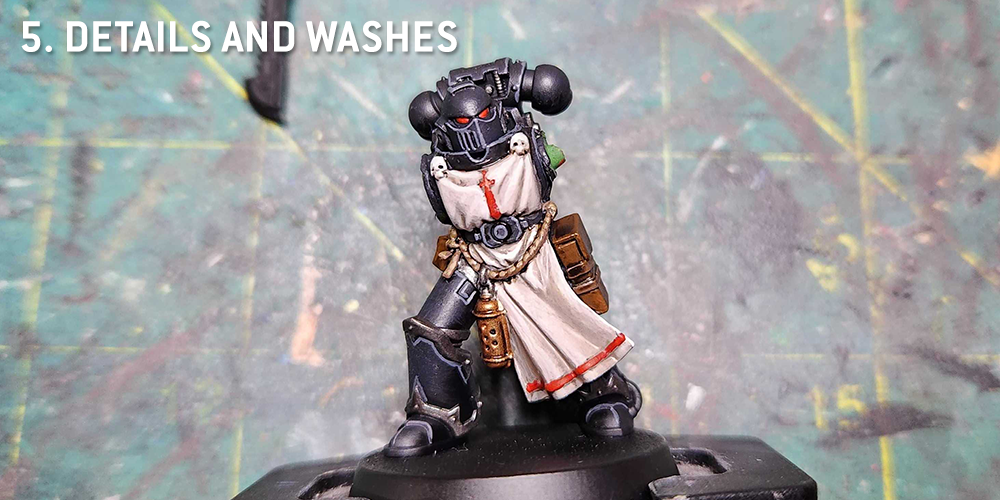
Time to pick out more details. I paint the censer with Balthasar Gold, the holster with Mournfang Brown (and the straps around it with Cygor Brown), and the rope gets a wash of Skeleton Horde. I’ll wash the censer and holster with Agrax Earthshade to darken them. Later I’ll come back and edge highlight the holster with Cygor Brown and Rakarth Flesh.
Step 6. Arms and Gold Trim
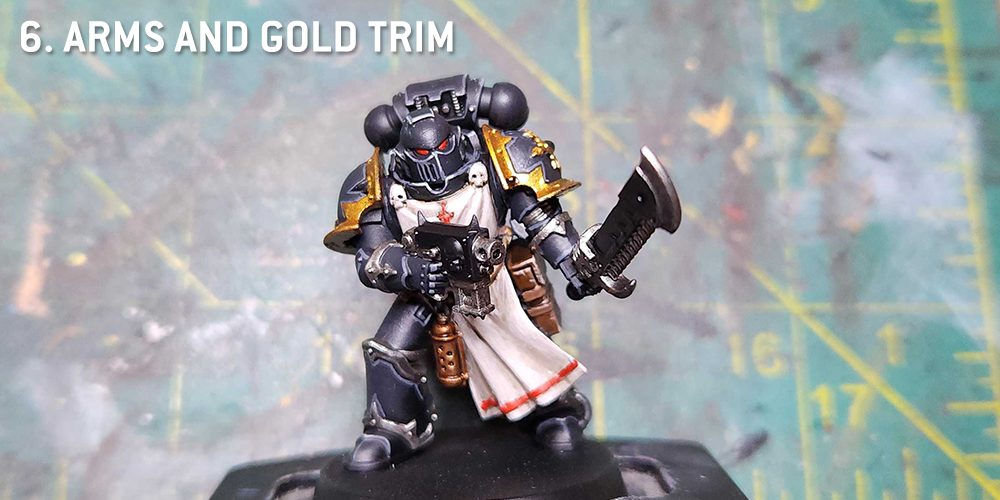
Surprise! Now we’re adding the arms. I’ve been painting them separately this whole time to make it easier to access and photograph the robe as I’ve been painting it. The arms are painted using the same scheme as everything else, though the shoulder pads have gold trim – that’s painted with Retributor Armour.
Step 7. Final Details
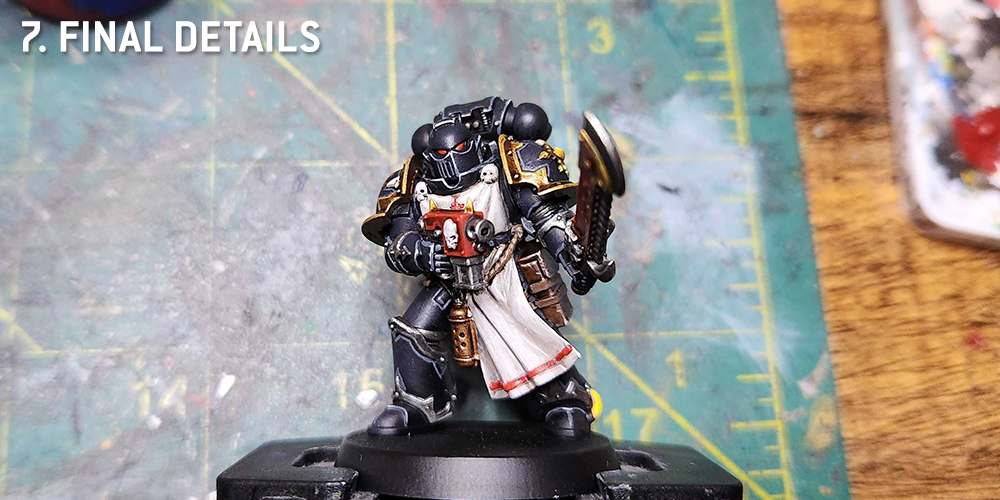
There are a lot of little final details here to condense into one step, but it doesn’t make sense to put them in their own steps so here’s what remains:
- Bolt Pistol and Sword: Painted Mephiston Red, washed with Carroburg Crimson, and then highlighted Mephiston, with Evil Sunz Scarlet for the edge highlights.
- Gold Trim: Wash with Agrax Earthshade, highlight with Retributor Armour and Runefang Steel.
- Skulls: Rakarth flesh washed with Agrax Earthshade, highlighted with Rakarth Flesh and Reaper Polished Bone
- Edge Highlights: I hit the corners and highest raised points with Celestra Grey to introduce a second, lighter edge highlight.
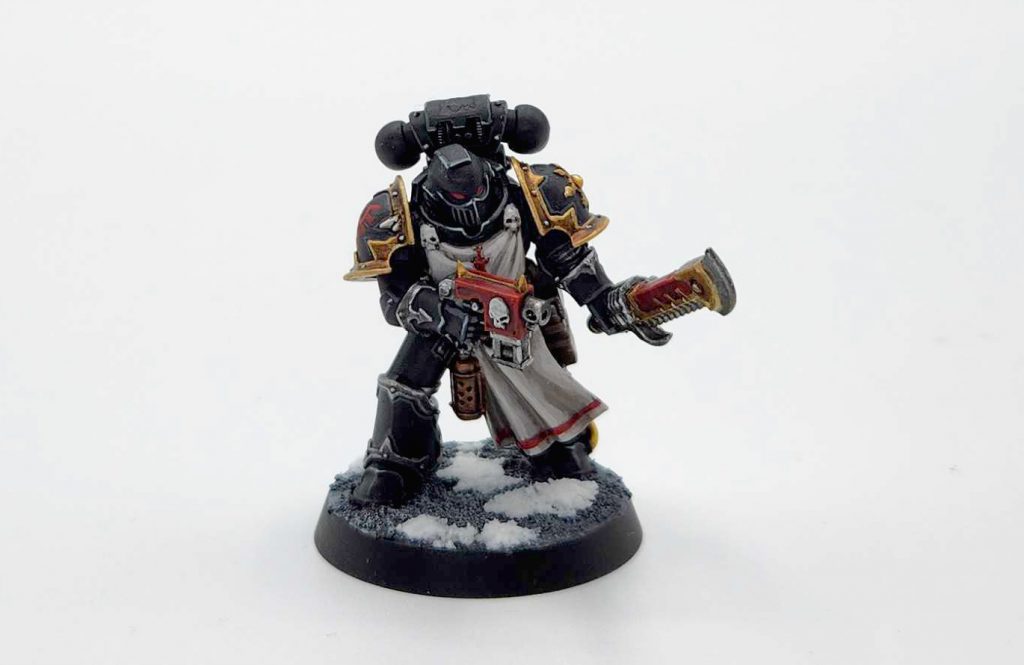
And that finishes off the second Fallen model for my Black Legion. I’m very happy with the result, and may eventually do one or two more, though I don’t want to overdo it – these guys are supposed to be rare! This was a fun conversion to work on and the scheme was pretty easy.
This article is part of a larger series on how to paint Dark Angels space marines. For more on painting Dark Angels, you can return to that series by clicking this link.
