
The battlefields of the 41st millenium theoretically contain a huge variety of terrain features – after all, there’s a whole galaxy of different locales to pick from, and Games Workshop (plus a whole host of other suppliers) make a generous range of different kits to help bring this to live.
However, as you play in tournaments and competitive games you’ll probably notice that a pretty large proportion of tables are dominated by examples of one specific terrain feature – the ruin.
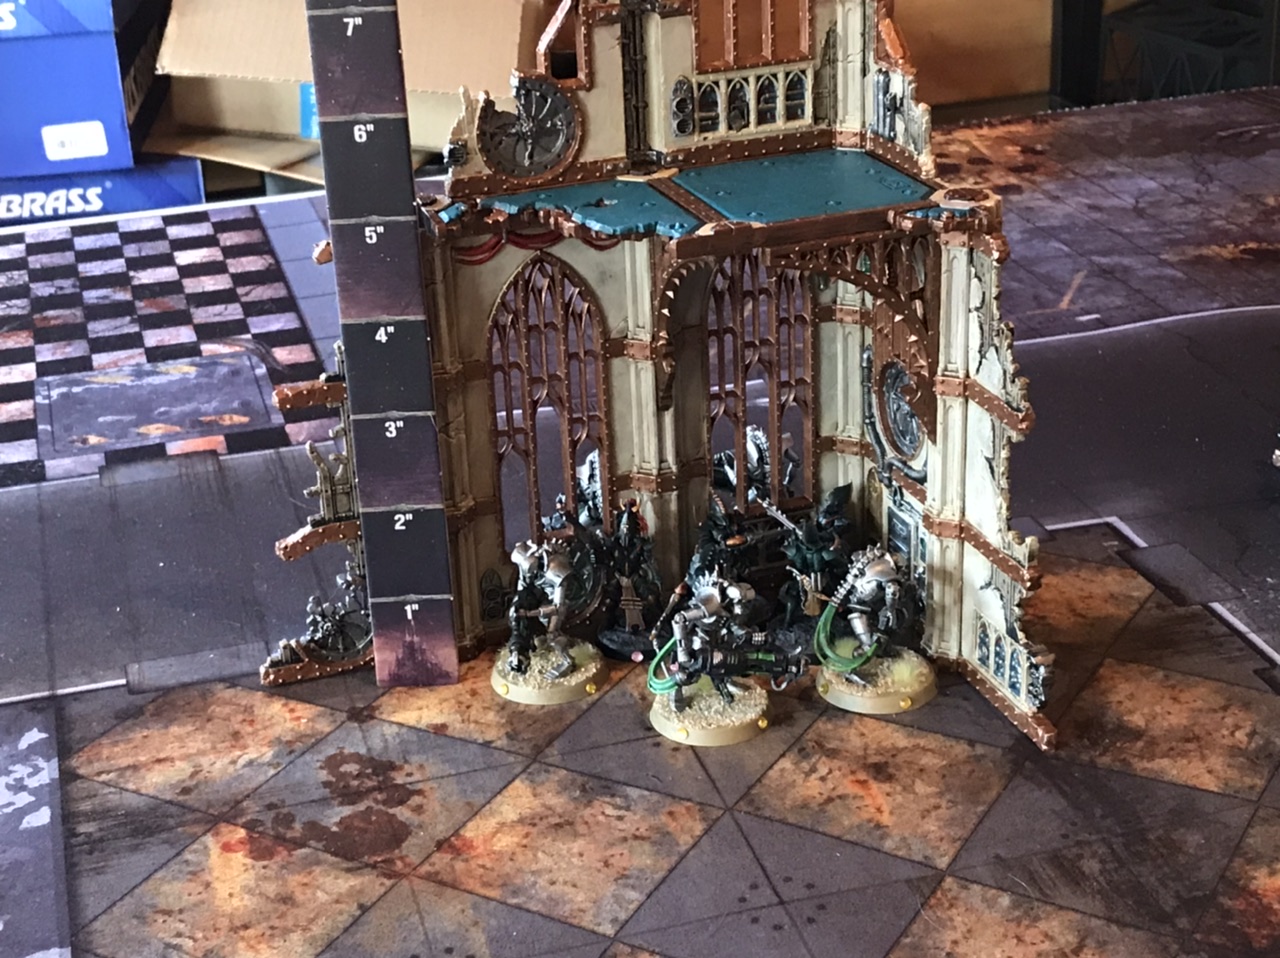
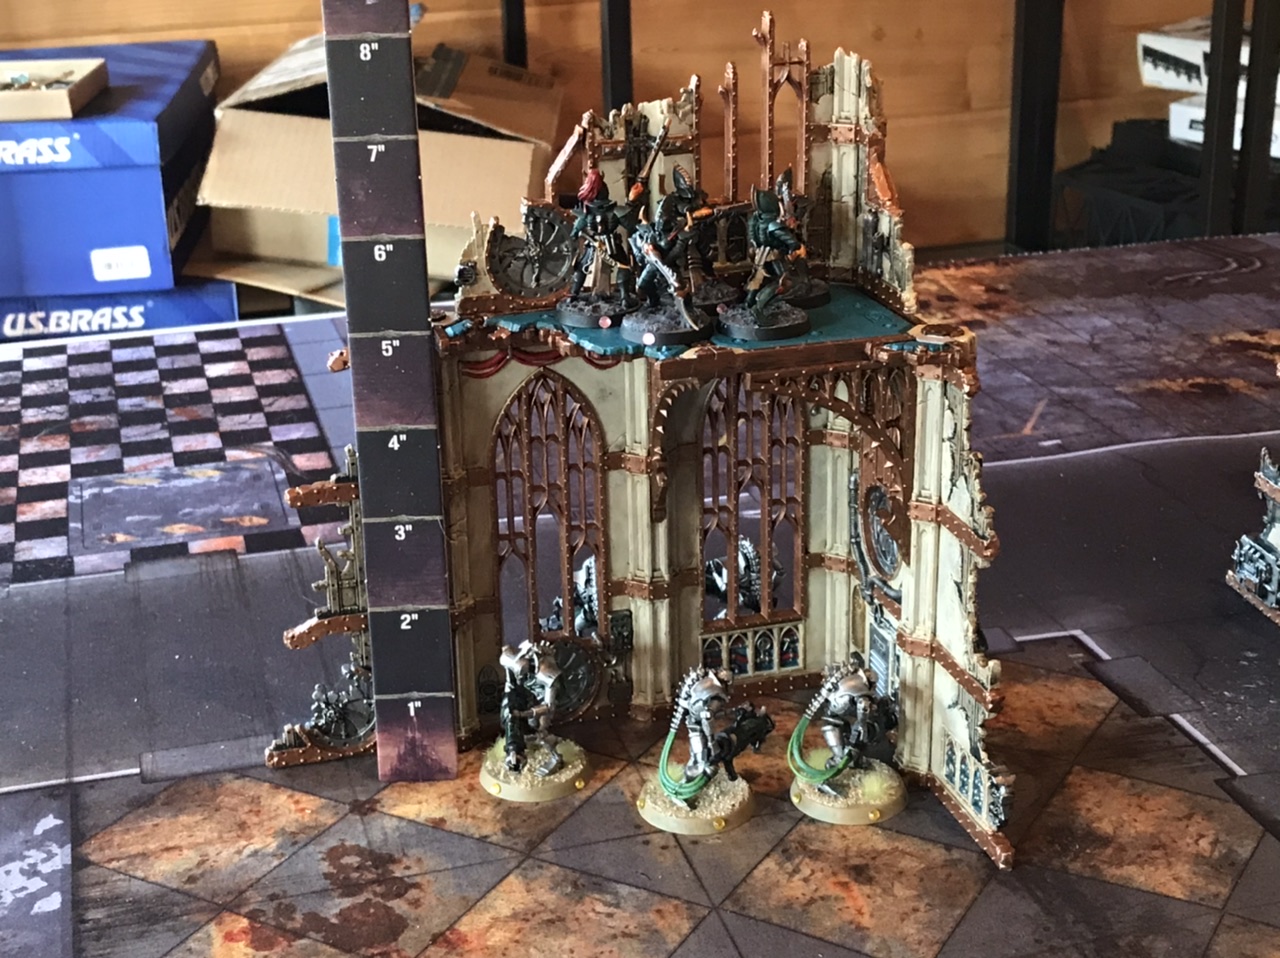
Ruins predominate in competitive play because they hit that sweet spot of being functional and easy to produce, especially in an age of laser-cut MDF. While they vary in size and shape, most consist of at least two thin wall sections joined at one end to make an “L” shape, and are usually at least tall enough to shelter INFANTRY units behind them. Some will also have a second floor attached part way up with space to position models, and some are extra tall, being large enough to hide a VEHICLE or even a Knight behind them.
A very common convention for mass-producing tables that provide a good game experience is to use a pair of large central L-block ruins (sometimes called “NOVA Ls” since NOVA’s GT is one of the most famous users) to ensure there’s some good line of sight interplay in the middle of the board. An example showing the London Grand Tournament’s implementation of this is below.
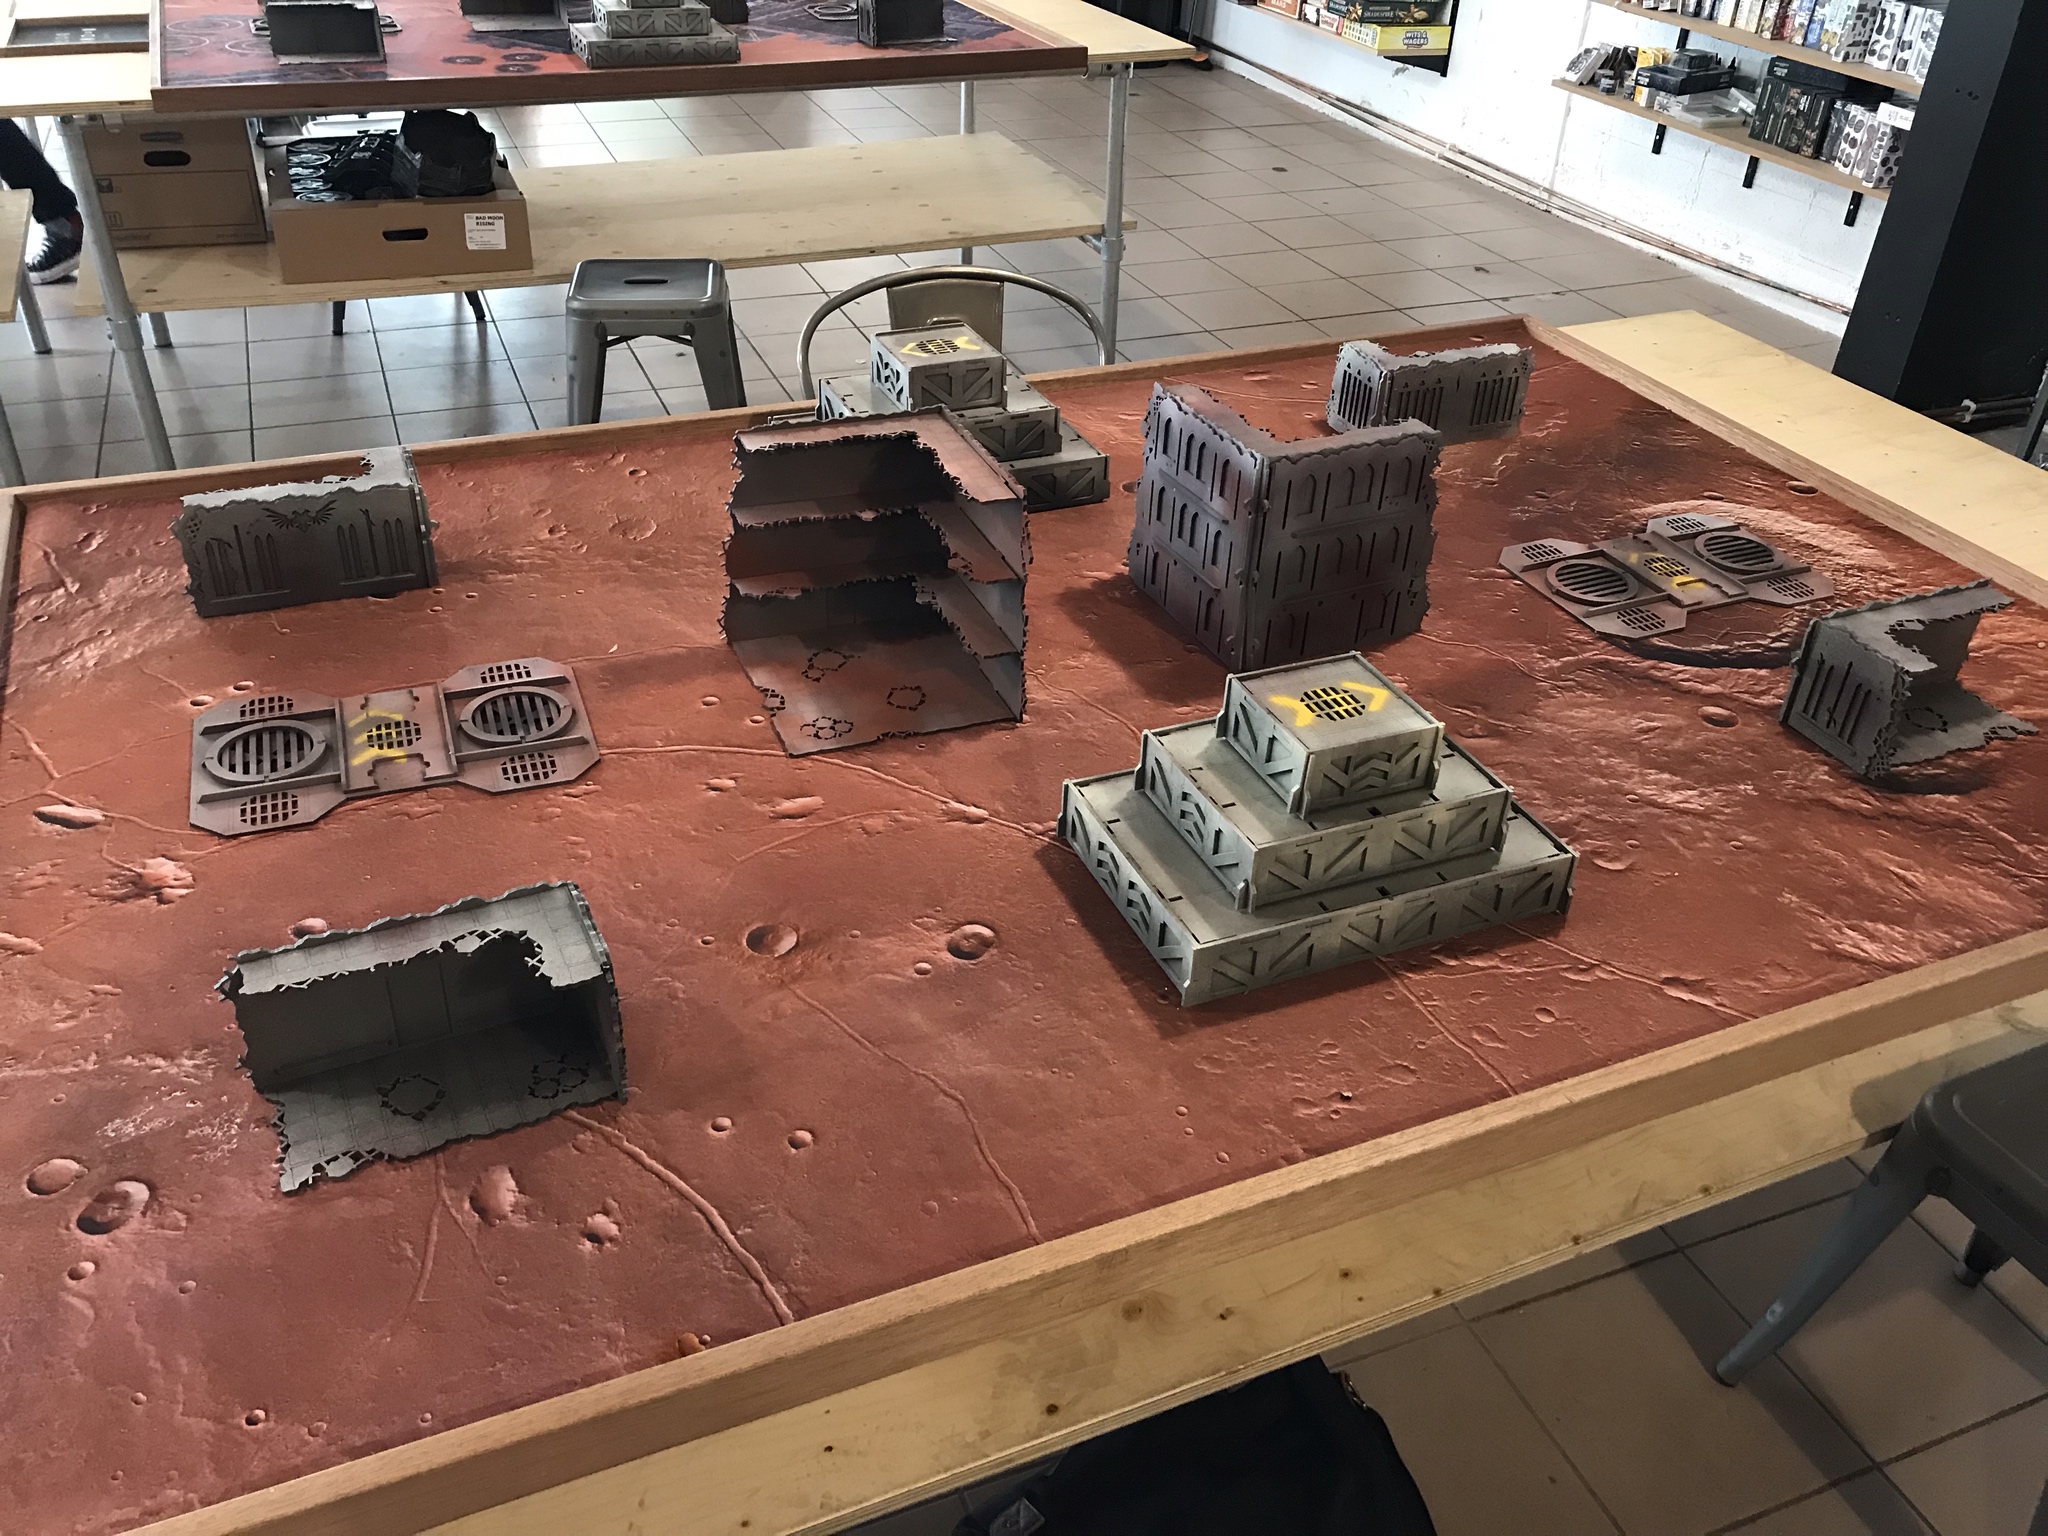
While most of the large events that do this also have standard specifications for how the rest of their terrain is set up, for smaller events having the two central ruins on a table lets them fill out the rest of the board with more of a mixture of stuff from their stocks while being confident that a minimum standard is being met.
Their popularity on tables at competitive events means understanding how ruins work is tremendously important for succeeding in competitive play. The way ruins work in 8th edition can also be somewhat counterintuitive, and even when you’ve played with them a lot it’s easy to forget what they can allow your opponent to do with their movement phase. I’m not to proud to admit that I have thrown at least one winnable game in the last six months by having a complete brain freeze on how easily an opponent’s unit could pull off a charge through a ruin, and especially with larger ones you need to constantly remember that they’re just more permeable than you might think.
In today’s article we’ll first cover the rules for ruins and their basic implications, and then talk about some more advanced positioning tricks and gotchas when playing with them. This article is a loose sequel to SC: Screening Tactics from a few weeks ago, and shout out again to reader George F whose email inspired this set of articles. It’s also probably worth having a look at SC: Charge and Fight Phases, because we’re going to assume a working knowledge of charges, pile-ins and heroic interventions when we cover related points.
The Rules
As of the 2019 version of Chapter Approved, the rules for ruins are as follows:
Only INFANTRY, BEASTS, SWARMS and units that can FLY can be set up or end their move on the upper floors of ruins (any unit can do so on the ground floor). INFANTRY models are assumed to be able to scale walls and traverse through windows, doors and portals readily. These models can therefore move through the floor and walls of ruins without further impediment.
INFANTRY units that are entirely on or within a ruin receive the benefit of cover. Other units that are entirely on or within a ruin only receive the benefit of cover if at least 50% of every model is obscured from the point of view of the shooting model.
While it is not directly part of the ruins rules, the current wording on the FLY ability from the rulebook FAQ has a big impact on how ruins work in-play, and is as follows:
‘If the datasheet for a model says it can FLY, then during the Movement phase it can move across models as if they were not there, and when moving across terrain features, vertical distance is not counted against the total it can move (i.e. moving vertically is free for this model in the Movement phase). If the datasheet for a model says it can FLY, then during the Charge phase it can move across models (other than BUILDINGS) as if they were not there.
Finally, for the competitive scene the following additional terrain rule from the ITC FAQ is now used almost universally (with a version of it even being part of GW’s official events):
Ruins: For this event, the bottom level walls of all ruins are considered to block LoS (Line of Sight) even if they do not actually do so. This means existing openings in them such as those created by windows, doors, bullet holes, etc. block LoS. This rule does not mean the players create walls where none existed. If in doubt as to where to define these barriers, clarify with your opponent before the game begins.
There are some other rules that some events adopt around what can be placed on the upper floor of ruins and when units up there can be charged, and a special kind of ruin used by some US events that I guess we’ll touch on at the end of this section, but these are the key ones we need to build up our list of what each kind of unit can and can’t do around a ruin. We’re also not really here to talk about cover – cover is great and you should make sure to claim it if you can, but our focus today is on movement, positioning and fighting. For a few of these points blocking LOS is relevant, and we’ll be assuming that most ruins used in competitive games block LOS to any INFANTRY on the far side. Obviously if you’re dealing with a specific piece of terrain that clearly doesn’t, adapt accordingly!
Outside of special abilities, movement involving ruins happens in three phases – movement, charge and fight, and the limited number of ways you can move in the shooting or psychic phases overwhelmingly allow a unit to move “as if it was the movement phase”, so the same rules apply.
Infantry

Let’s start off by talking about INFANTRY. If you’ve read through the rules above you may be realising that ruins pose very little obstacle to these units – 95% of the time they may as well not be there at all. Infantry can:
- All times
- Maintain unit coherency through a wall
- Movement phase:
- Move through ruin walls
- Move vertically through floors, paying for their vertical movement.
- End their move above the ground floor.
- Do all of this while falling back where relevant.
- Disembark or embark into a vehicle through a wall as long as the normal qualification of being within 3″ is met.
- Charge phase:
- Charge through walls
- Charge units that are within 1″ of the near side side of the wall, i.e. the thickness of the wall plus the distance they are out the other side is <1″ total.
- Charge units on higher floors (including through floors), paying for their vertical movement.
- End their charge above the ground floor.
- Heroically intervene towards a unit within 3″, even if they’re on the far side of the wall.
- Heroically intervene through a wall as long as they meet the normal qualifications for doing so.
- Fight phase:
- Pile in through walls
- Pile in vertically through floors, as long as all other conditions are met.
- Consolidate through walls.
- Consolidate vertically through floors, as long as all other conditions are met.
- Fight through the wall as long as they meet the normal qualifications for doing so.
INFANTRY with FLY are mostly the same, with the only change being that when they move vertically in the movement phase they do not have to count the movement. In the charge phase they still do.
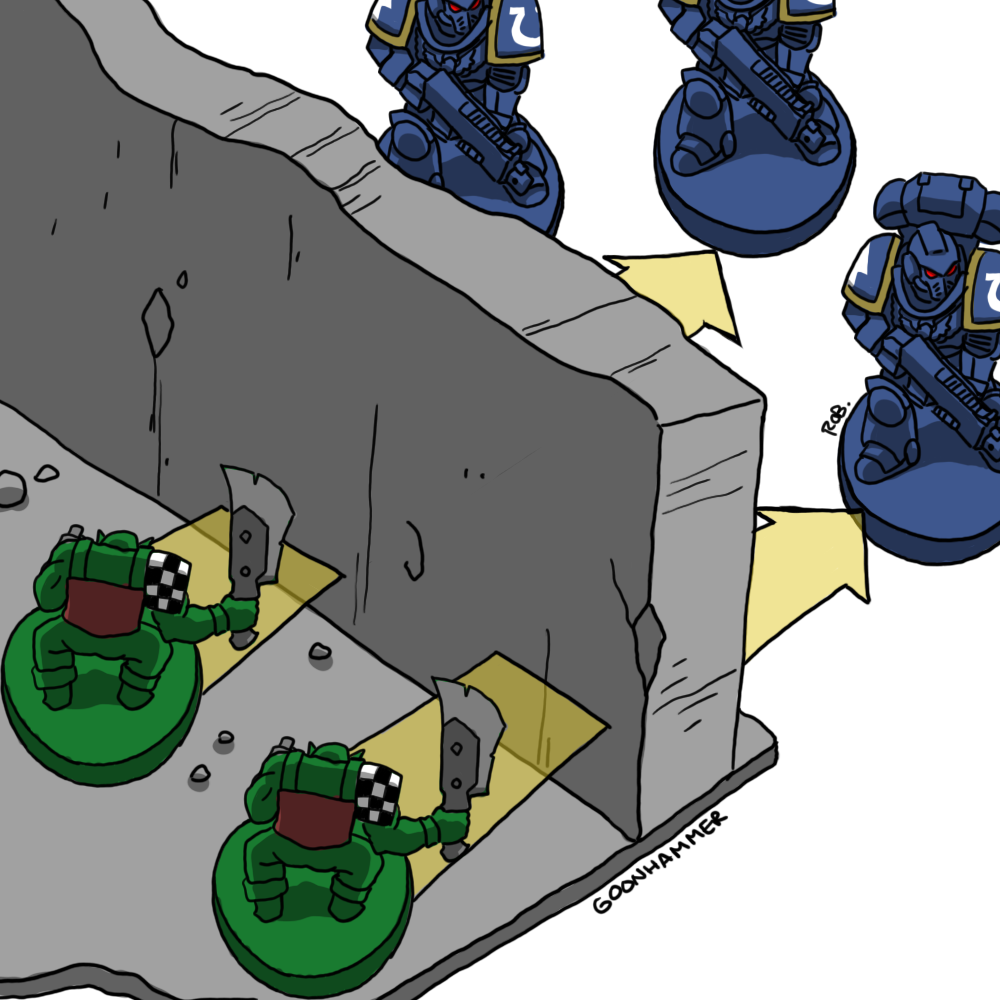
The one key thing INFANTRY can’t do, which will come up in some of our later examples, is end their move with their base partially within a ruin wall. In order to move through it, their base needs to completely clear it, meaning they need enough move from the back of the base to accomplish this and there has to be space to fully place them on the far side.
Ruins are a fantastic playground for INFANTRY, and many battlefields are full of basic troopers screaming OH YEAH and bursting through walls like some sort of beverage mascot. To all intents and purposes, when planning your movement distances they’re often functionally irrelevant unless your opponent has taken steps to block you. This lets regular INFANTRY use ruins defensively to try and outmanoeuvre other unit types, while powerful INFANTRY melee threats like Assault Centurions (who, to be fair, are explicitly equipped for busting through walls) are especially valuable because they can use this terrain to approach the enemy while hidden without being impeded.
Other Units With FLY
Our next category of units, more middle of the road in capabilities, are non-INFANTRY with FLY (or most equivalent abilities). There are plenty of BIKER and VEHICLE units that still want to get in amongst the enemy, so lets see how the flying ones fare.
These can:
- All times
- Maintain unit coherency through a wall.
- Movement phase:
- Move across ruin walls without penalty (as long as there are no vertical obstructions like overhanging floors)
- Move vertically to reach higher floors, without paying for the vertical movement (but not through the actual floor).
- End their move above the ground floor.
- Do all of this while falling back where relevant.
- Charge phase:
- Charge units that are within 1″ of the near side side of the wall.
- Charge units on higher floors as long as they can reach them without moving through floors, paying for their vertical movement.
- End their charge above the ground floor.
- Heroically intervene towards a unit within 3″, even if they’re on the far side of the wall.
- Fight phase:
- Fight through the wall as long as they meet the normal qualifications for doing so.
- (technically) pile in/consolidate to a higher/lower floor as long as they can meet the conditions for doing so and don’t go through a floor. This will functionally almost never be possible without an ability letting them move 6″ while doing this.
Note on Transports
I have decided against making a call on whether a non-INFANTRY unit can embark or disembark through a wall. RAW nothing stops it, but I strongly suspect the intent is they can’t, following on from the FAQ ruling that a wrapped INFANTRY unit can’t embark if it couldn’t normally move towards the transport. The number of units affected is incredibly minimal anyway.
FLY units experience much more variance in what they can do in different phases. In the movement phase their experience is the same as or better than INFANTRY’s most of the time, at least with the kind of ruins generally seen on tournament tables, which tend to be relatively unadorned thin walls. More complex ruins such as Sector Imperialis kits might prove move of an obstacle, but at least compared to non-FLY infantry avoiding the 5″ tax to go up a floor will usually cancel this out.
However, in the Charge and Fight phases their options sudden narrow considerably – unlike for infantry, those walls are suddenly solid. That can make pulling off a charge into units on the far side, especially if they’ve been carefully positioned, tricky, because if you haven’t made it over the wall in the movement phase, you have to go all the way around it, which for larger ruins like central L-blocks might be further than you can go. If your opponent has left models within 1″ of the edge of the wall you can still charge them, but if you do this with multiple units and the first unit kills all the models within 1″ then the second unit can’t pile-in successfully. Most savvy opponents (especially ones who’ve read this article, natch) aren’t going to let you get within 1″ anyway, forcing you to go the long way round, often denying you a charge completely.
The big, big takeway for these units, therefore, is that if you’re planning a charge, do your level best to clear the ruin in the movement phase, and if that isn’t possible then position yourself as close as possible to the corner you’re going to charge around, not necessarily as close to the enemy as possible.
Everyone Else
If you’re neither INFANTRY nor FLYing your options are even more limited. You can:
- All times
- Maintain unit coherency through a wall
- Movement phase:
- Move across a ruin wall if you have sufficient move to climb it, get your entire base across the top front to back, and go back down on the far side. This is very, very rarely the case.
- Charge phase:
- Charge units that are within 1″ of the near side side of the wall
- Heroically intervene towards a unit within 3″, even if they’re on the far side of the wall.
- Fight phase:
- Fight through the wall as long as they meet the normal qualifications for doing so.
BEAST and SWARM units can additionally:
- Movement phase:
- Move vertically to reach higher floors, paying for the vertical movement (and not moving through the actual floor).
- End their move about the ground floor.
- Charge phase:
- Charge vertically to reach higher floors, paying for the vertical movement (and not moving through the actual floor).
- End their move about the ground floor.
- Fight phase:
- (technically) pile in/consolidate to a higher/lower floor as long as they can meet the conditions for doing so and don’t go through a floor. This will functionally almost never be possible without an ability letting them move 6″ while doing this.
Beasts and swarms are pretty rare, and most of their extra options won’t come up in the average game.
When playing an army heavy on melee units in this category (especially Knight armies), ruins are suddenly a major impediment to your plans that need to be carefully worked around. Conversely, when up against these armies ruins represent a huge opportunity to confound their plans and keep your units alive.
Just before we talk about how, I am forced, under protest, to talk about a special kind of ruin used in some ITC events, which is the enclosed building/ruin. This is a terrain feature that uses the rules for ruins, but has walls that are solid, or at least only have windows that count as LOS blocking, on all sides on the ground floor. Only units that can traverse ruin walls can enter (so mostly INFANTRY) and once inside they can only be engaged by being charged by similar units, unless the models are within 1″ of the wall. We’re not going to talk much more about these in the specific beyond that, but it’s worth remembering that if your opponent has no way of engaging something inside one, a unit that’s hidden there is totally safe, which is probably very good for you!
Tactics
The Basics
For most of the rest of this article we’re going to cover some specific things you can do with ruins in certain situations. However, if you take nothing else away there are some key rules of thumb that will apply in the majority of situations.
- If you are moving or charging INFANTRY and just want to cover the most distance, train yourself to see the battlefield as if the ruin wasn’t there. It functionally isn’t for this purpose, and moving in a straight line through them is often your fastest route. Conversely, remember that your opponent’s infantry can come straight at you when working out how far away you need to be to be safe.
- If you are moving units within a ruin, and want to keep them safe, default them to being slightly more than 1″ in from the wall. This will prevent anything non-INFANTRY from attacking them through the wall.
- If you are planning to charge something with nasty overwatch with your INFANTRY, and you have the space to do so, charge from behind a wall, as it avoids overwatch. A lone CHARACTER doing this is a good way to stop overwatch on behalf of a unit that can’t go through the wall themselves.
- If a ruin piece is big enough that you physically can’t see around it from your side of the table, make sure to go check if your opponent has anything in there before planning your movement. I’ve won games by surprising my opponent like this, and lost them to forgetting to check myself! This is especially true when dealing with units that can perform heroic interventions.
These are all things you should be internalising and keeping in mind as often as possible. They won’t always be the exact correct thing to do depending on circumstances, but having these as your baseline will increase your chances of success in most games.
Defensive Positioning with Ruins – Movement
The first important thing you can do with ruins is use them as choke points or traps for units that can’t move through them. We touched on this when talking about screening – Knight-sized units are especially vulnerable to this.

You can be more aggressive about this though – if an enemy VEHICLE or MONSTER strolls into a ruin and it’s critical for you that they stay there, you can trap them.

Obviously be very careful against anything that can Heroic, but even then a 3″ radius net can often trap a critical, very valuable unit out of position for a turn. When using such units, be extremely careful not to walk yourself into this situation – some amount of getting blocked is often inevitable, but try and plan an escape route.
Also in the movement phase, ruins can sometimes be used to escape from a poorly thought out wrap. This is usually the case when there’s a second floor – if your troops are in a position where they can legally move up the wall to it, then they can do so unless the opponent has the foresight to block that level off as well.
A botched wrap can be game-ending for some armies, so if you’re trying to tie up a unit in terrain be very careful how you do it, and confirm with your opponent that they’re happy (well I mean not happy but accepting) you’ve closed off any escape routes that you’ve positioned units to block.
Defensive Positioning with Ruins – Shooting
Now obviously, when your opponent wants to shoot at you putting a nice big wall in between you and them usually substantially improves that. However, what if, for whatever reason, you need to expose your units a bit, but still want them to be as safe as possible. Perhaps there’s a delicious objective marker just too far away from the wall to safely hold it from inside. What can you do?
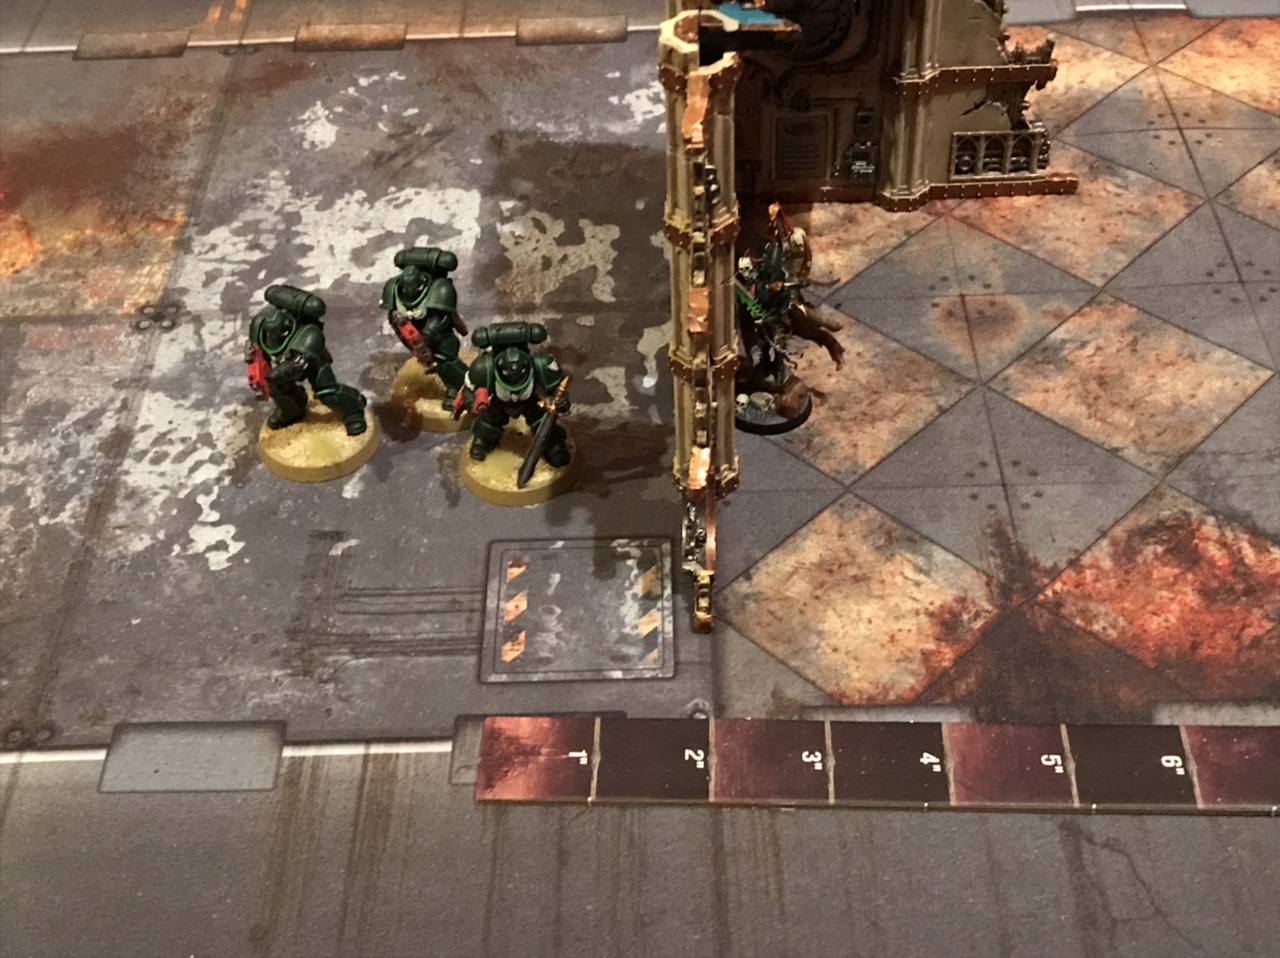
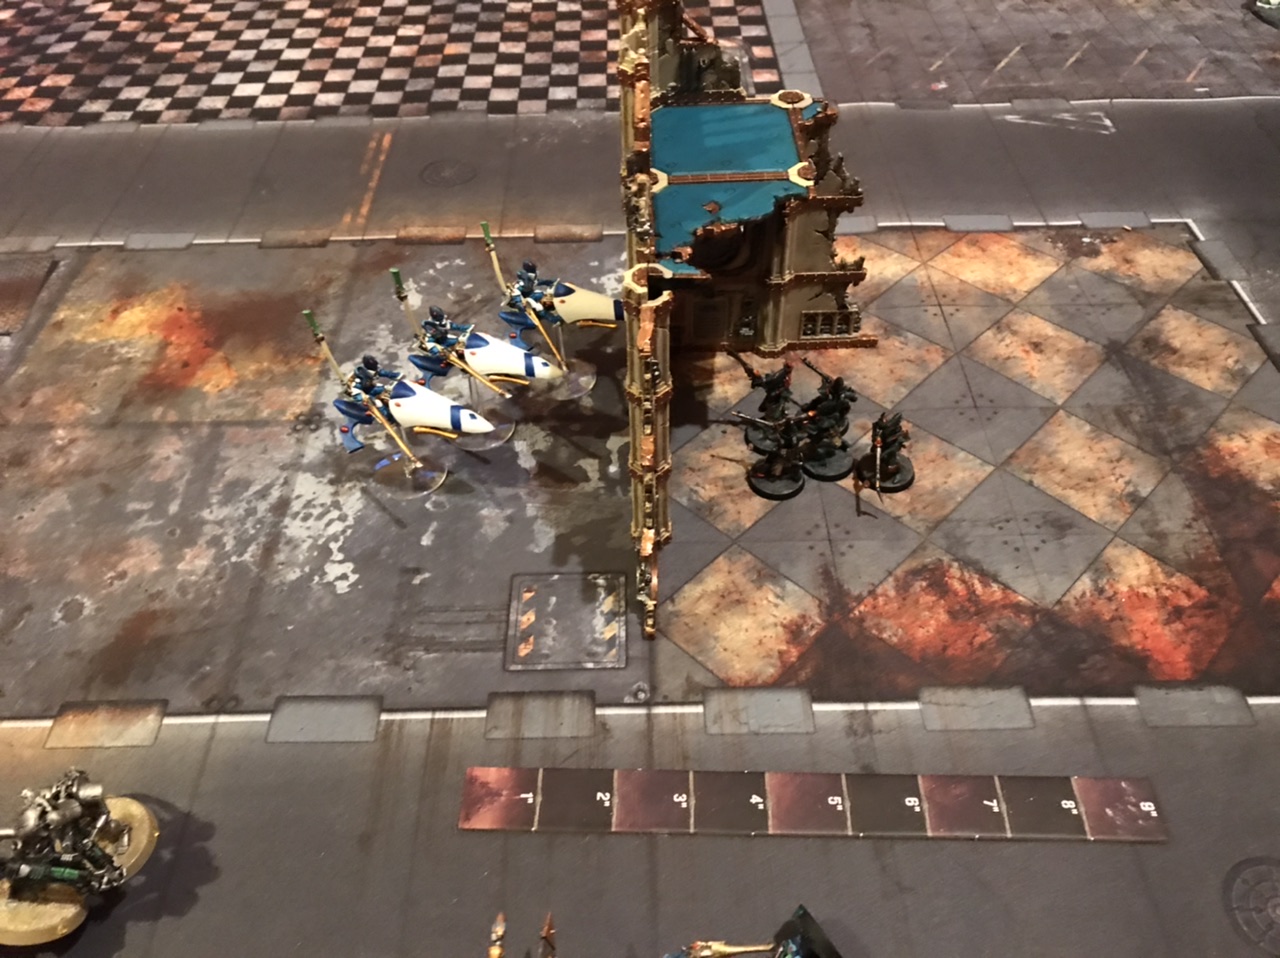
It’s not fool proof, but the optimal choice in this case is to use the ability to maintain squad coherency through the wall to only expose the minimum number of models, as shown below:
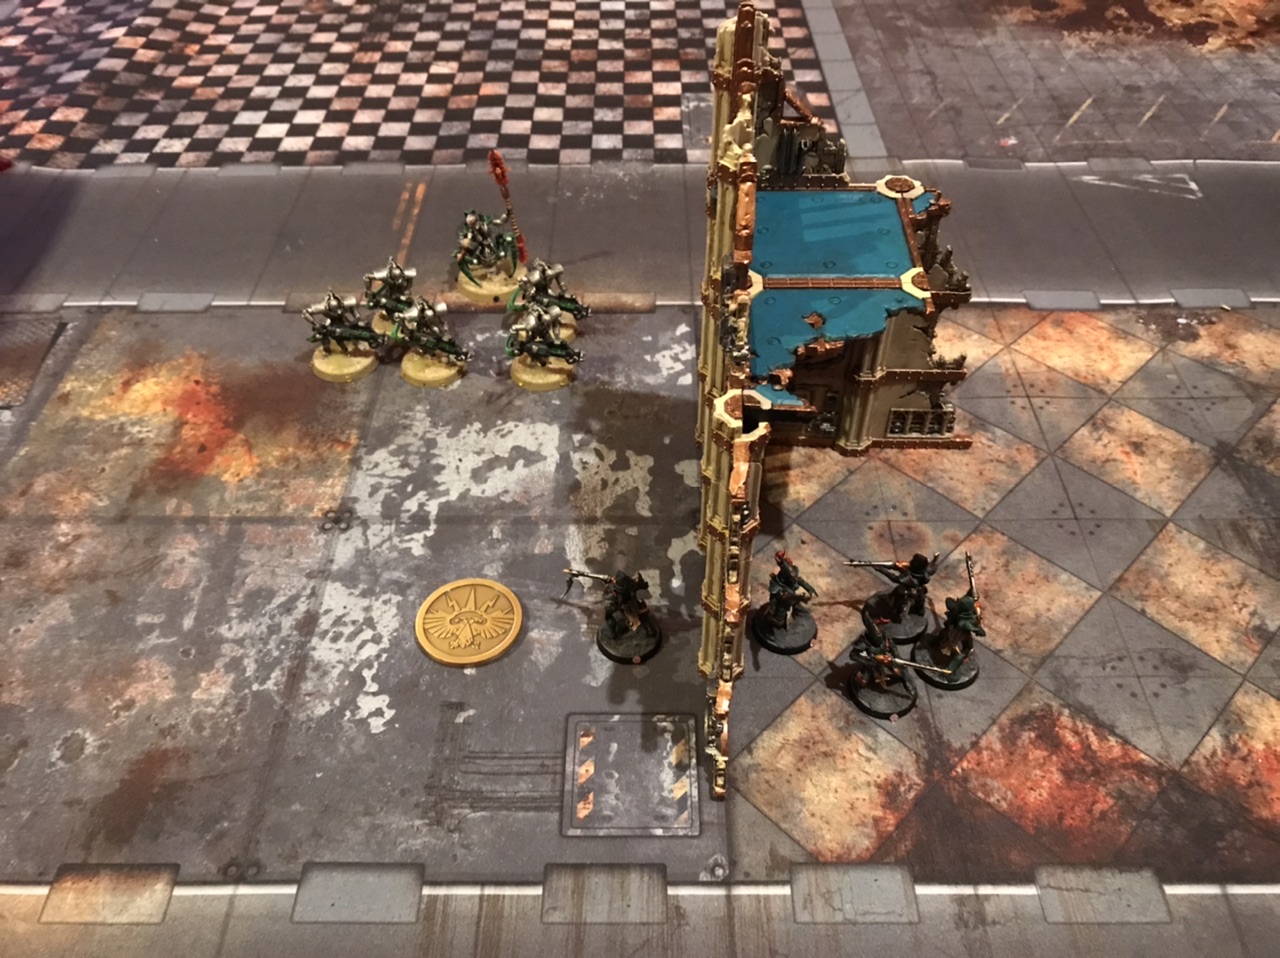
Now obviously as long as that single model is in the open the enemy units can declare shooting against it, but this setup creates multiple “failure cases” for the opponent if they want to wipe the squad.
Firstly, Illuminor Szeras really hates elves. So much so that it might squash his tactical acumen. If he shoots first and vaporises one Kabalite, then the rest of the squad is suddenly safe.
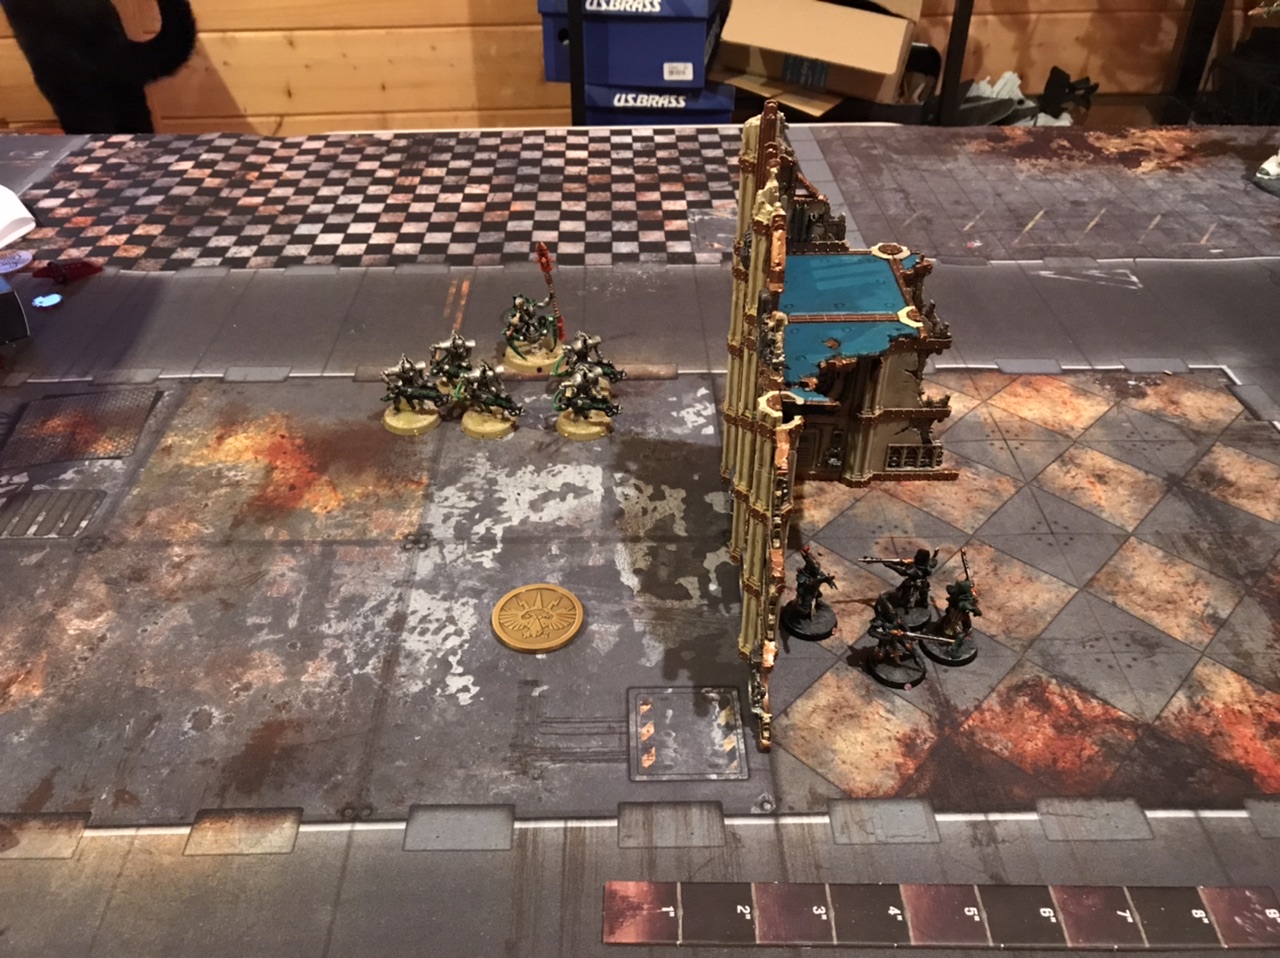
This is great for the Drukhari player, because now the Kabalites can grab the objective again on the next turn, extending their usefulness in the game.
Obviously this lesson goes both ways, and if you’re the Necron player here it’s important to assess whether casualty pulls could affect your firing options and shoot with the Immortals first. However, even on average dice they leave one Kabalite alive, again leaving the Drukhari player with an extra turn of objective grabbing value.
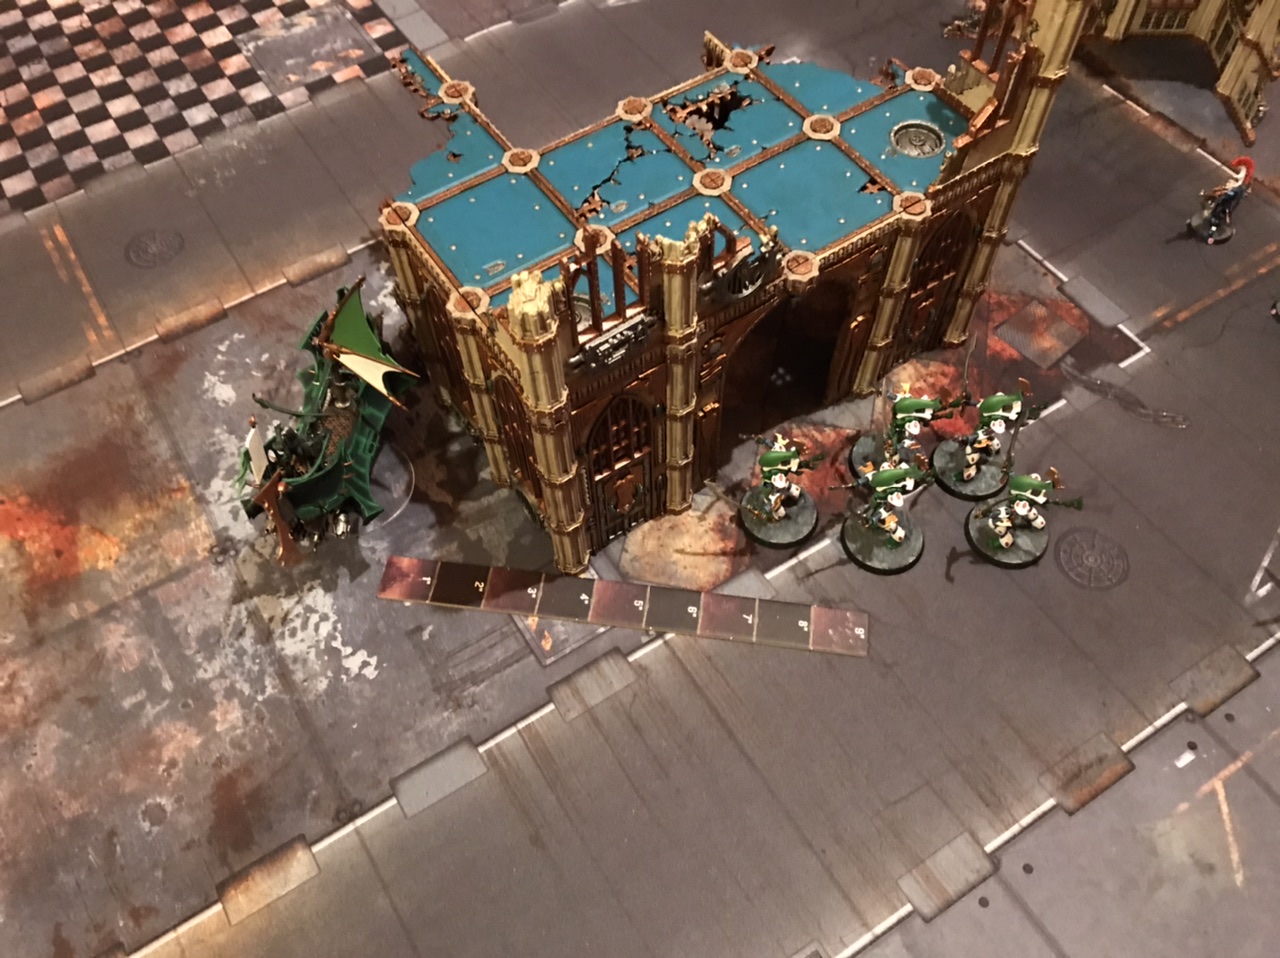
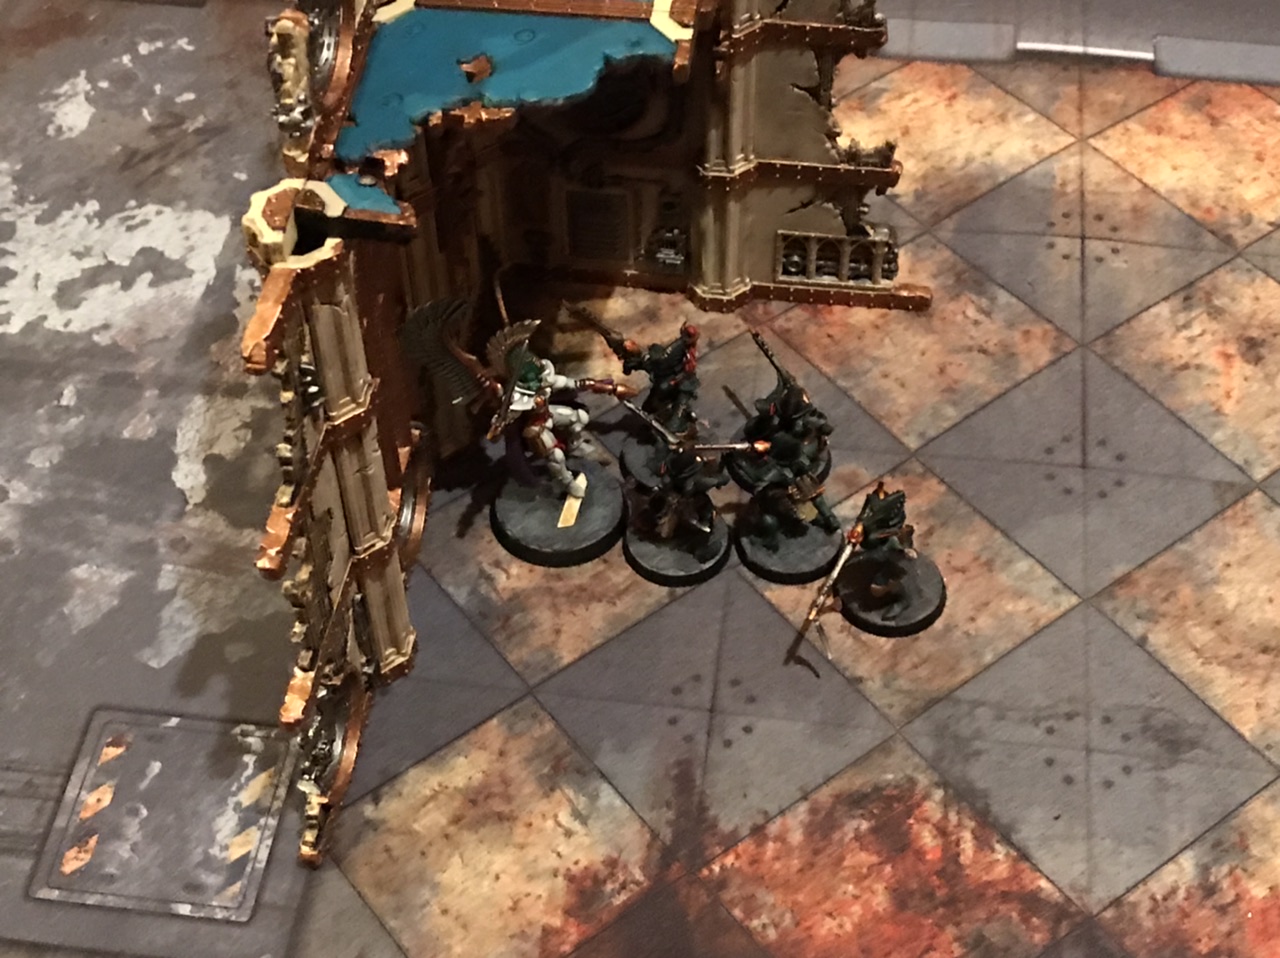
Next, let’s consider how we can use ruins to give some extra protection to units riding in a transport. We’ve brought a Raider up against some Space Marines, and the massive sails mean we’ve decided we aren’t going to hide it. However, since we’re probably expecting it to suffer a lascannon-related accident, and don’t want the passengers to get mown down by Intercessors when it dies, we can position it near a ruin to protect them.
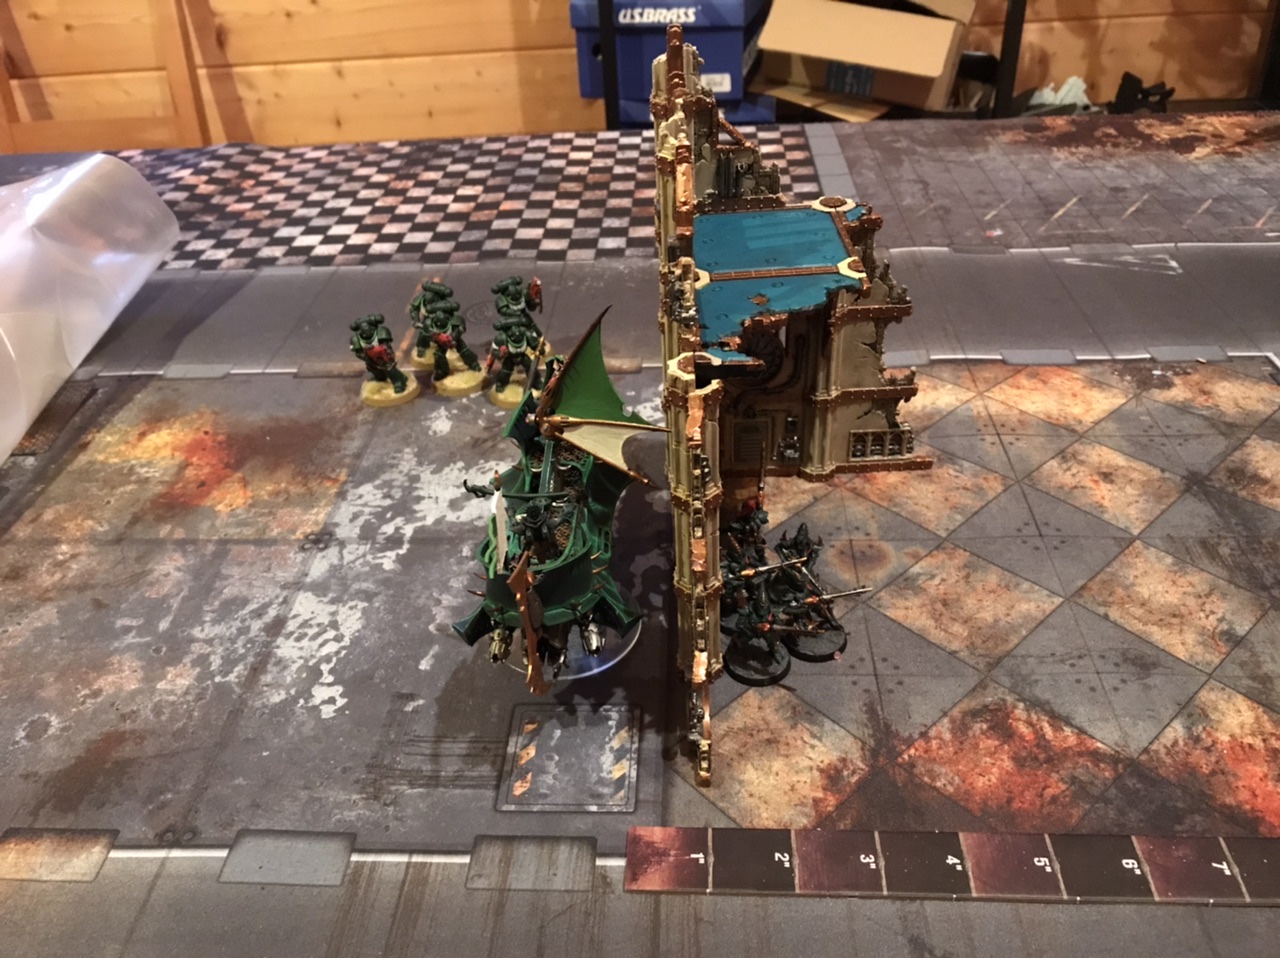
All the models can be legally placed on the far side of the wall while within 3″ of the transport’s base, so once again we get to keep the Kabalites for another turn even after the transport dies. One thing an opponent might try to do to mitigate this is surround your transport before killing it – but with especially tall vehicles you might be able to sneak out to a different level.
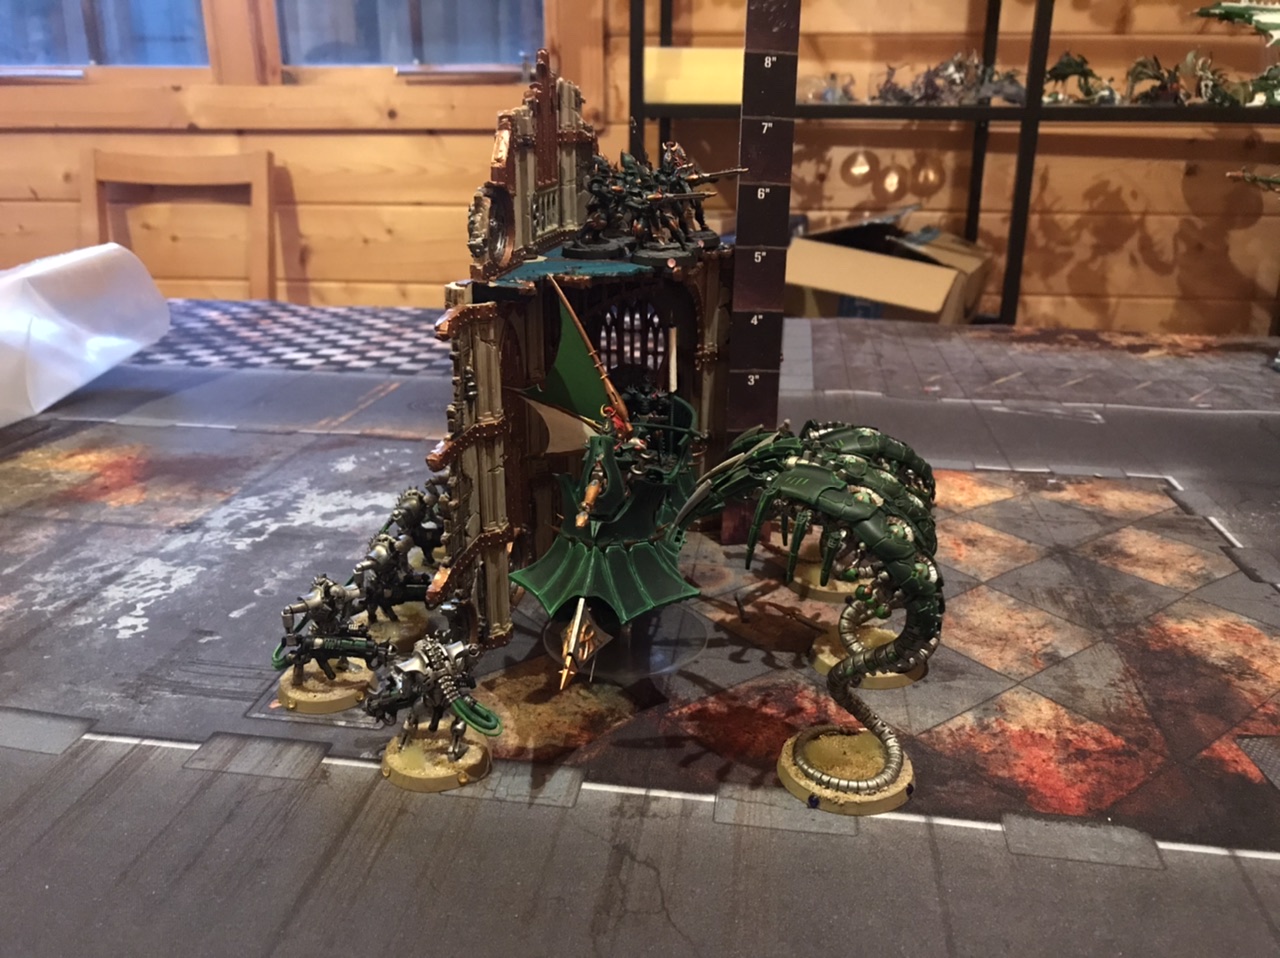
Here, the Raider is sufficiently tall that the upper floor of the ruin is within 3″ of the hull – so when it dies the Kabalites can escape upwards, leaving the hangry Wraiths (who have been sorely abused in the course of these articles) frustrated and ever more hangry.
Finally of course, to rehash a trick from last week, if you have a character in the open you need to protect, you can do so by hiding a squad in a ruin closer to the firing unit.

Defensive Positioning with Ruins – Charges and Fighting
We have our positioning rule of thumb for protecting ourself against chargers, which is “slightly more than 1″ from the wall”, but if you know what you’re up against then you can tailor this more specifically.
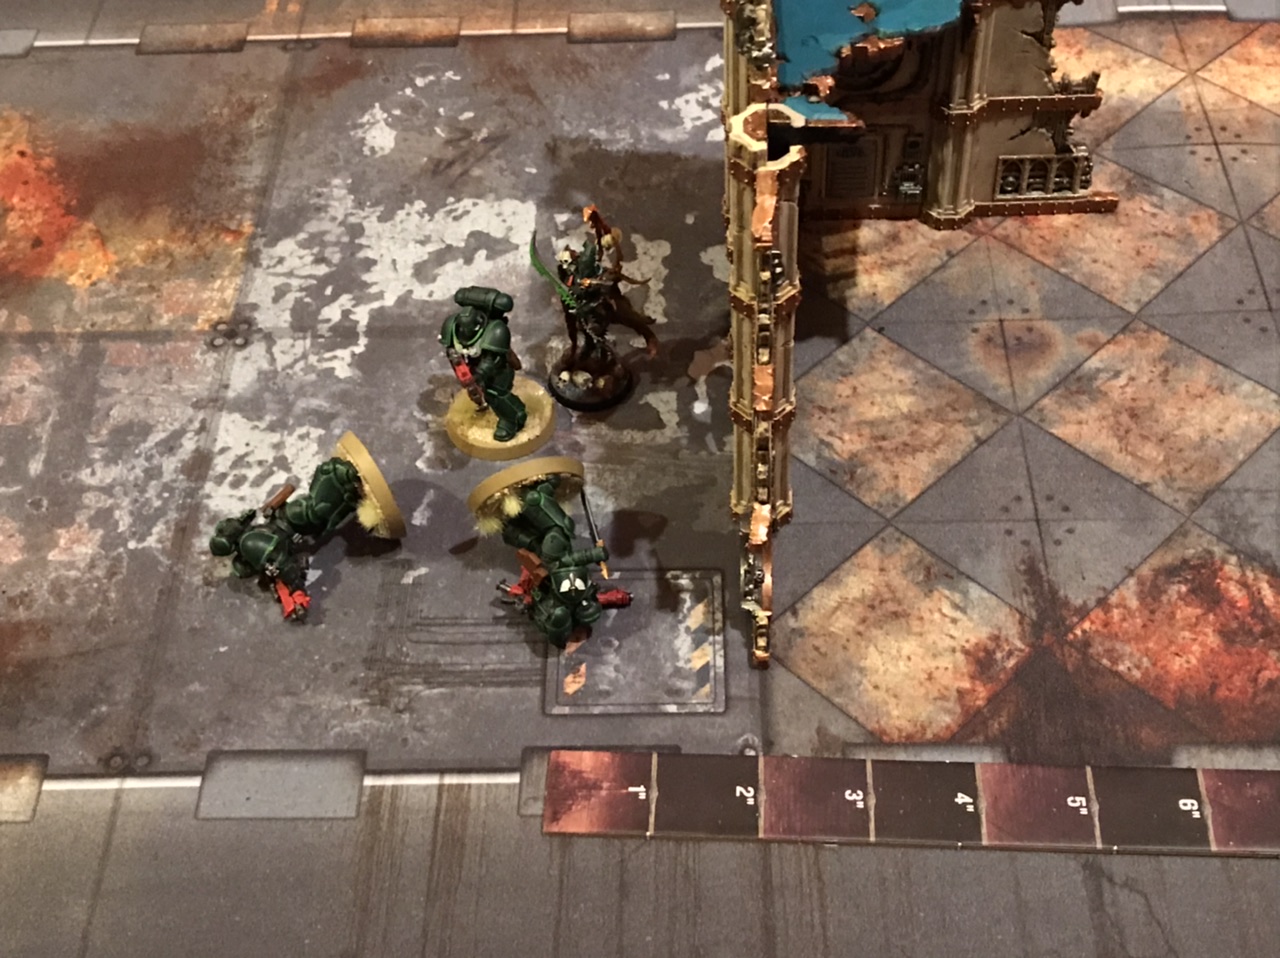
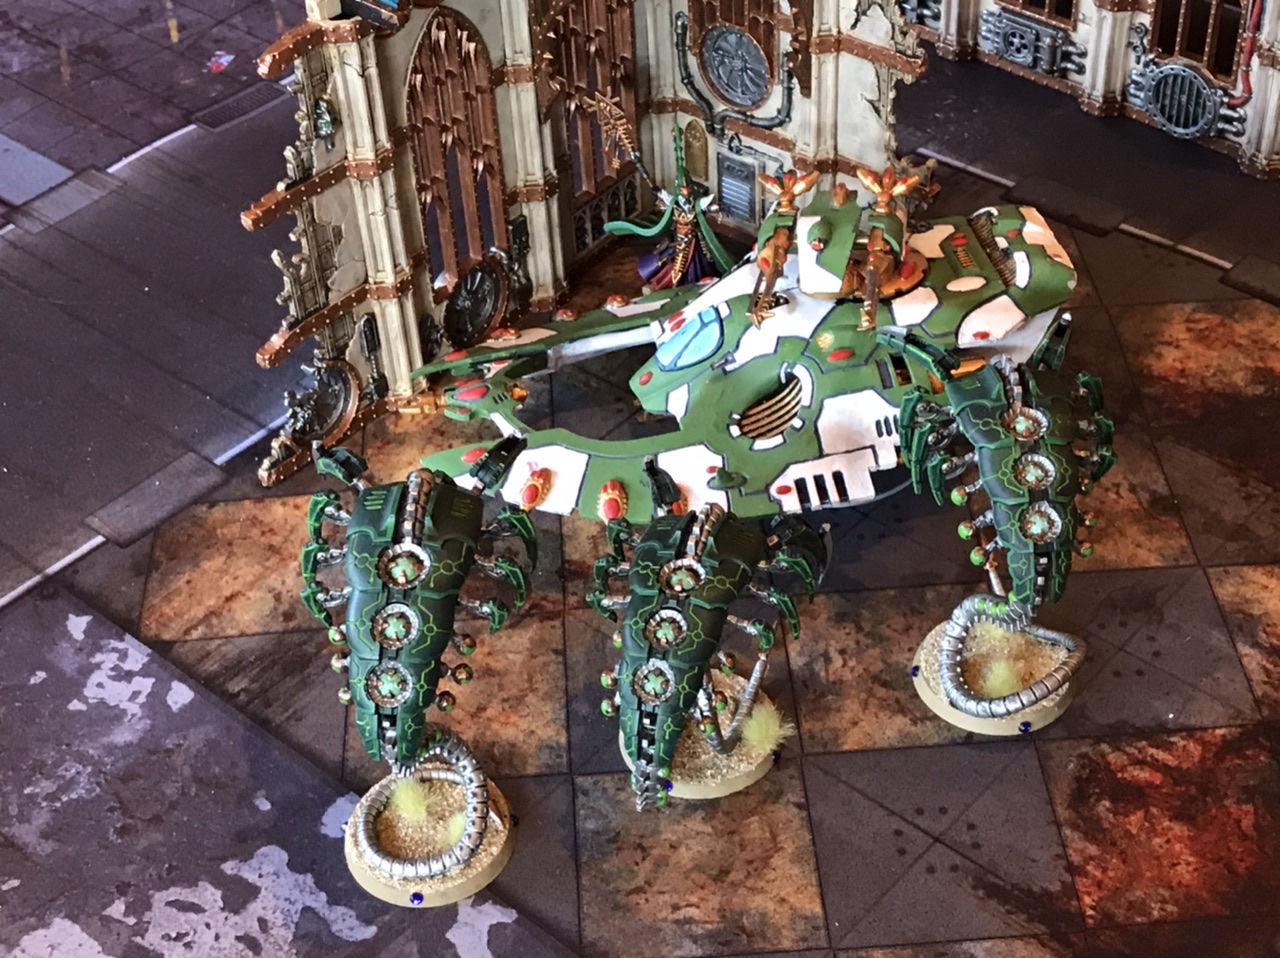
Being more than 1″ away from the wall protects you from non-INFANTRY but it doesn’t, by itself, protect you from horrible melee killers like Centurions and Wraithblades. WIth more careful placement it can though, as can be seen below.
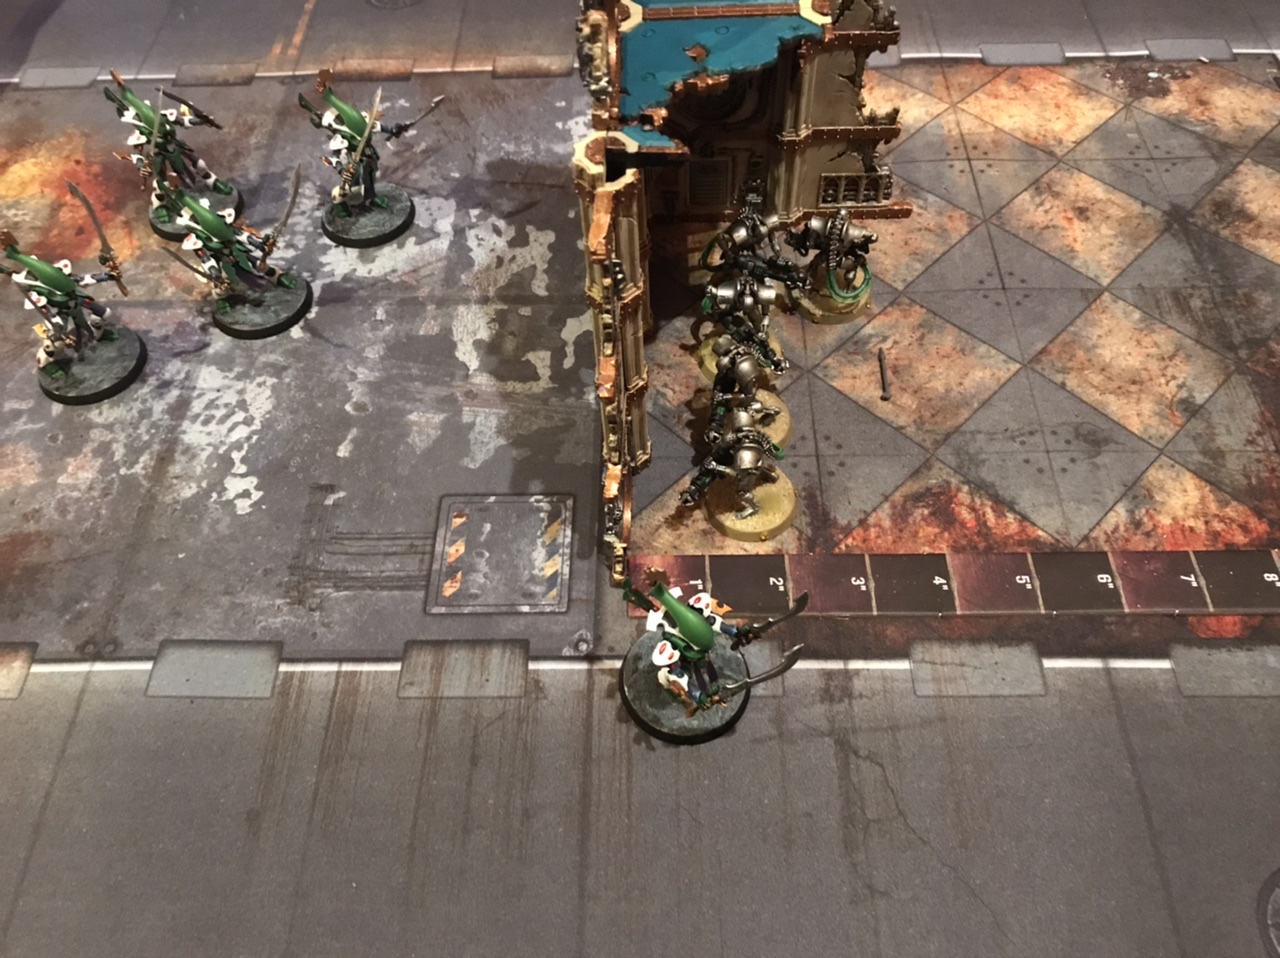
The squad of Wraithblades on the left wants to charge the Immortals, and you’d think they’d be able to go straight through the wall. However, here they can’t. While the Immortals are over an inch from the wall they’re only just that far back, and they’ve bunched nice and close together. This means that while the Wraithblades can traverse the wall, there’s no legal place to put them once they’ve done, because their bases won’t fit between the Necrons and the ruin. They can still manage a charge with a big enough roll to get a model into the space past the squad at either end, but the chance of a failed charge goes up substantially.
You can deploy something similar to impede FLY units. For these, the goal for them is to be able to move clear of the wall in the movement phase (when they ignore it) so that they don’t have to circumnavigate it when charging. As long as the defenders don’t leave enough space for the models to land past the wall and 1″ away from them in the movement phase, however, this isn’t possible.
By also bunching up as much as possible while still covering all reachable bits of the inside with the 1″ bubble, the defenders maximise the distance the chargers need to move to get round and into them when charging. Once again your opponent might still make the charge – but all of this is about incrementally, over every game you play, increasing the number of situations where the odds were in your favour. You’ll still lose on the roll sometimes, but your aggregate performance will increase.
In a metagame full of Smash Captains, it’s probably also worth doing a specific shout out to not forgetting that FLY INFANTRY is still INFANTRY. Using ruins to protect oneself against nasty flying BIKERS can become such second nature that you forget that JUMP PACK units can still just charge or heroic straight through walls. Don’t fall into that trap.
A final thing you can do with a corner ruin and a transport, when you’re up against a powerful non-INFANTRY melee unit, is create a safe zone for passengers to escape to and to protect key assets. You need to be a bit cagey about this when against FLY units as they might be able to make smart use of coherency to sneak some models in, but it’s often a practical way to make a last ditch stand against superior foes.
Even better, you can probably emergency exit out the far side of the ruin next turn, leaving your opponent cursing, once again, the incredibly permeable walls of the 41st millenium.
Wrap Up
As ever with these fairly open ended pieces, there’s bound to be some stuff we’ve missed, but everything in this article is stuff I’ve either done or seen done in a game, so making sure you’re aware of all of these capabilities should help you avoid walking face first into through a surprisingly soft wall and getting punished for it. If you have any thoughts or suggestions for things we’ve missed, or any other aspects of tactics and positioning you’d like to see covered, let us know at contact@goonhammer.com.
