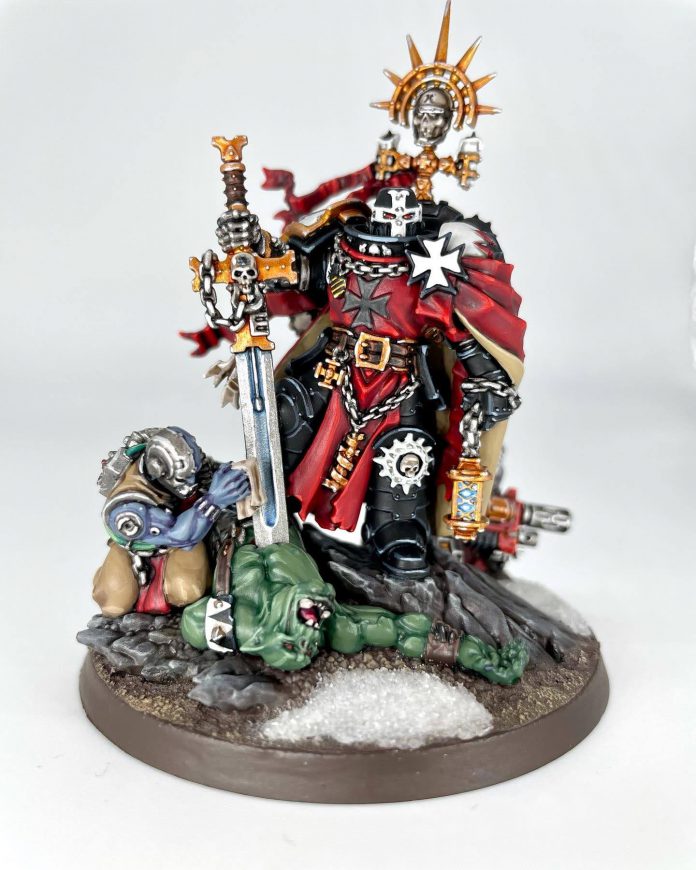
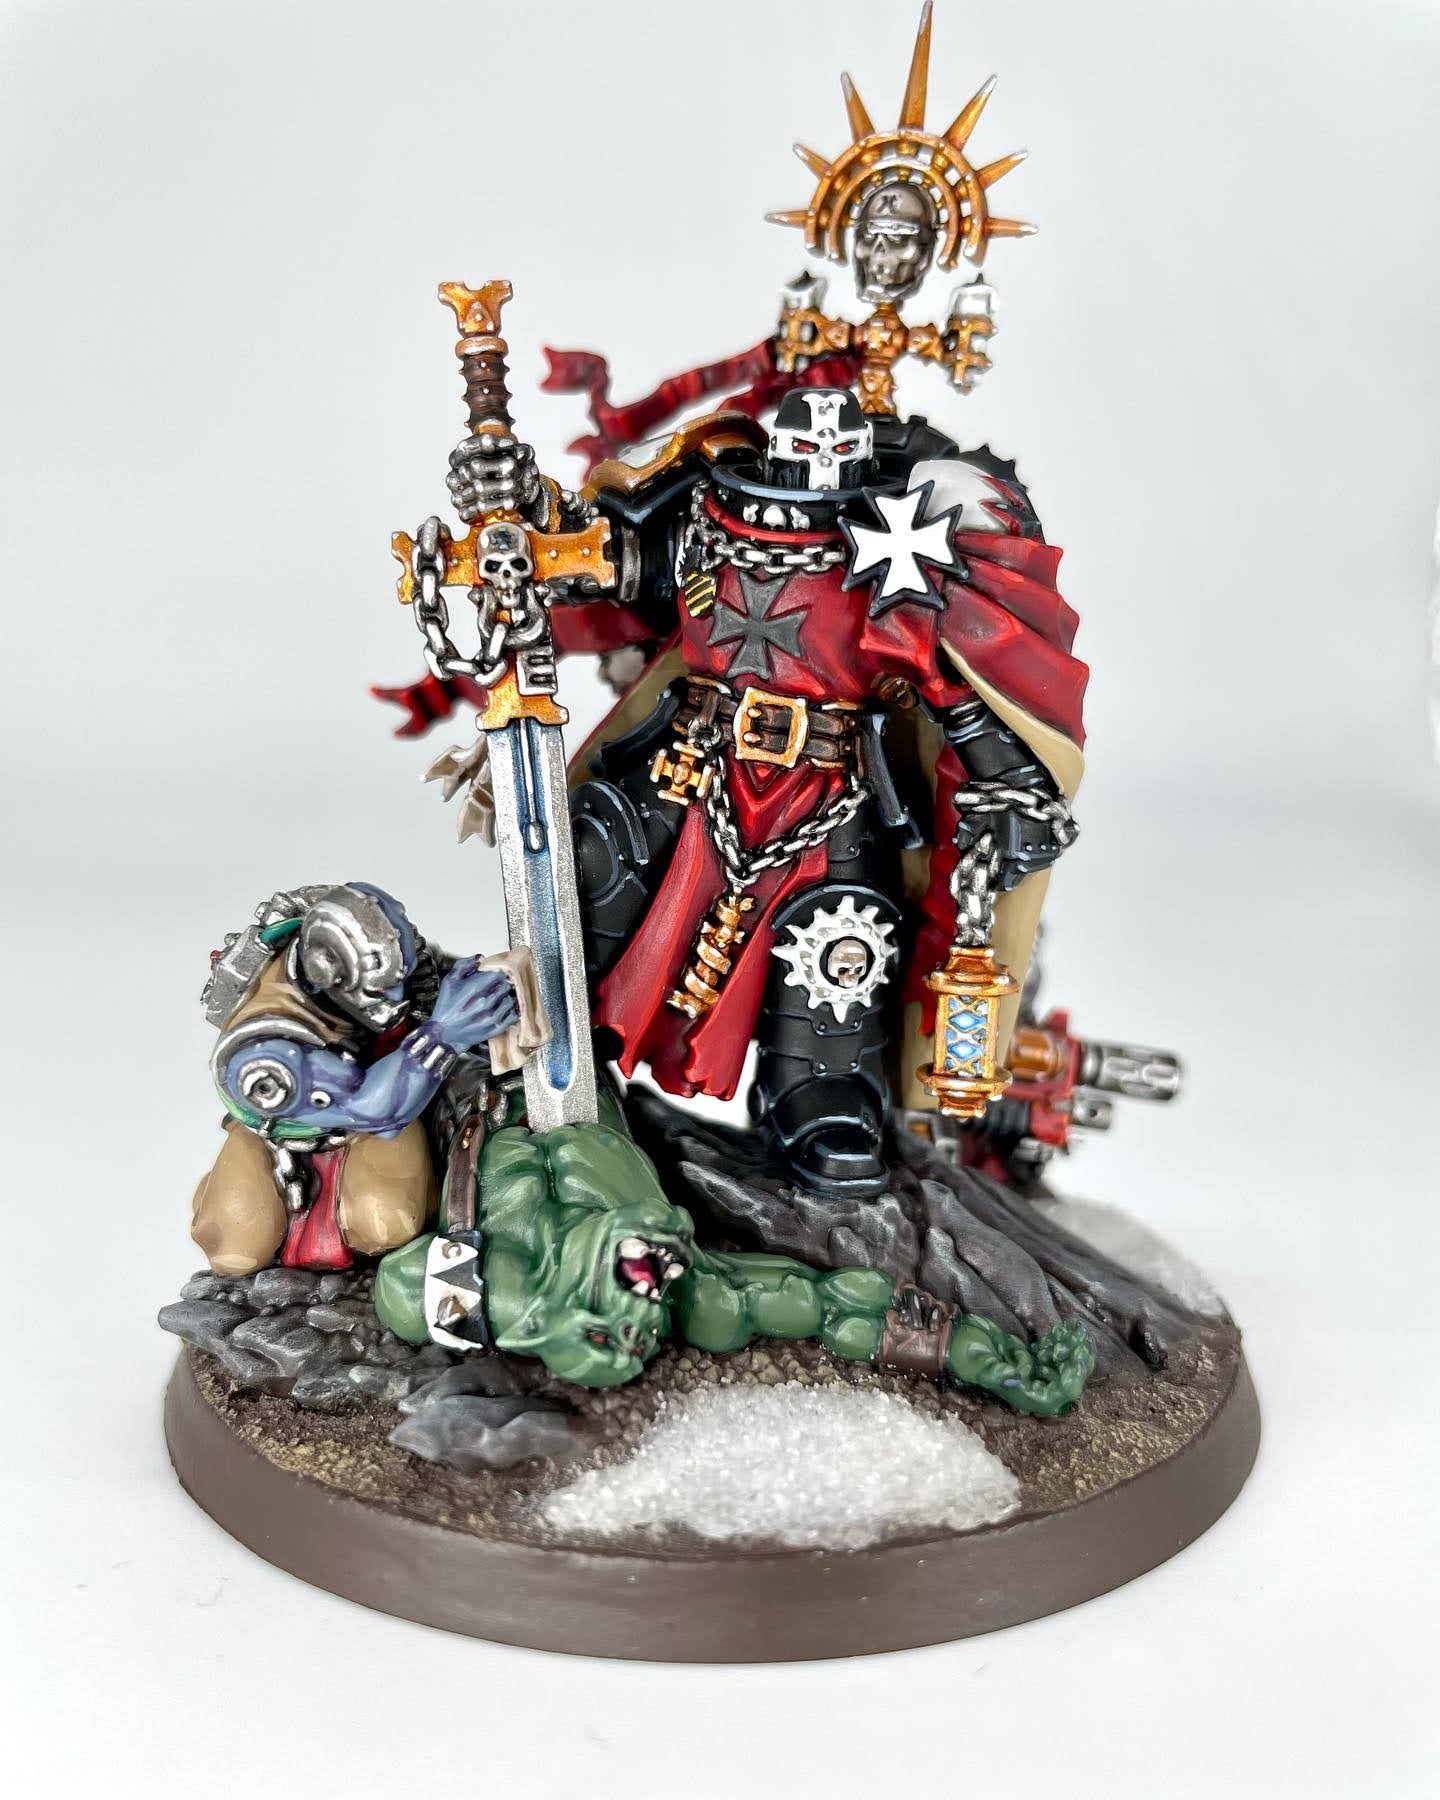
In our How to Paint Everything series we look at how to paint, well, everything! We look at the lore and heraldry around the models and talk about multiple techniques and methods for painting them. In today’s How to Paint Everything, we’re looking at how to paint the biggest, baddest, and highest of Marshals, High Marshal Helbrecht.
If you read our multitudinous review of building High Marshal Helbrecht last week, this week we’re looking at how to paint the big lug in a variety of styles. Expect to read the word “subassemblies” a lot.
SRM’s Method
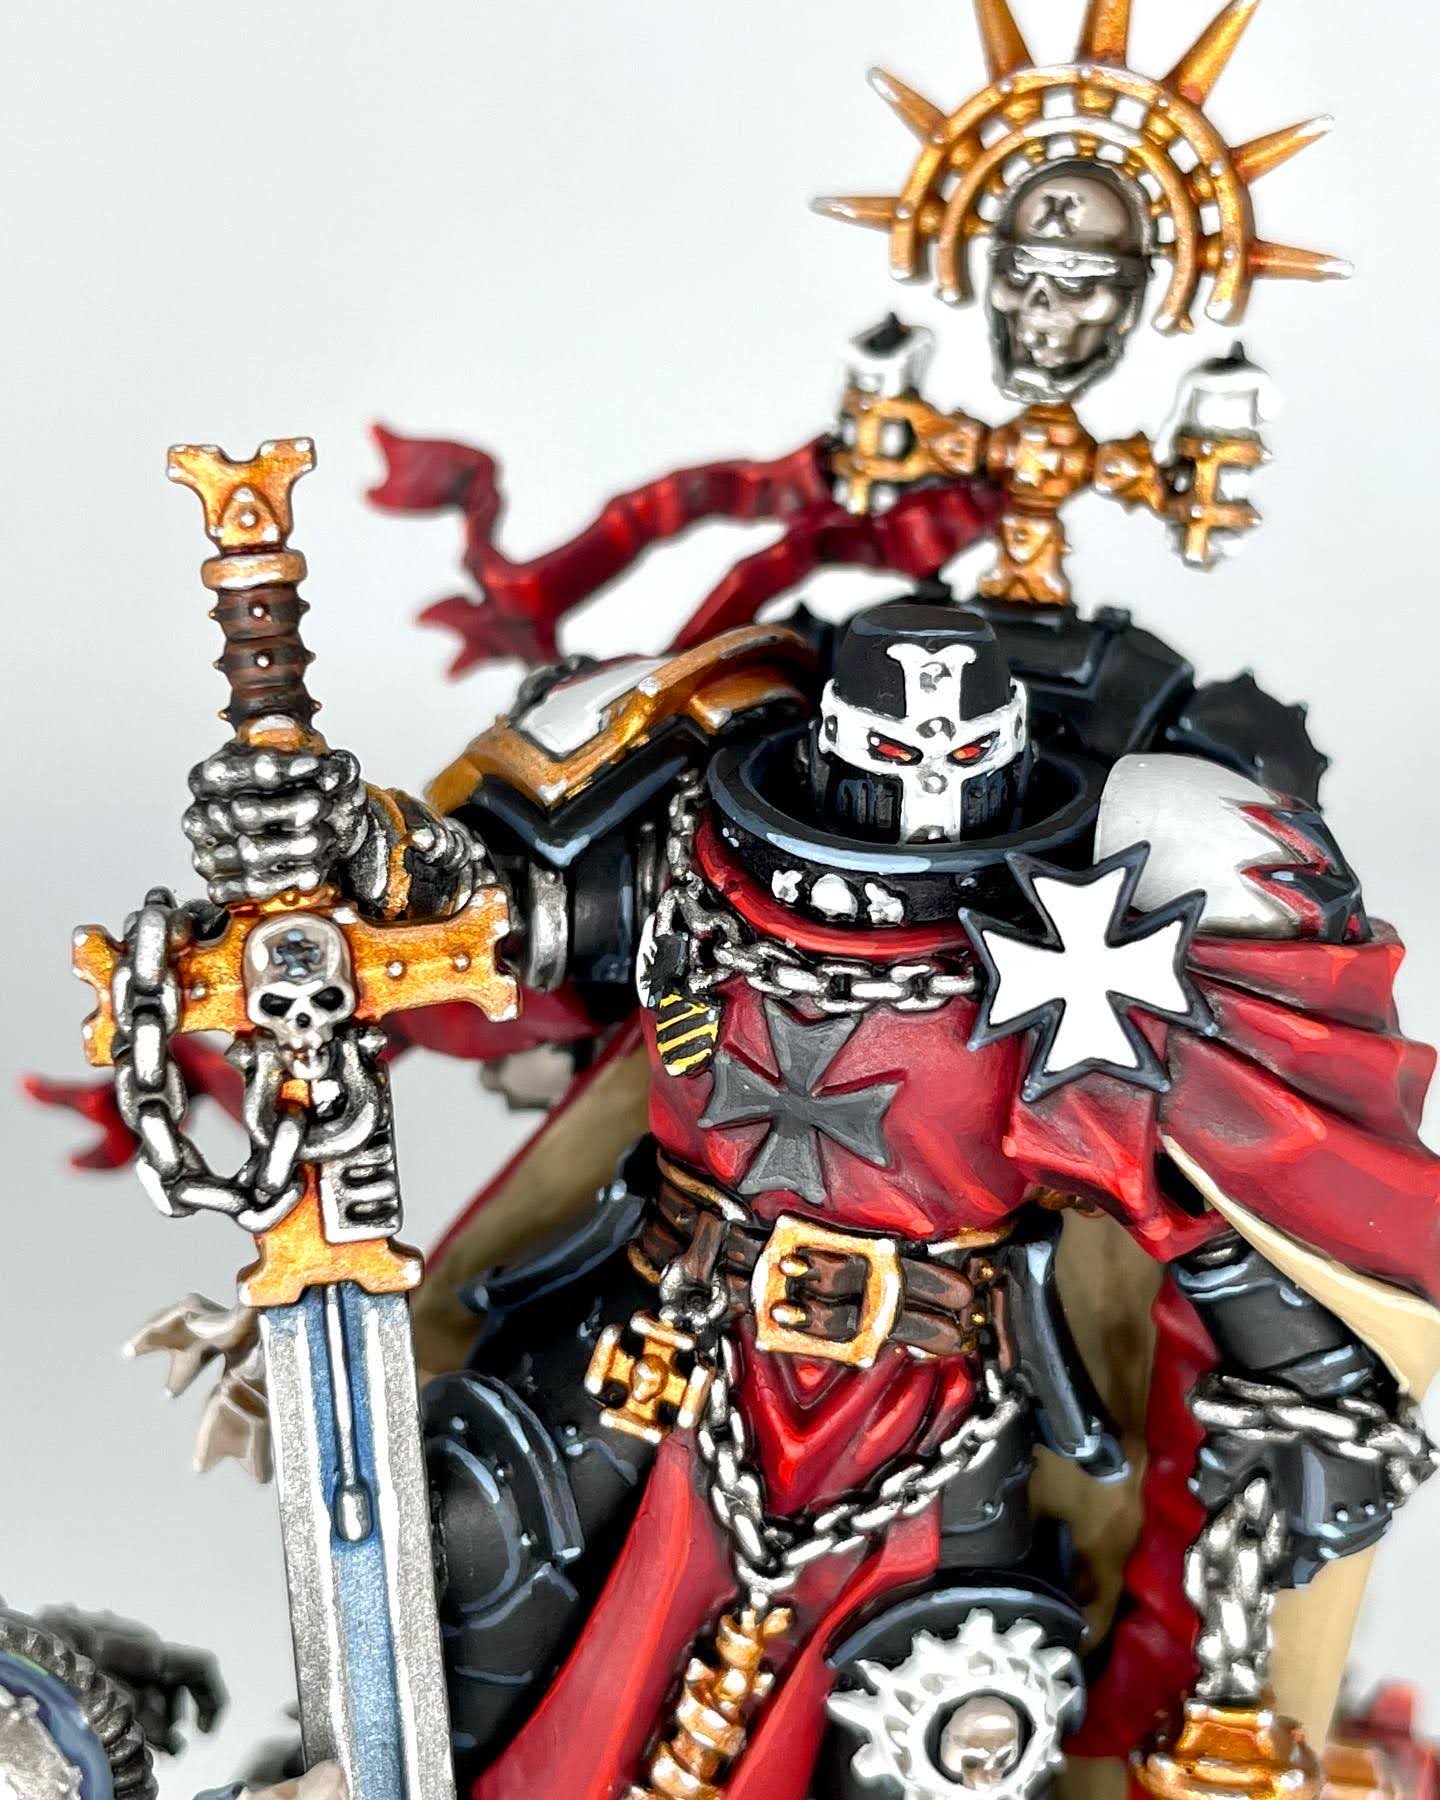
Back when I painted my firster, older, smaller, and decidedly more pewter High Marshal Helbrecht in 2017, I made a conscious effort to steer away from the typical golden boi look of the ‘Eavy Metal paintjob. Instead, I hewed closer to my more classical Black Templars scheme, letting the model’s oodles of bling speak to his status.
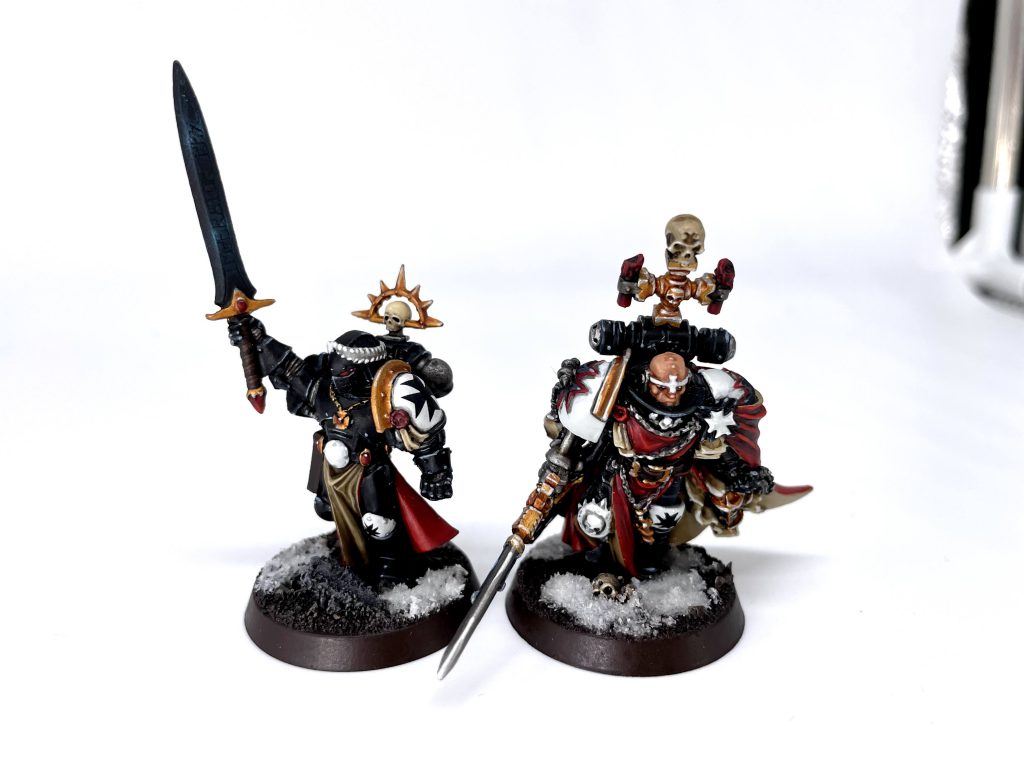
Fortunately, I have this recipe damn near memorized, as I have reproduced it over several thousands of points worth of tiny crusading weirdos. With the template set for the central figure, the only challenges here would be the bevvy of details on the model and his attendant weirdos. I’ll break down how I painted Helbrecht first, then talk through what went into his shared-base running crew an lastly, the base itself. I had these fellas in subassemblies to make painting them easier, as there was no way to get to all the sundry parts of each model without doing so. There’s a bit of color mixing for the various fabrics here as I really wanted them to look smooth, but you do you.
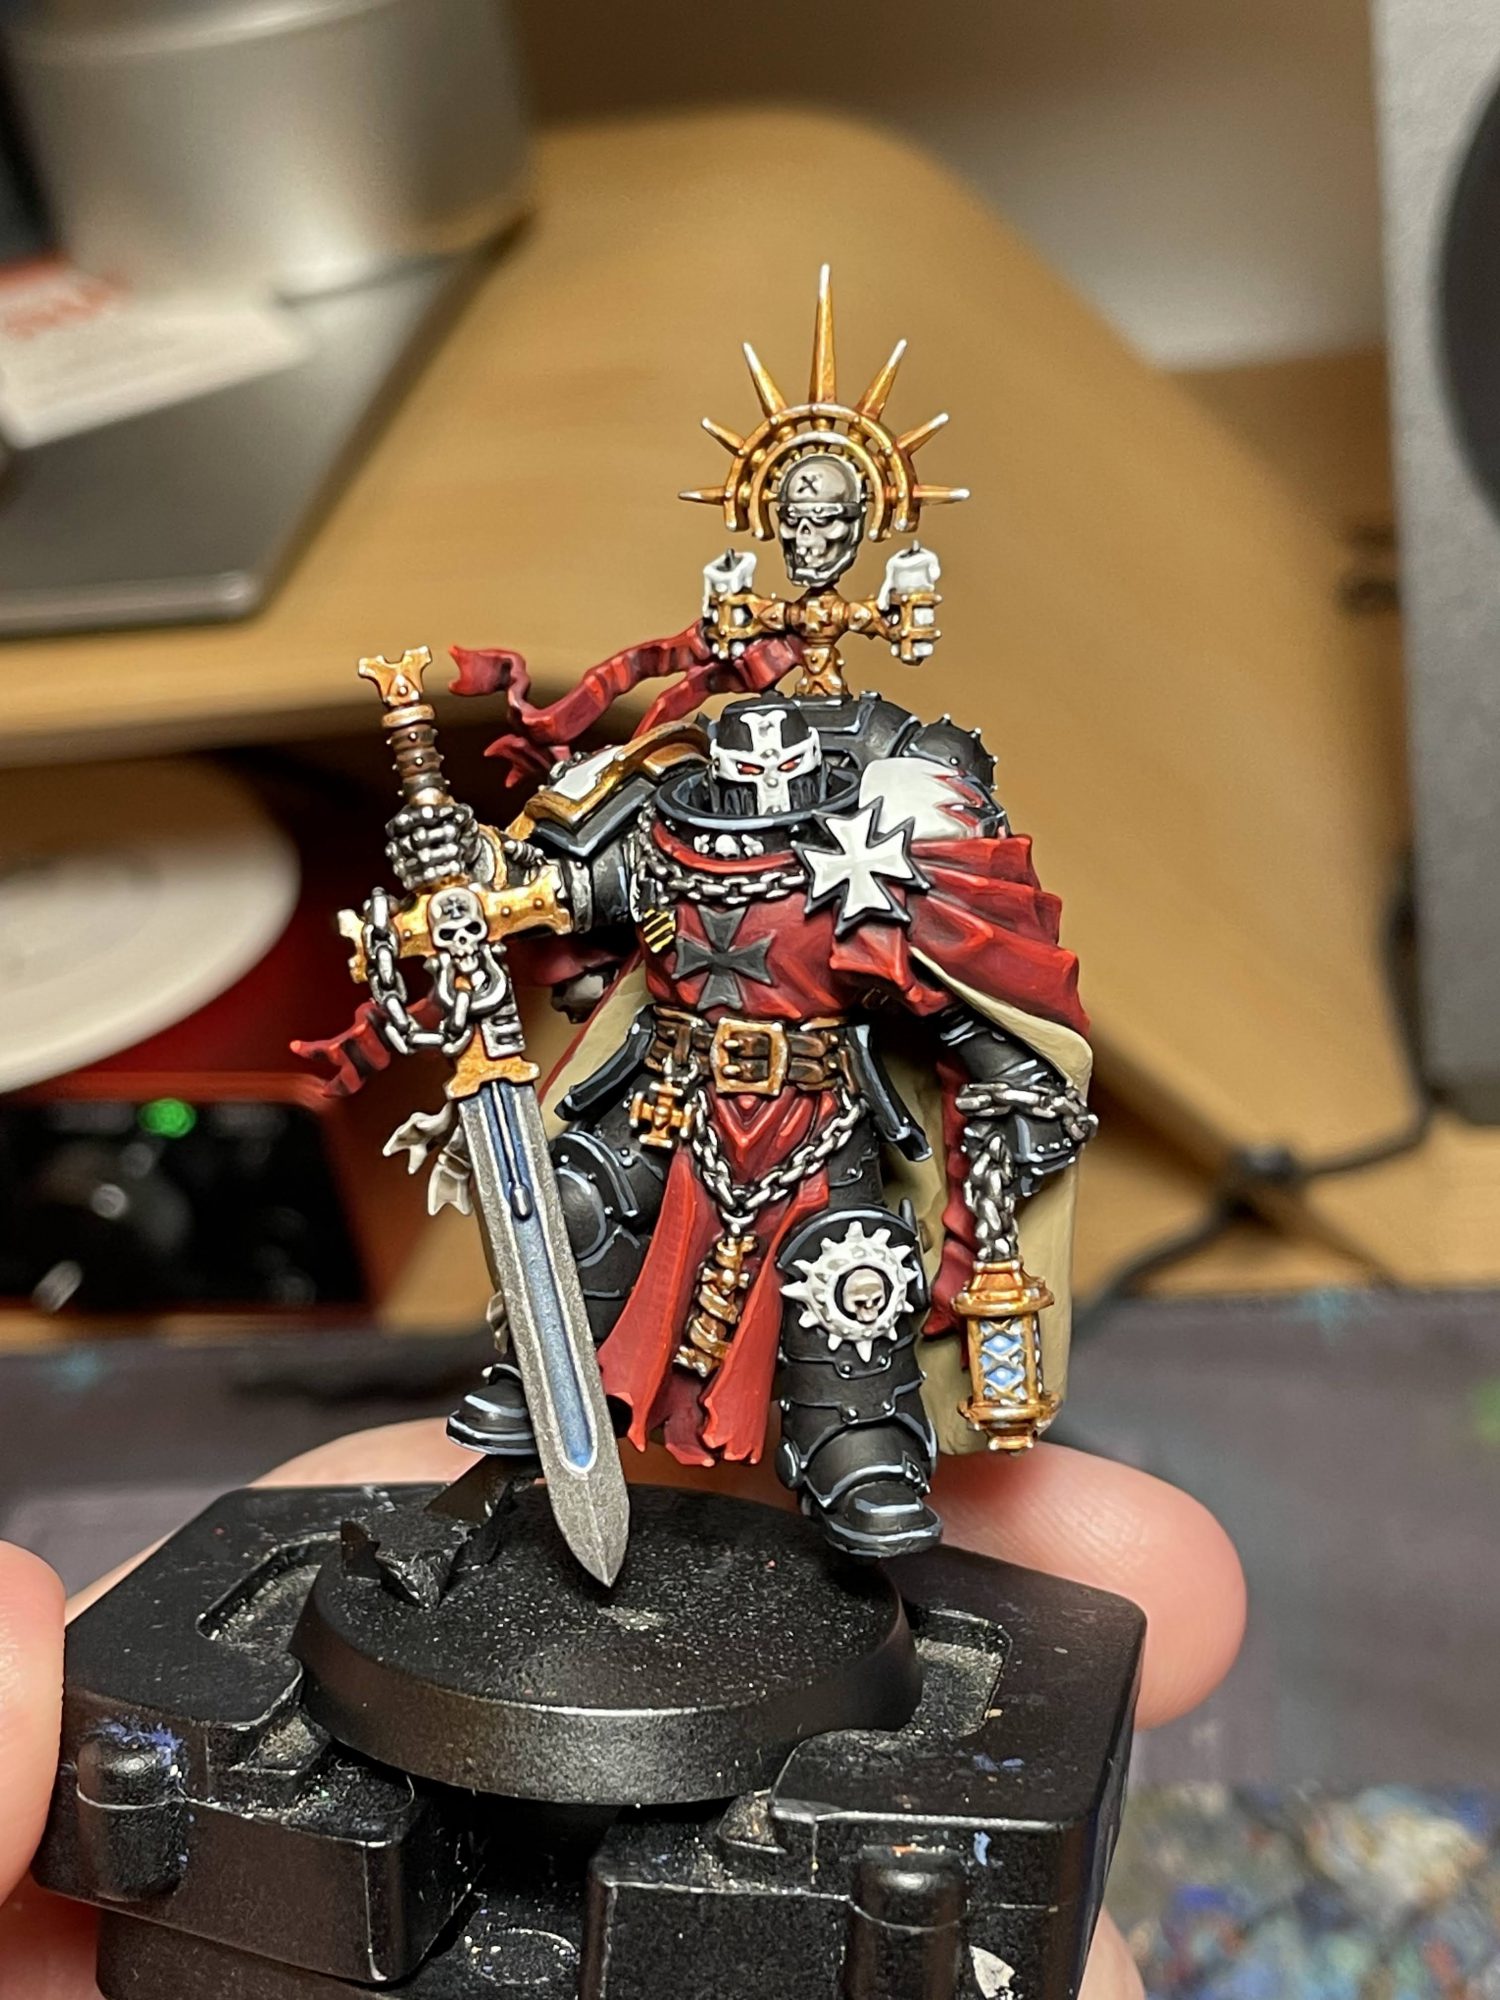
Red Fabric (Helbrecht’s Cloak Exterior, Tabbard, and Crusader Seal Parchment):
- Khorne Red
- Recess shade with a 1:1 mix of Agrax Earthshade and Nuln Oil
- Add a little Mephiston Red to the Khorne Red and layer up, leaving the darker red in the recesses
- Mix in a little more Mephiston Red and layer up again, concentrating on raised areas where light would hit
- Mix in a little bit of Evil Sunz Scarlet and layer up yet again
- Highlight the sharpest edges with pure Evil Sunz Scarlet
- Highlight the very sharpest corners with Wild Rider Red
Red Weapon Casings (Combi-melta):
- Mephiston Red
- Recess shade Nuln Oil, also shading around the rivets
- Edge highlight Wild Rider red
- Highlight sharpest corners and rivets Fire Dragon Bright
Black Fabric (Helbrecht’s Cloak Cross)
- P3 Thamar Black
- Add a little Skavenblight Dinge to the black and layer up, leaving the darker tan in the recesses
- Mix in a little more Skavenblight Dinge and layer up again, concentrating on raised areas where light would hit
- Edge highlight with pure Skavenblight Dinge
- Highlight the corners with Stormvermin Fur
Black Armor (Helbrecht’s Power Armor):
- P3 Thamar Black
- Edge highlight Dark Reaper
- Highlight the sharpest edges and rivets Fenrisian Grey
White Armor (Helbrecht’s Shoulders, Faceguard, Candles, and Details):
- Ulthuan Grey
- Recess shade with slightly thinned Nuln Oil
- Hit the deepest recesses with extremely thinned P3 Thamar Black
- Edge highlight White Scar
Lenses (Helbrecht’s Eyes):
- Mephiston Red
- Nuln Oil wash all over the eyes
- Evil Sunz Scarlet, concentrating on the inner edges
- Fire Dragon Bright, at the very sharpest corner of the inner edges
- White Scar dot in the far back corners
Red Wax (Purity Seals):
- Khorne Red
- Wash Druchii Violet
- Highlight Mephiston Red
- Highlight the most raised edges Squig Orange
Parchment (Purity Seals):
- Rakarth Flesh
- Recess shade Agrax Earthshade
- Layer up a 1:1 mix of Rakarth Flesh and Flayed One Flesh
- Highlight the sharpest corners pure Flayed One Flesh
Bone (Skulls on Helbrecht and his base):
- Rakarth Flesh
- Recess shade 1:1 mix of Agrax Earthshade and Nuln Oil
- Layer up a 1:1 mix of Rakarth Flesh and Flayed One Flesh
- Highlight the sharpest corners pure Flayed One Flesh
Brown Leather (Sword Handle, belts):
- Rhinox Hide
- Wash Agrax Earthshade
- Edge highlight Doombull Brown
Steel (Helbrecht’s backpack bits, joints, helmet details, chains, etc):
- Leadbelcher
- Wash Nuln Oil
- Highlight Stormhost Silver
Power Sword Blade:
- Leadbelcher
- Glaze the blood groove in the blade Guilliman Blue/thinned Talassar Blue
- Recess shade the seam between the hilt and blade Drakenhof Nightshade
- Highlight Stormhost Silver
Gold (Helbrecht’s pauldron rim, melta canister, sword hilt, etc):
- Retributor Armour
- Wash Reikland Fleshshade
- Edge highlight Liberator Gold
- Highlight sharp corners and rivets Stormhost Silver
Stained Glass (Helbrecht’s lantern details):
- Ulthuan Grey
- Glaze the glass panes Guilliman Blue/thinned Talassar Blue
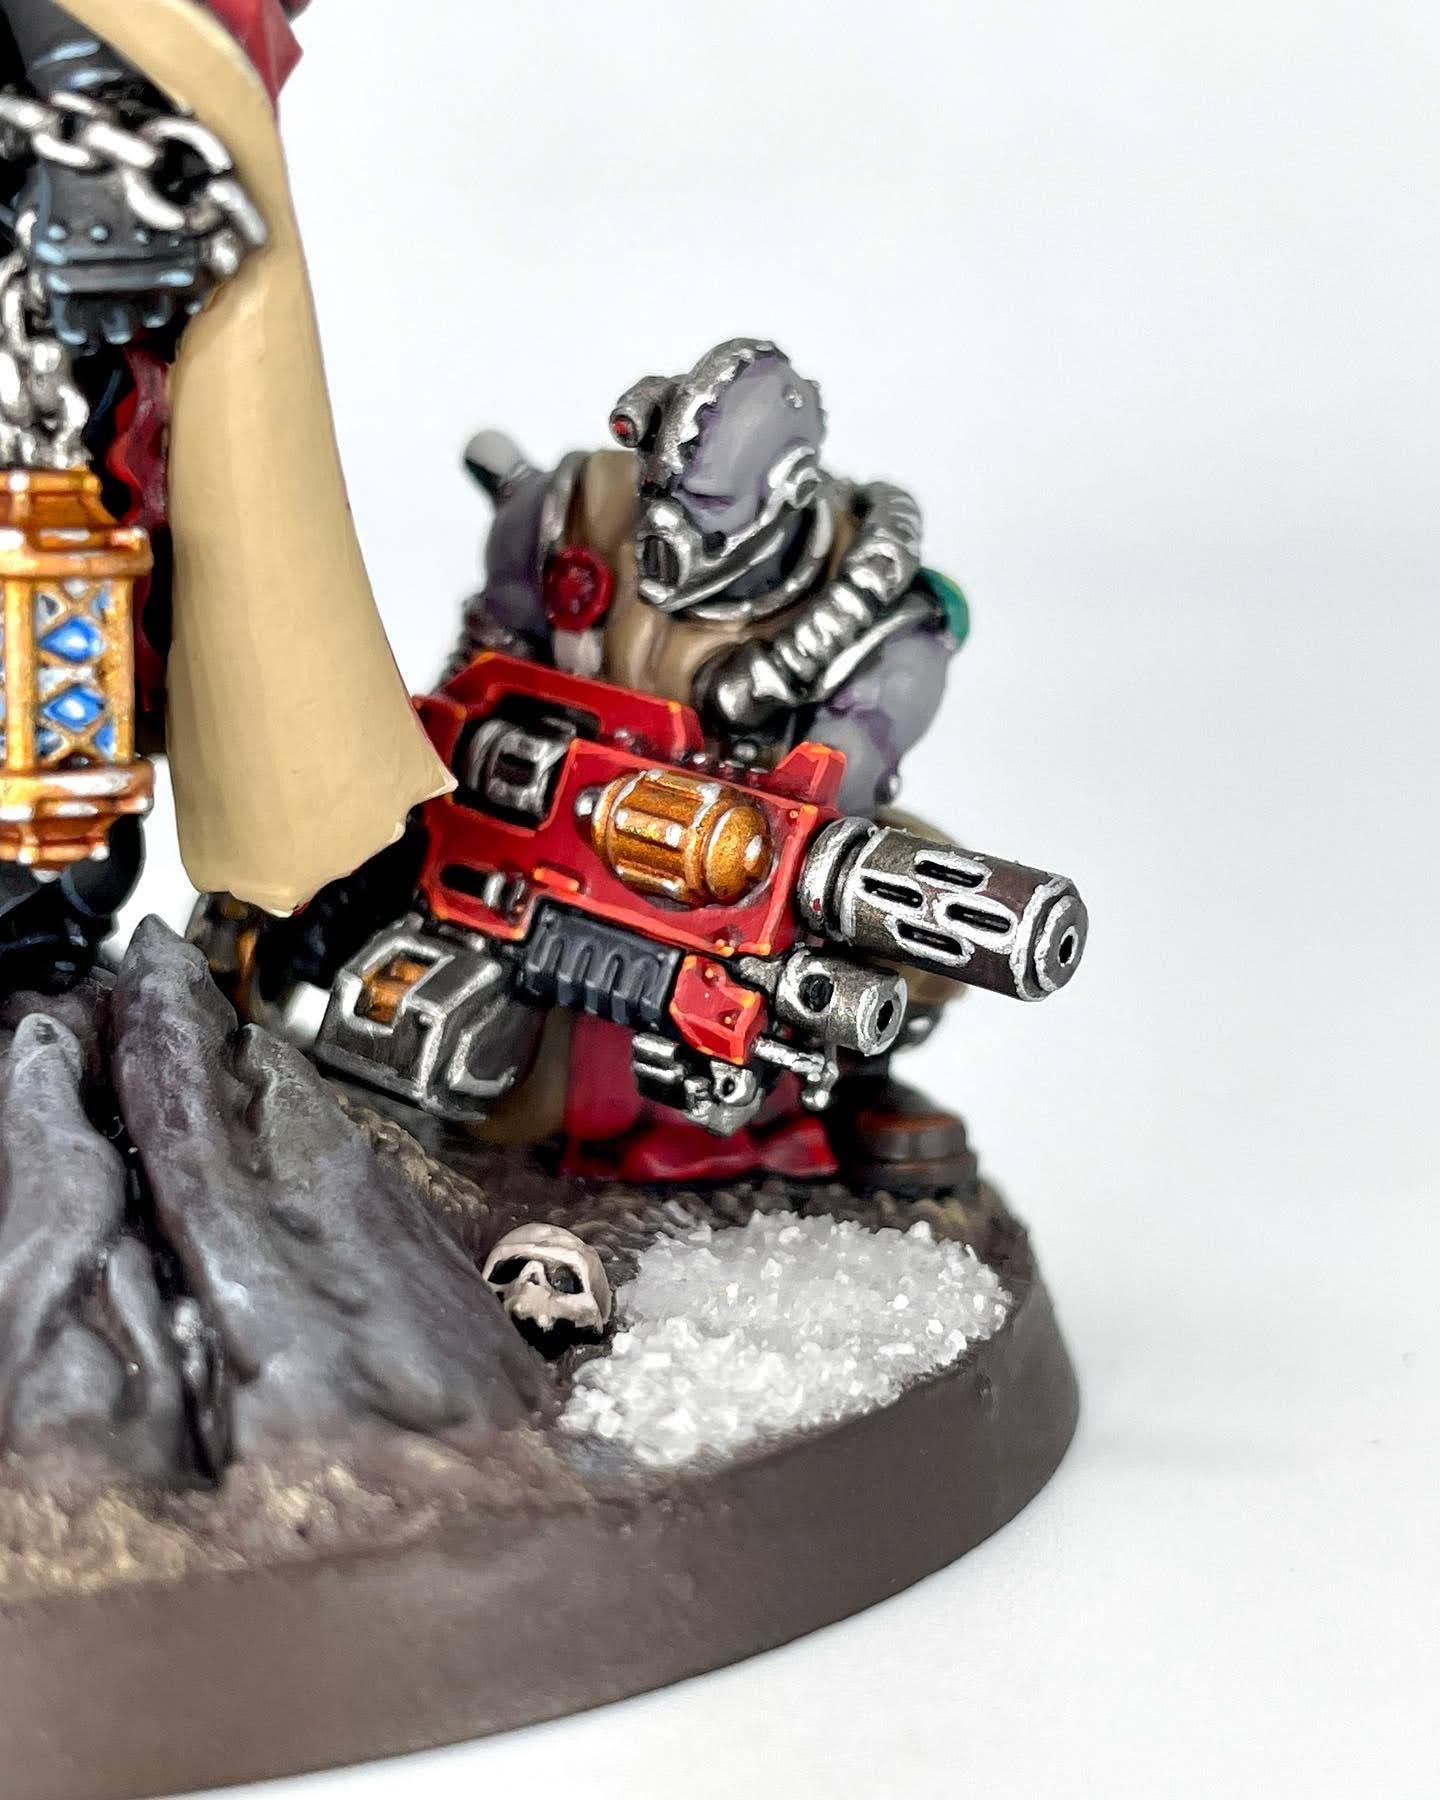
That more or less sums up how the big man himself is painted. It might seem like a lot of details, because it is a lot of details. This guy’s got so many textures, bud. For the attendant weirdos, we will be reusing a few of these recipes. Namely, we will use the same Steel, Gold, and Lenses recipes where applicable, while echoing the Black Armor at the hard parts of their boots, and the Brown Leather recipe for the leather portions of their footwear. To tie them in with Helbrecht, I also painted their tabbards with the same Red Cloth and Black Cloth recipes, and the same Parchment and Red Wax recipes for their purity seals. Fortunately, everything else here but the weird cyber-skin can be reused on regular Black Templars Initiates and Neophytes without issue.
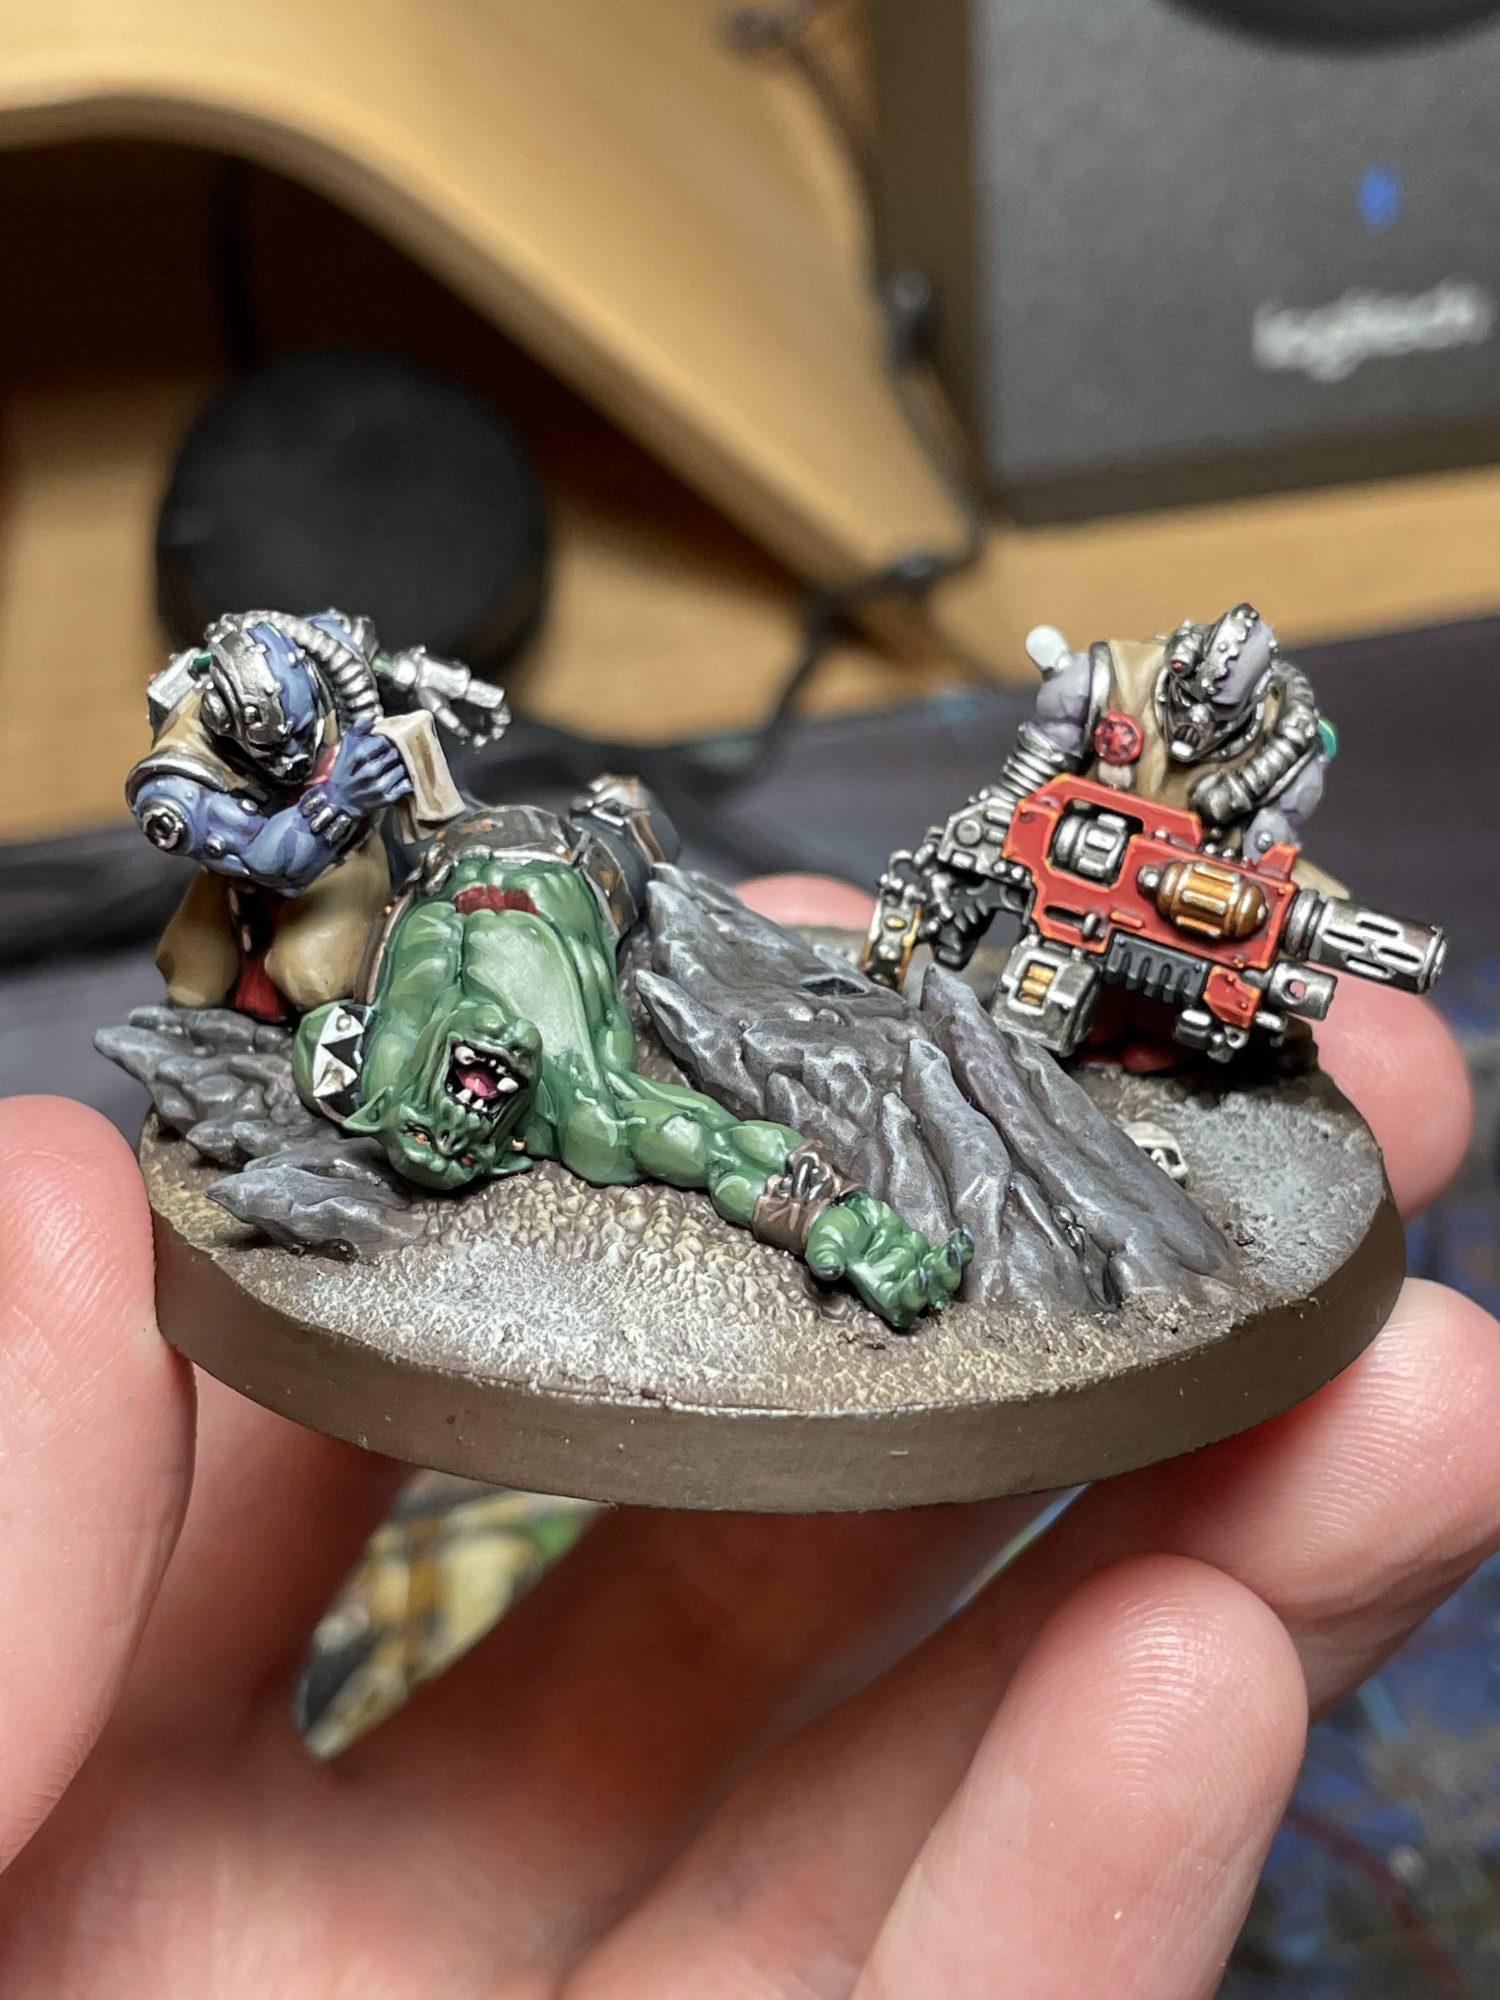
Green Tubing (Wires, cables, and pot of science juice on that one shoulder):
- Kabalite Green
- Wash Biel-Tan Green
- Highlight Warboss Green
- Highlight the most raised edges Skarsnik Green
Brown Cloth (Pants, shirts):
- Steel Legion Drab
- Recess shade Agrax Earthshade
- Add a little Tallarn Sand to the Steel Legion Drab and layer up, leaving the darker tan in the recesses
- Mix in a little more Tallarn Sand and layer up again, concentrating on raised areas where light would hit
- Highlight the sharpest edges with pure Karak Stone
Red Weapon Casings (Combi-melta):
- Mephiston Red
- Recess shade Nuln Oil, also shading around the rivets
- Edge highlight Wild Rider red
- Highlight sharpest corners and rivets Fire Dragon Bright
Black Weapon Casings (Combi-melta):
- P3 Thamar Black
- Edge highlight Eshin Grey
- Highlight sharpest corners and rivets Dawnstone
Melta Barrel (Combi-melta):
- Leadbelcher
- Wash Nuln Oil
- Wash front 2/3 Seraphim Sepia
- Wash front 1/3 Druchii Violet
- Edge highlight with Stormhost Silver
Lighter Cyber-Skin (skin on melta servitor)
- 1:1 mix of Rakarth Flesh and The Fang
- Recess shade with Druchii Violet
- Add a little Rakarth Flesh to the The Fang and layer up, leaving the darker color in the recesses
- Mix in a little more Rakarth Flesh and layer up again, concentrating on raised areas where light would hit
- Highlight the sharpest edges with pure Rakarth Flesh
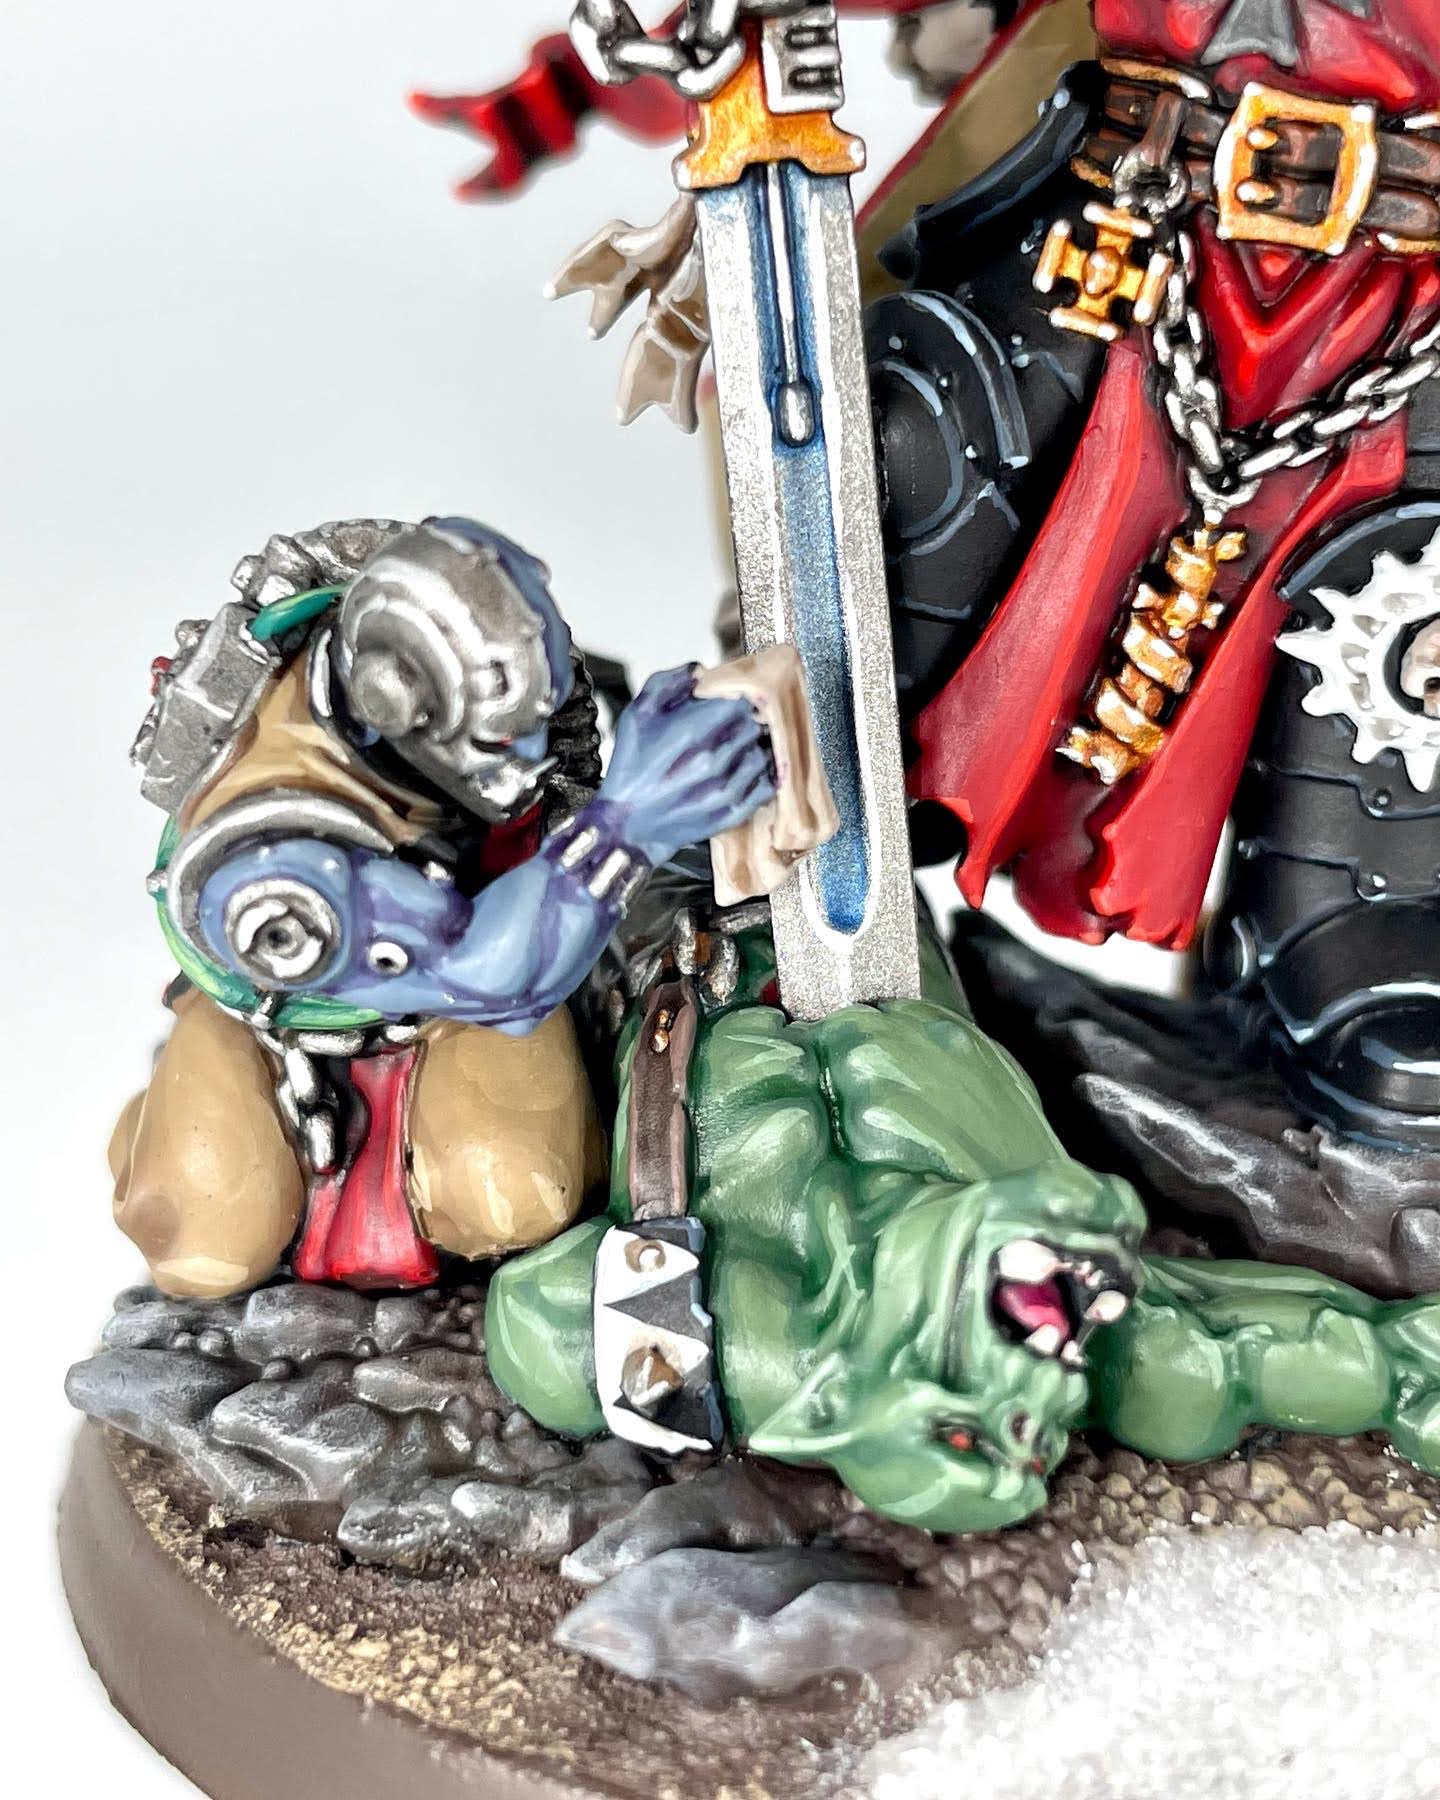
Darker Cyber-Skin (skin on sword hankie servitor)
- 1:1 mix of Cadian Fleshtone and The Fang
- Recess shade with Druchii Violet
- Add a little Cadian Fleshtone to the The Fang and layer up, leaving the darker color in the recesses
- Mix in a little more Cadian Fleshtone and layer up again, concentrating on raised areas where light would hit
- Highlight the sharpest edges with pure Cadian Fleshtone
Lastly, that brings us to the basing. We’ve got a dead Ork, which I painted in the colors of my regular opponent’s Goffs, plus some big cool rocks and dirt. The Ork will be using the Brown Leather recipe for his boots and leather straps, Black Weapon Casing recipe for his armor, Black Cloth for his pants, Red Wax for his tongue, and Bone for his teeth.
Ork Skin:
- Waaagh Flesh
- Recess shade with Biel-Tan Green
- Add a little Warboss Green to the Waaagh Flesh and layer up, leaving the darker color in the recesses
- Mix in a little more Warboss Green and layer up again, concentrating on raised areas where light would hit
- Mix in a little bit of Skarsnik Green and layer up yet again
- Highlight the sharpest edges with pure Skarsnik Green
- Glaze eyelids and nose with Carroburg Crimson
Rusty Steel (Buckles, studs):
- Leadbelcher
- Wash 1:1 Agrax Earthshade and Nuln Oil mix
- Recess shade with extremely thinned down Skrag Brown
- Highlight Stormhost Silver
Rocks (Aforementioned Cool Rocks):
- Dryad Bark
- Heavy drybrush of Eshin Grey
- Drybrush Dawnstone
- Wash 1:1 Agrax Earthshade and Nuln Oil mix
- Add Athonian Camoshade and Druchii Violet in recesses and random patches, letting the washes flow together
- Drybrush of Eshin Grey
- Drybrush Dawnstone focusing on higher areas
- Drybrush Celestra Grey focusing on the highest areas
Dirt (Aforementioned Dirt):
- Dryad Bark/Stirland Mud, as the base is partially sculpted and partially empty
- Drybrush Steel Legion Drab
- Drybrush Tallarn Sand
- Drybrush Karak Stone
Snow:
- Drybrush areas you want to put snow with Ulthuan Grey
- Mix PVA glue, snow flock, and water into a toothpaste-texture mixture and apply it to previously drybrushed areas
- Dust with snow flock and shake/blow off excess
And with that, you should have everything you need to paint your Helbrecht like my Helbrecht. Don’t sweat it if you don’t have all the colors or missed that I didn’t saw how to paint the tiny heraldic shields on these four models in one. I left that as a treat, for you.
Jack’s Method
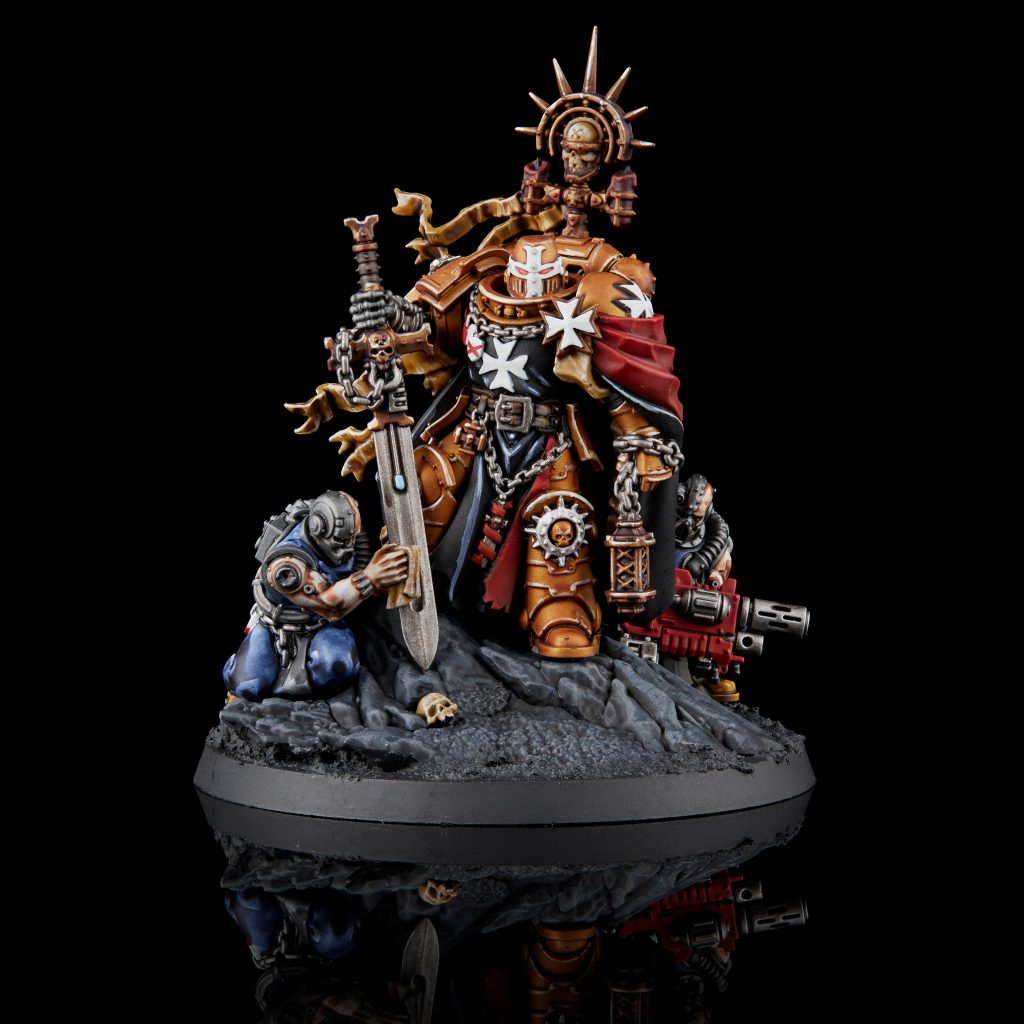
As I talked about in our prior article on building High Marshal Helbrecht, I painted this guy in subassemblies (and wish I’d used more). I’d kept him off his base, both servitors separate, and both his helmet and backpack separate. In hindsight, I would also have kept both his hands separate, as well as the combi-melta the servitor is carrying. None have any particularly complicated connections, and they’d open up quite a bit of access.
Planning my paint scheme, I could tell immediately that while I wanted to stay fairly close to the box, I wouldn’t be able to match it exactly, as the thought of trying to paint red on the inside of that cape terrified me. I flipped it to black on the inside, which also made me slightly change how all the various crosses on and around his shoulder were being painted to increase the contrast there.
Starting to paint, my first step was the cape. Despite it being on the outside of the model, I wanted to use an airbrush to paint it, and it would be much easier to mask it rather than trying to mask everything else. You can follow my guide in How to Paint Everything: Blood Angels to see how I painted it. If you kept the combi-melta separate, this is a great time to paint it red as well. Once those airbrush steps were dry, I gave it a complete coat of gloss varnish and then masked it with Humbrol Maskol (use a brush you hate, 50/50 you end up getting liquid latex drying in the brush).
I could then move on to the remainder of my airbrush work on his armor. I feel like Helbrecht doesn’t quite have the traditional gold that I’d paint my custodes, Sanguinius, or Sanguinary guard with, instead having more of a brass color. I used Scale 75 Victorian Brass as a fitting basecoat, and decided the paint has enough sheen and there are plenty of crevices for a wash to shade so I didn’t need an airbrushed highlight.
I next peeled the masking back off the cape, and gloss varnished the entire model. I then washed all of the brass with Gloss Reikland Fleshshade, and varnished him back to matte.
At this point I could start painting by hand, generally working from the inside out. These are the recipes I used for the various different areas. Unless otherwise noted, my washes cover the entire basecoat area, and highlights are all edges.
Brass Armor
Edge highlights with Scale 75 Citrine Alchemy
Black Cape/Tabard
- Scale 75 Decay Black
- Vallejo Game Color Sombre Grey
- Vallejo Game Color Wolf Grey
Leather Belts/Sword Grip
- Vallejo Model Color German Camo Black Brown
- Citadel Gloss Nuln Oil
- Vallejo Model Color Burnt Umber
- Vallejo Model Color Flat Earth
Gold
- Scale 75 Viking Gold
- Citadel Druchii Violet
- Scale 75 Dwarven Gold
- Scale 75 Citrine Alchemy
Dark Silvers (Mechanical parts, bionics, etc)
- Vallejo Mecha Color Gunmetal
- Citadel Gloss Nuln Oil
Light Silvers (Weapons, chains)
- Citadel Iron Hands Steel
- Citadel Gloss Nuln Oil
Parchment
- Citadel Zandri Dust
- Citadel Skeleton Horde
- Citadel Flayed One Flesh
Candles
- Citadel Gal Vorbak Red
- Citadel Agrax Earthshade
- Citadel Word Bearers Red
- Paint the wicks with Scale 75 Decay Black
Bone
- Citadel Zandri Dust
- Citadel Skeleton Horde
- Drybrush Scale 75 Birch
White
- Citadel Ulthuan Grey
- Citadel Apothecary White (just use this to shade around rivets, be very sparing)
- Vallejo Model Air White (but you can use whatever pure white you like to use)
This pretty much wraps up Helbrecht himself. A number of these have a wash with Gloss Nuln Oil – I did all their basecoats then washed them at the same time. Now we can move on to the servitors. Both of them got a medium grey prime with the unspellable grey Badger primer, but anything between about the color of the plastic and a touch darker than one of the Citadel contrast primers will do. I then gave them a quick hit from above with white to give them some extra shading. I wanted to wrap these guys out fairly quickly, so most of their painting was done with contrast paints – if I ever want I can go back in and repaint them with my more typical techniques, but as sidekicks this leaves them looking pretty good.
Jumpsuit
Citadel Leviadon Blue
Flesh
Citadel Darkoath Flesh
Tabard
Citadel Black Templar
Boots
Citadel Snakebite Leather
Dark Silvers (Mechanical parts, bionics, etc)
- Vallejo Mecha Color Gunmetal
- Citadel Gloss Nuln Oil
Light Silvers (Weapons, chains)
- Citadel Iron Hands Steel
- Citadel Gloss Nuln Oil
Red Gun Casing (if you didn’t airbrush it)
- Citadel Mephiston Red
- Citadel Gloss Nuln Oil
- Scale 75 Aldebaran Red
Paint the base however you want, glue the various pieces together, and you’ve finished painting a Black Templar beatstick.
That wraps up our look at painting the new Helbrecht but as always, if you have any questions or feedback, drop us a note in the comments below or email us at contact@goonhammer.com.
