How to Paint Everything: Mortarion

In our How to Paint Everything series we look at how to paint well, everything. As the delayed but hotly anticipated 9th edition release of Codex: Death Guard rapidly nears, we thought we’d sit down and talk about how to paint the Daemon Primarch of the Death Guard, Mortarion.

Like most of the traitor primarchs, Mortarion was whisked away to and raised on a word in less than ideal circumstances. As a child, Mortarion was transported to the world of Barbarus, a poison-choked world wreathed in deadly fog. It was a harsh planet, ruled by brutal warlords and warp-powered psykers called necromancers. Many of the planet’s population lived in the planet’s deep valleys with cleaner air, eking out a simple existence as farmers.

Found by one of the planet’s overlords at a young age, Mortarion was made to live in the overlord’s fortress high in the poison fog and taught the ways of warfare and artifice. But as he grew older, Mortarion began to question his adoptive father’s methods and the treatment of the population below and he fled, returning to the valleys and becoming horrified to find the injustices being done to the planet’s people by Barbarus’ terrible overlords. Mortarion led a revolt, building an army as he traveled from settlement to settlement, giving the people hope and fighting back the forces of the overlords. He worked with smiths to create suits of armor for traveling through the planet’s fog and eventually only one Warlord remained – his adoptive father, who lived in a terrible fortress high in the poison clouds, where not even Mortarion’s superhuman physiology could allow him to survive. It was at this point that the Emperor arrived.

Credit: Zuul the Cat

At first, Mortarion spurned the Emperor’s help, saying he could defeat the Overlord alone. And so the two struck a wager – if Mortarion could do so, the Emperor would leave. But if he could not, Mortarion would swear fealty to the Emperor and leave with him. Mortarion left alone and climbed the mountain to the Overlord’s citadel, but was overcome by the noxious gasses and collapsed at the gates of the fortress. Before he could be killed by his adoptive father, the Emperor arrived and saved him, killing the Overlord. Mortarion swore fealty to the Emperor and left with him, but he never forgive the emperor for denying him his revenge or the opportunity to prove that he was worthy of the respect of his people.

During the Heresy, Mortarion’s Death Guard became known for their implacable nature and grim determination, and winning battles through sheer resilience. The Death Guard did not build on the worlds they conquered; they only destroyed their opponents and moved on. Mortarion never became close with most of his fellow primarchs, but did develop a respect and rapport with Horus. When Horus turned on the Emperor, Mortarion was swift to follow, in part by convincing Mortarion that the Emperor was a sorcerer like his adoptive father on Barbarus and the other necromancers that had enslaved the planet. Mortarion’s Death Guard were one of the legions that turned on their brothers at Istvaan V.

En route to Terra for the final siege, the Death Guard became trapped in the warp and afflicted by a horrible plague of Nurgle, by the designs of the legion’s own Calas Typhon. The Destroyer Plague ravaged the legion and Mortarion, until they could suffer no more, and the primarch finally succumbed to the disease, swearing fealty to the plague god in exchange for a release from their agony. Mortarion became a daemon primarch and his legion were forever transformed into the bloated champions of Grandfather Nurgle.

Where to Read More

Surprisingly, Mortarion is one of the primarchs who has been done the least service by the Horus Heresy series. That said, he’s gotten a bit more attention in the 40k timeline thanks to the Death Guard being the primary antagonists of the Dark Imperium boxed set. The quintessential book for Mortarion in the Heresy is James Swallow’s The Buried Dagger, which chronicles the Death Guard’s time trapped in the warp and transposes it against the primarch’s days on Barbarus. Dark Imperium and Plague War by Guy Haley also both feature Mortarion as a key antagonist, though they’re merely “adequate” as books.

Avoid Mortarion’s Heart, which is one of the dumber entries into 40k lore.


Painting Mortarion

This is one of the bigger and more complex/detailed kits that Games Workshop produces, so generally hobbyists want to take their time to get things right. While the Death Guard (and Nurgle Daemons) are generally pretty forgiving to paint, since they can be messy, sloppy monstrous things, there are a lot of details and finer points on Mortarion to consider. If you’re looking for how to paint Death Guard more generally, check out our How to Paint Everything: Death Guard article, with tons of different methods and tips.

PierreTheMime’s Method

Just as with every model kit, there’s a number of ways to attack this build. The kit is HUGE, so if you’re up for it you can preassemble various components, paint them separately, and then carefully assemble them afterward. Personally, I’m a little too impatient for this method, and tend to completely assemble kits first even if they bite me a little for it later. Most of the details you’re going to miss are going to be hidden most of the time, right? Well, I made a minor exception for Morty, mostly because his wings are gigantic themselves and would block or impede me manipulating the model while I painted the body.

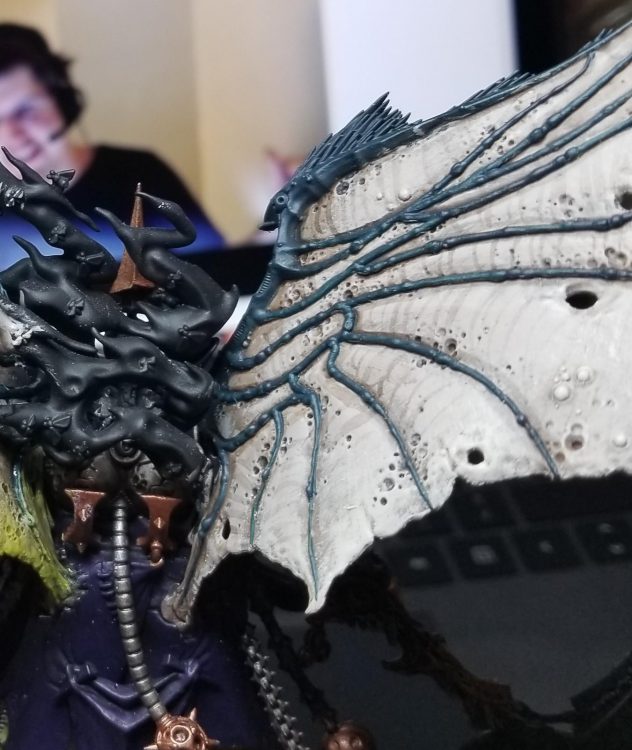
Something I always do going in is I have a vague idea of how I want my color palette to look, but I don’t set it in stone. This gives me some wiggle-room to feel things out as I go and if I hit upon something I like I hadn’t planned for I’m not going to doubt my decision to go in that direction. I started this project by painting a wing. This gave me an idea of what my final skin-tone was going to shake out to be and was relatively quick to complete.

I picked up a giant bottle of Nightgaunt Gloom a while back and I’ve been finding excuses to use it. Since I was going with a contrast-y wash method with this technical paint, I primered the wings with Wraithbone spray. I washed the non-skin wing with gloom, let it dry, and then took a few passes at lightening raised areas using increasing mixes of Corax White (a “cool” white color) and Nighthaunt Gloom.

Next, I based all the skin with Balor Brown, followed by a few passes of lightly watered-down 50/50 mix of Balor Brown and Ushabti Bone on raised areas. I hit the fly-hair wing bitz with Black Templar contrast and called that a day. I like adding an infected reddish tone to Death Guard skin around where it meets other materials–to do this, I heavily watered down Evil Sunz Scarlet and gently applied that to the surrounding areas in a couple of layers.

Once I’ve based the wing, I hit the entire piece with a generous wash of Agrax Earthshade. After I let that dry, I start going over all the flat surfaces with watered-down layers of the colors mentioned above until I have some nice darks in the recesses and some variation (Death Guard being somewhat mottled seemed appropriate).

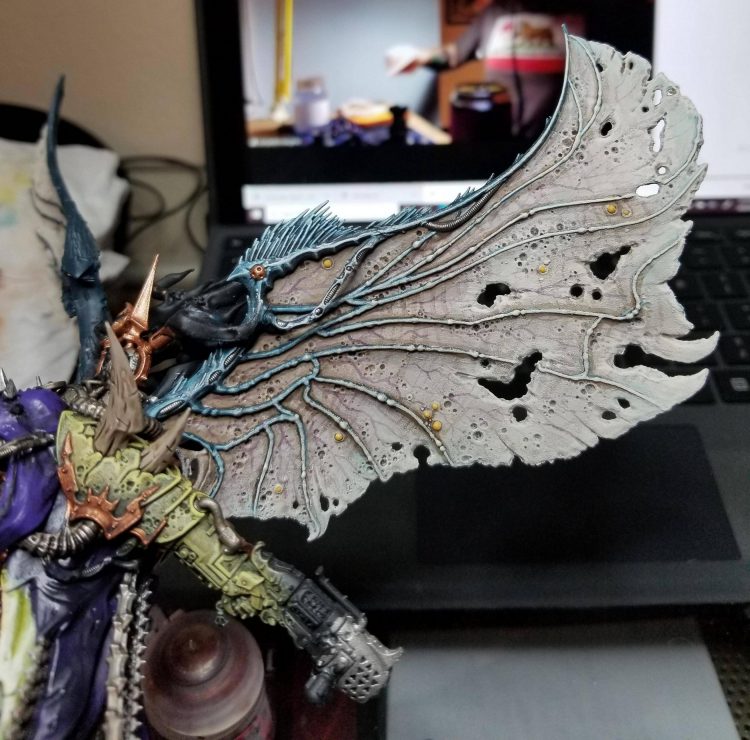
I used Warpstone Glow and a light touch of Warpstone/Wraithbone on the buboes in various places, touching back up the rings around them with some shade if they need it. Finally I start going some edging around all the various holes in the wings with increasingly white 75/25 Corax/Nighthaunt, and then a final light edge of Corax-only.

Here’s a shot of a completed wing-part:

Credit: PierreTheMime

Next, onto the main event. I kept mostly with the typical Death Guard scheme, which involves primarily Elysian Green for armor, Balor Brown/Ushabti Bone for skin, Wazdakka Red and Evil Sunz Scarlet for cloth, Leadbelcher for any generic metals (chains, etc.), and Balthasar Gold for the Bronze/dark gold. For the shaft of the scythe, I used Skrag Brown. Typically when doing wooden surfaces this is my go-to. This part is essentially just paint-by-numbers style basing–a crucial but extremely dull step.

Example of priming/base colors:

The next step, as you’ll gather from anytime I post in HTPE articles, is to slather the whole thing in Agrax Earthshade. Make sure you don’t let too much of it pool in any one location!

Once dried, use the basing colors again on top-level surfaces to smooth things out. You can play around with this as much as you’d like. Typically on a single model I’d only do a few rising layers of color on things like cloth, but here I spent the time and make sure things transitioned smoothly. I started gently raising the colors by mixing in Wraithbone (the “warm” white), except the Evil Sunz Scarlet which gets mixed with Fire Dragon Bright (a brilliantly bright orange) instead. Unless you’re going for that effect, never lighten reds with whites or, like shirts in a wash, you’ll get pinks instead. Start uses small brushes to touch-up/edge smaller surfaces, like the scarring across his gross face and the edges of cloth.

Shading/highlights:

The next step was to add transitioning to the bottom of the cloth as it becomes spectral fire. Something a bit tricky with Mortarion is there’s not really a great sense of where it really starts so I just kind of winged it. Firstly, I started lowering the red back down, transitioning from Evil Sunz Scarlet back to Wazdakka Red, then mixing in Abaddon Black in small amounts to deepen it further. Once the red became a bit of a tinged grey, I started adding in Corax White, and continually built that back up until finally using just Corax to detail the edges. Once that part was complete, I watered down some Nighthaunt Gloom and applied that to the folds to deepen the effect and give it a touch of a blue hue.

Something I did with both the spectral fire and the smoke is I added little dots to show off flying sparks or little shimmering bits. Simple keep raising your colors from what you were using and apply dots with a very fine brush in random locations. It’s a very simple, if a little painstaking, effect that adds some extra character.

Toward the end of things, I heavily water down some Fire Dragon Bright and apply that in random locations along the silver to make rust coloration. Go over semi-large surfaces first, let that dry, then go over smaller random spots within one or two more times. It’s a cheap and quick effect that has never failed me.

All detailing on main body complete, base and wings incomplete:

Credit: PierreTheMime

Not to get too “and then paint the rest of the owl,” but most of the next steps are pretty rinse/repeat for the attendants and the base. The grit and stone were painted using a grey mix of Abaddon Black and Wraithbone, rising up in brightness and then a final drybrush of Wraithbone. I used a liberal application of Nurgles Rot technical at the base, letting it flow from the supernatural filth that is sprouting from the stone. The open sores and sinew both on the scythe shaft and the rocks I used a mix of Secret Weapon Scenics Realistic Water and my reds (a decent approximation of Blood for the Blood God) to create a nice oozing blood effect.

With this method of subassembly, attaching the wing above the scythe-arm can be a bit tricky because the flesh-tubing above the joint makes it difficult to fit. For this reason, I had to lightly clip the tab used to attach the wing to the body to get it in. There’s still plenty of physical contact to make a good bond, so it shouldn’t be a major concern unless you’re planning on pulling really hard on a wing of your intricately painted model any time soon. Having used super glue, I then had to do some touchups around the bond where the paint became shiny from the glue. I use a brush applicator for all my gluing-needs; if you’re careful there should be much work here.

Finished product:

Credit: PierreTheMime

Credit: PierreTheMime


Robert “TheChirurgeon” Jones’ Method

I’d had Mortarion for a while – ever since the model was released – but didn’t get around to painting him until last summer, when I was stuck at my parents’ house on lockdown. I didn’t stray too far from the general scheme offered up by GW – I knew I wanted to keep the purple cloth – but I wanted to try something a bit more involved with the wings. The armor followed my standard procedure of “Prime Black > Castellan Green > Nuln Oil Wash > Castellan Green > Death World Forest > Death Guard Green” as the base, with heavy washes of Agrax Earthshade over that and edge highlights with Ogryn Camo. Most of this is nothing special, and can be found in my write-up for painting Death Guard in How to Paint Everything: Death Guard

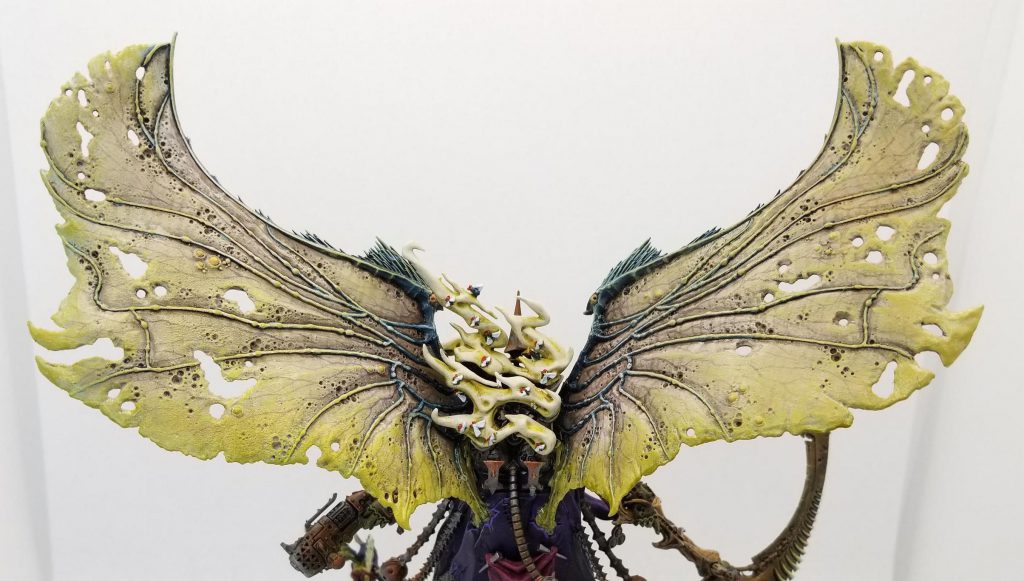
Let’s talk about the wings. I started by painting the wings liberally with Rakarth Flesh, then drybrushed that up, working outward, to Reaper Polished Bone. Then I painted the ribbing and bone parts of the wings with Incubi Darkness, the color I use on my Nurgle bugs. Next I came back and shaded the recesses with Agrax Earthshade and also used it to paint lines going across the wings between the veins/fingers/whatever that run throughout the wings. The goal here is to add texture to the wings and make them feel more organic.I’m also going for a look that goes from a darker shade further inside on the wings and got lighter toward the outer edges.

The next step was adding additional detail – I drybrushed the dark blue parts with a couple of progressively lighter mixes of Incubi Darkness and Reaper Ghost White, though white will work fine here, and I drybrushed the outer portions of the wings, covering the veins, to help blend them from a matching bone color to the blue further in. The pustules I painted Averland Sunset with a plan to coat them with Nurgle’s Rot later, like I do for all my pustules. Finally the big details here are the veins – they’re just freehanded with Duruchii Violet. Start at the base and work your way out, letting your paint run out and your brushwork get lighter as you go. Go back and add some forks/branching and you’re set. Don’t overthink it. Working with an ink helps ensure your work will be light.
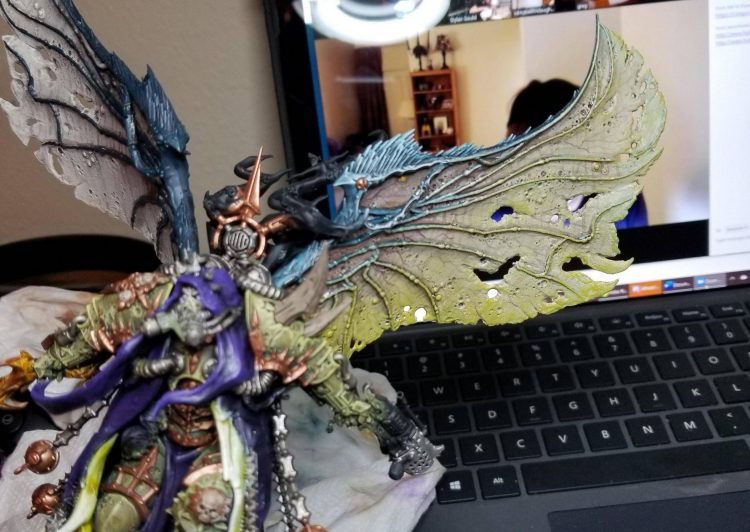
I initially played around a bit with some other shades before deciding I just wanted to go with a lighter green on the wings. So I did some light drybrushing toward the outsides and edges of the wings with Ogryn Camo, to give them a greenish tint toward the edges. I do a light drybrush of Ogryn Camo on the veins going inward to give them a bit more of a greenish tint as well. Then I came back and hit the wings with Nurgle’s Rot, hitting the pustules and the lower parts of the wings. The wings are dripping slime, so I want the slimy, glossy, snotty parts to be toward the bottom edges, where it will pool before dripping off.
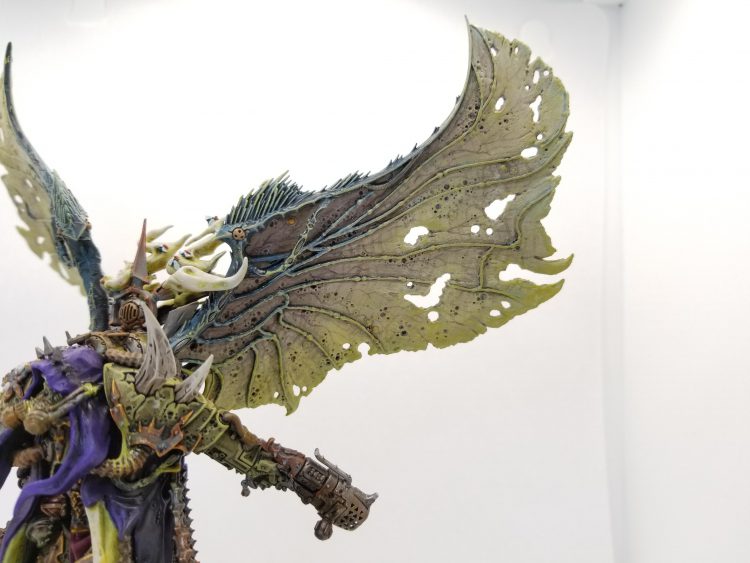
Credit: Robert “TheChirurgeon” Jones

In the final step I coat the leathery portion of the wings that wasn’t coated in Nurgle’s Rot with ‘Ardcoat. This gives them a glossy, wet sheen and is exactly what I’m going for. It’ll also make the veins pop, and give the wings more a transluscent feel.

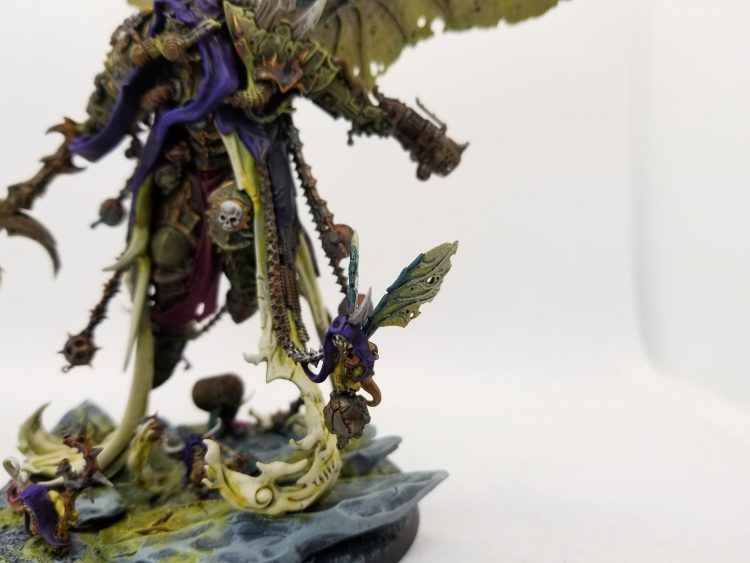
The wings are by far the most time-consuming part of painting Mortarion, but here are some quick notes on the other parts:

I did the Poisonous gasses by painting those parts with Wraithbone and then shading them with Contrast Plaguebearer Flesh and blending that with Reaper Polished Bone. The cloth is done with Naggaroth Night shaded with Nuln Oil for the cold purples and Screamer Pink shaded with Duruchii Violet for the warm purples.
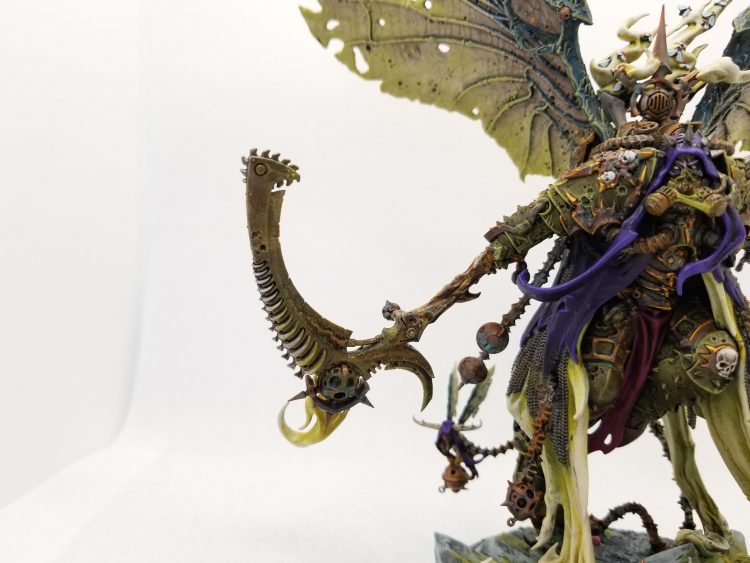
Credit: Robert “TheChirurgeon” Jones

The rusted metal I do by painting a basecoat of Leadbelcher, which I wash heavily with Nuln Oil and Agrax Earthshade, then I coat it with splotches of Typhus Corrosion and then drybrush that once it dries with Ryza Rust. The brass parts are done with Balthasar Gold shaded with Agrax Earthshade, then washed a bit with Nihilakh Oxide and then edge highlighted in parts with Retributor Armour. 

The snot parts I do by painting them with Ogryn Camo and highlights of Averland Sunset and Flash Gitz Yellow, then I coat them in Nurgle’s Rot.

The end result is something I’m very proud of, and is pretty close to the GW scheme, but has a lot of little tweaks to make it fit with my army.
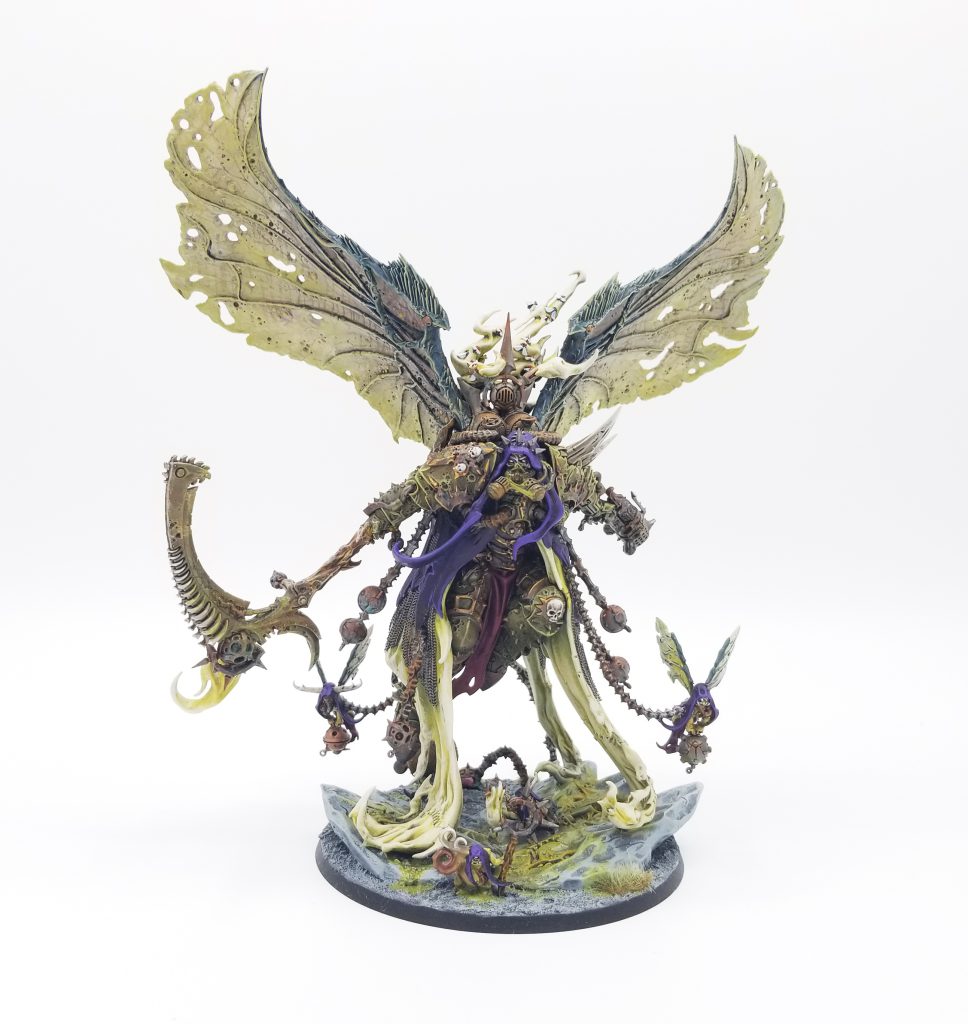
Credit: Robert “TheChirurgeon” Jones


Final Thoughts

Mortarion is a hell of a model and we’re glad he’s finally going to be the terror on the tabletop we deserve. We hope you found this guide helpful and as always, if you have any questions or feedback, drop us a note in the comments below or email us at contact@goonhammer.com.