
Everyone learning Infinity will have a certain kind of game at least once – one where Achillies walks across the table and kills everything you have, leaving you asking ‘how does anyone stop that?’ Sometimes that turns people off the game entirely – Infinity is a game with a high skill ceiling and getting a mismatched opponent can be a very rough experience as a beginner. What this article is setting out to do is to explain how to defend yourself against even a tournament level player. These techniques alone won’t win you the game, but make sure you’ll be able to stay in the game.
This article is not a basics of play guide or a Ruleshammer article. I’m not looking to explain the mechanics here; there are lots of other great resources for that – not least the free rulesbook. I’m here to explain the implications of those rules. I’ll try to avoid too much jargon but I will freely toss around terms like ARO and assume knowledge of how the mechanics function. This is also going to be fairly long and comprehensive.
Let’s get started!
Preamble: Terrain
Note with the above table: I play it as though anything which potentially can block LOS does block LOS – i.e. no shots through pipes, gaps, etc.
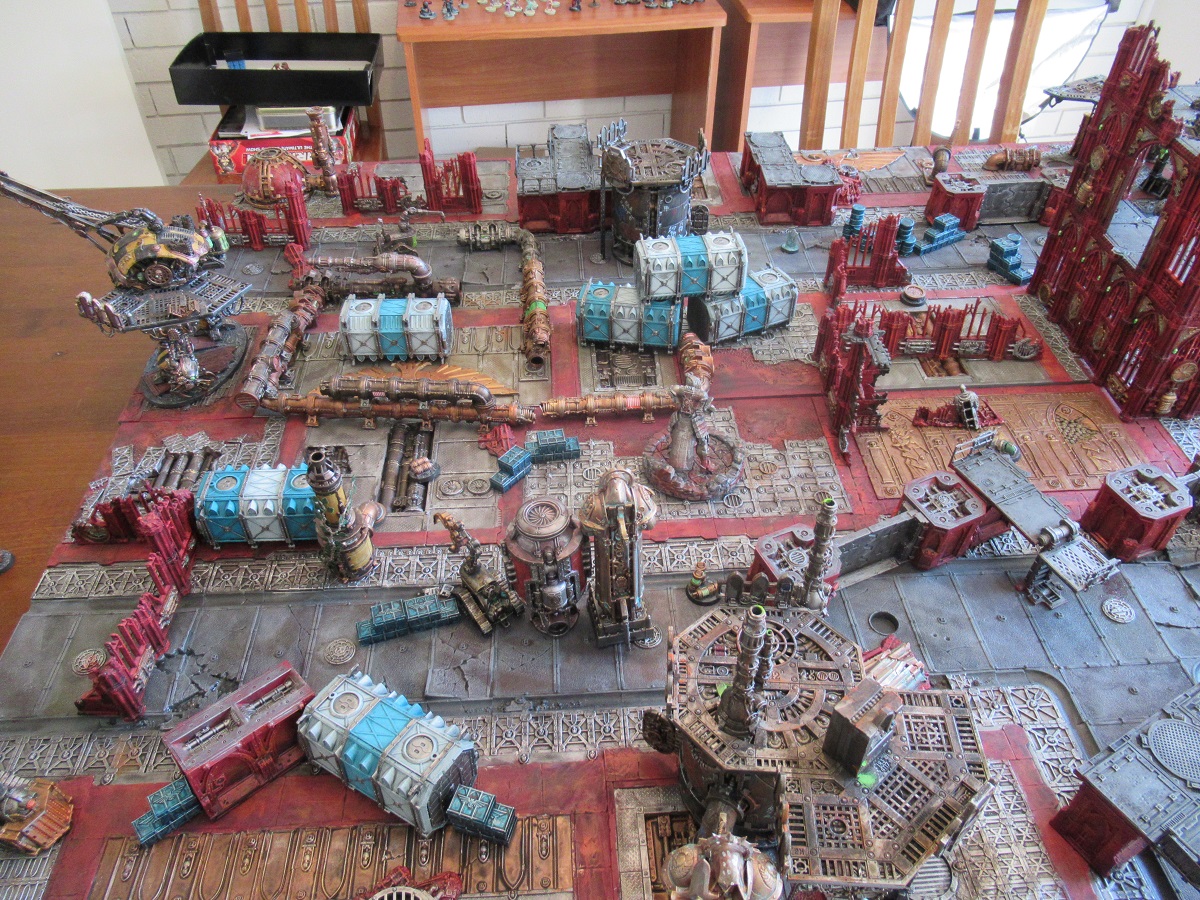
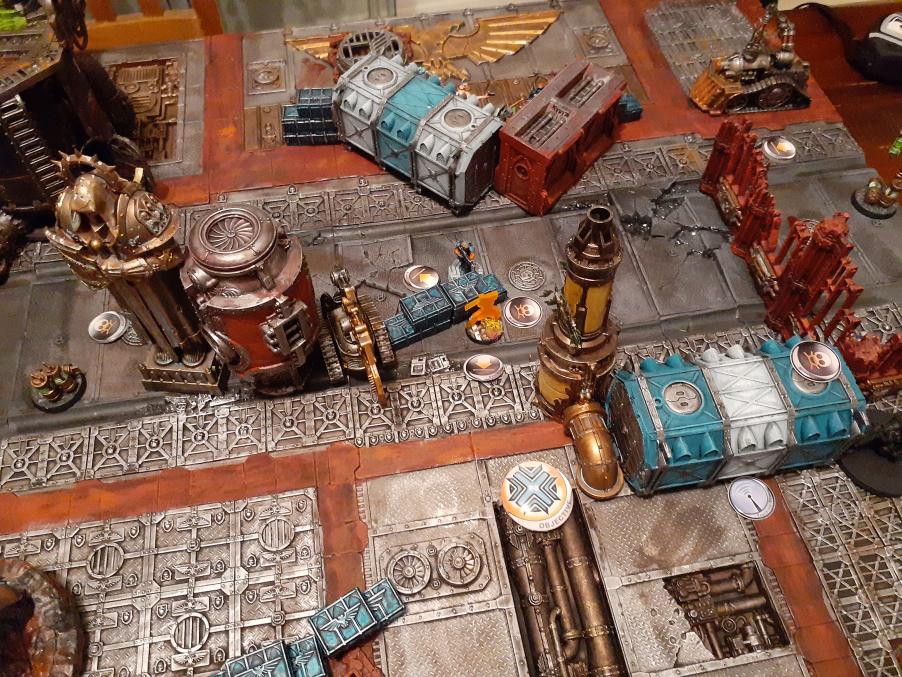
Infinity tables need a LOT of terrain. As dense as you can reasonably make it. The general rule of thumbs I use is that there should be:
2-3 ‘corridors’ across the table.
– A good, but not great sniper’s nest.
– Few clear lines of sight from one deployment zone to another
– Terrain inside the deployment zones to allow models in the DZ to have plenty of cover when being strafed by an opponent that’s come in on one side.
– Objectives on or around terrain
Essentially, if one side is able to establish sniper dominance over the table the terrain should not make it impossible to proceed without facing that sniper. A sniper should be able to restrict the other side’s ability to maneuver without outright denying it. It can be very difficult to have discussions about Infinity with people in different environments and different metas because terrain standards can totally alter how the game is played. I heavily advocate dense, clustered tables; one of Infinity’s great strengths is that it’s hard to get straight up diced off the table, but a big gun sniper on planet bowling ball negates that entirely.
Part One: Delay
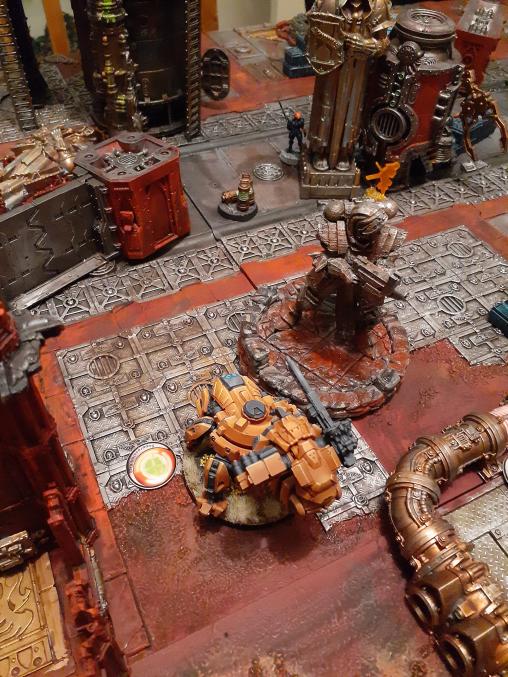
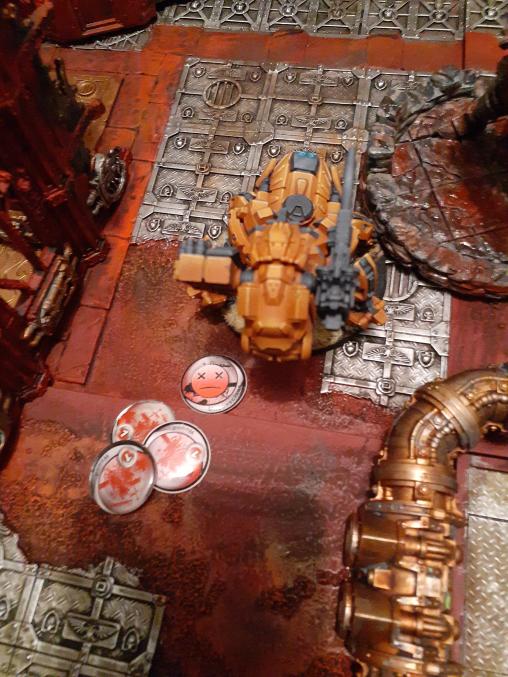
Check out this defensive setup from my opponent: He’s put down three mines, a repeater and an Impersonation marker to box my link in, and all of this is further overwatched by a Total Reaction remote and a TAG in suppressive fire. It takes me my entire turn to push out of it.
Everything here hinges off one extremely important concept that I’m going to lead with and emphasize constantly throughout this article: In Infinity, Delay is Defense.
(Arguably in all wargames, and in warfare itself delay is defense – it’s just especially visible in Infinity. The principles I’ve learned in structuring an Infinity defense have dramatically upped my skill in other wargames)
A standard Infinity table is 48×48, with 12’ deployment zones on each side. This means that a standard 4-4 infantry model who starts right up on the deployment line will take three full orders in a straight line to get to the enemy’s DZ. A more reasonable table setup will slow this down a bit – say that the terrain is angled in such a way that it takes 5 full orders just to cross the distance. That means that the opponent upon reaching your DZ has 5 activations to inflict damage and to withdraw the piece to a safe position. If you are able to delay that model by one order with your defensive setup that’s suddenly 20% of the offensive power of that push gone – and possibly one of your models who will live instead of die. If you can delay the push by two orders then they’re suddenly in a position where they can only spend three orders actually taking fights. That’s suddenly an entirely different paradigm – that means suddenly that model gives up its ability to withdraw and enter suppressive fire, a process costing two orders, meaning if it goes on this run it’s going on a suicide trip. At that point a competitive player will consider just scrapping the attack entirely and look for some other way to get ahead, such as taking board position or playing for objectives.
This can’t be emphasized enough. Delay is Defense. If you can cost your opponent even two or three orders crossing the board, especially if they’re orders they didn’t budget for when planning their turn, then you can shut down their entire attack run before it hits your lines. Your defensive models don’t all need to be invisible sniper ninjas, even a speedbump sacrificial model can perform an essential role as part of your defensive network.
Part two: Threat Types
There are a lot of models and profiles in Infinity, but offensive choices fall into one of a small number of categories.
Apex Gunfighter
Your Hac Taos, Cutters, Achillieses – someone with Mimetism, a spitfire or HMG, two wounds, and a high ballistic skill – something that can reasonably expect to take a face to face roll against any model in the game. All factions have several of these, and a lot of them will have some sort of weird trick or catch or super power to push them a step beyond.
Disposable Attack Piece
Drop Troops, bikers, libertos – models that are cheap, fast, deploy up the board or from orbit. These models are dangerous because they bypass a lot of attempts to delay them, but the blow is softened by them usually being pretty fragile.
Warband
A model with smoke grenades. These models also are usually excellent in close combat and have template weapons – grenades, shotguns, chain rifles, etc – and usually great phys stats. The smoke grenades deserve special mention for how to deal with because they’re very binary weapons that can totally negate even the most comprehensive defenses. Warbands are exceptional at killing models they can get in close to.
Skirmishers
A model with camouflage, infiltration and mines. These models can get to you quickly and come with a dangerous close-range toolkit – but they’re fragile, lightly armoured and lightly armed.
Offensive Link Team
Link teams tend to fall into two categories – defensive links, there to support a sniper, or offensive links moving up three or more elite heavy infantry. These are like Apex Gunfighters But More – they can absorb losses and keep going in a way that can be absolutely terrifying, but if your opponent loses the link they’re likely out of the game.
Part three: Layered Defense
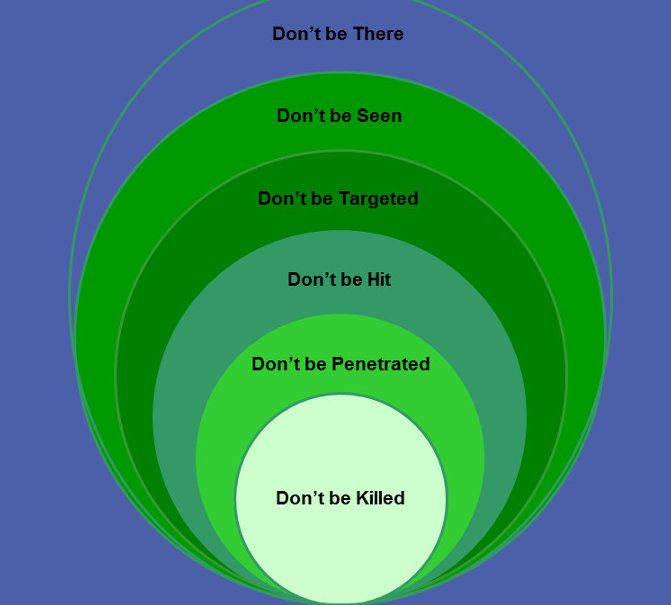
So how to stop these threats? The best way is ‘in as many different ways as possible’. Let’s go through the layers.
Don’t be there
Deployables are the first line of defense. Land mines, MadTraps, CrazyKoalas, and camouflage decoys are all ways to slow your opponent down without costing your force any resources. The best thing that can ever happen to your mine is to force your opponent to Discover it and then try to shoot it – that blows an entire order in the best case, and stands a resonable chance of costing two.
Mines counter skirmishers. Most skirmishers are pretty average Phys, lightly armoured, and rely on big visual modifers to win gunfights – exactly the kind of guy that doesn’t want to go through a minefield. You may also want to deploy your mines in such a way that they only trigger at the same time as they see one of your overwatch pieces – i.e. at the top of the stairs.
Be aware that heavy pieces can blow right through mines as if they’re not there. Many TAGs will laugh them off, and a lot of heavy infantry has good enough phys to dodge right through it. Maybe your mine has a 25% chance of taking a wound off something important in that case. That can be neat, but don’t rely on them. Counterdeploy them to mess with lighter assets.
MadTraps threaten everything. MadTraps are a unique piece of gear available to O-12 and Yu Jing and an extremely powerful threat – the danger of hitting a valuable piece and covering it in immobilizing glue. They’re amazing tools because if they’re not dodged they stand 50/50 or better odds of single-handedly halting an attack run. As area denial tools they’re exceptional, they’re like mines that are just as dangerous to heavy infantry – and even make TAGs sweat a little.
Hacking counters heavy infantry. The first thing to be aware of with hacking is that the skill of your hacker often matters less than your Repeater network. The area threatened by your hackers is more meaningful than any other trait of your hackers. If you want to rely on a hacking based defense make sure to bring plenty of remotes, deployable repeaters, or other devices that can project your bubble out as wide as possible. The gold standard here is PanO’s Peacemaker remote – a forward deploying repeater with a shotgun and a sacrificial auxbot – to engage it you’ve got to engage the hacker at the same time.
Hacking presents an amazing case of delay because your opponent can brute force through it using Reset actions, but this still halves their speed through the entire bubble and has a chance of catastrophic failure. If your opponent has packed a killer hacker – by no means a certainty – that’s not the end of the world either – if they’ve spent a couple of orders manoeuvring to fight your hacker that’s still an effective delay and means they’re not spending those orders coming at you with Achillies.
Jammers threaten everything. They’re the MadTraps of Hacking, all of the advantages and able to threaten any profile in the game. If you have access to Jammers, load up on Jammers. Even the threat of one can cause a player to abandon an attack run pre-emptively. Like mines in general, though, you can’t rely entirely on them – you’ve got two shots and you’ll only get both if you’re lucky, and they’re only damage 13 meaning it’s a coinflip if it actually lands against most targets – but the consequences of one going through is immense. Much like the MadTrap, a model hit by a jammer is practically out of the game and even though a Jammer might only pose a 25% threat of doing that that’s a threat that changes your opponent’s whole approach to that area of the board.
Don’t be seen
Deploy.
Everything.
Prone.
Do not volunteer a piece for ARO duty if it is not specialized for ARO duty. This will lose you the game faster than literally anything else. If it means your opponent has to spend one more order to walk over to your fusilier before she kills it then that fusilier has saved a life. Deploy everything prone and out of line of sight unless it is specifically there to take fights. Bunker up. Turtle up. Button up. D.E.P.
The second point here is that pieces that are going up on ARO duty shouldn’t automatically go in the biggest, most sweeping views possible. Consider the humble Total Reaction HMG remote. If it’s up on the walls looking at your opponent’s deployment zone then it can die in one order. If the opponent activates their apex gunfighter without having to leave their DZ and takes a fight that’s massively stacked in their favour then you haven’t delayed them at all.
But what if instead you deploy the TR bot further back, lower to the ground, watching a corner that’s already covered by a mine? Then suddenly you have a layered defense – a model that might be happy fighting the TR bot, like a Skirmisher, won’t necessarily want to fight it and the land mine at the same time. Or your opponent might have to spend 2-3 moving their apex gunfighter into a position where it can fight the TR bot, but be unable to go further because it can’t get through the hacking net, preventing them from following through on the attack. ARO gunfights are at their best when they’re one part of a layered defense. Don’t try to solo the world. Don’t be seen.
Caution should also be taken when deploying skirmishers or other mid-field camo tokens. They’re often very easy targets for early game attacks because they tend to be clustered near objectives and being in midfield only take half as many orders to reach. It’s often worth deploying one a little awkwardly if it means they don’t immediately get discovered and shot.
Deploying in this way can take some time. It’s okay to take your time deploying, games can be won and lost in deployment. Take half an hour if you have to.
Don’t be targeted
Camouflage, Hidden Deployment and Holomask are very powerful ways to deny information to your opponent. A camouflage token up on a hill might be a sniper or an oddly placed mine and your opponent can’t tell. In the best case they’ll waste orders discovering distant camo tokens, or brazenly call your bluff and step out into the open in full view of your sniper. If you play with a group on the regular then be sure to mix this up or people will get used to your tricks.
Hidden deployment is a unique and horrifying power that can paralyze an entire enemy gameplan with merely the threat of it. Special mention goes to HD missile launchers – Swiss Guard, Hac Tao, or the dreaded Noctifier – all pose an existential threat to offensive link teams. HD gives you all the initiative and control, letting you time your shot for absolute maximum impact. If you pull the trigger as soon as the first opponent leaps out of their DZ or if you wait until they’re lined up with another ARO threat is up to your judgement in the moment. If you get lucky enough to target a shot against a piece in the second half of their movement then they’ve got zero defense against it, making it the jackpot of ARO shots.
Be aware that when you’re relying on information denial for your defense you are bluffing. This means you’ve gotta, you know, bluff. Bend down to check the sight lines for your land mines and confirm the exact course of enemy models who are taking what seem to be perfectly innocent paths across the board. Don’t be obnoxious about it and don’t slow the game down, the ideal situation is to just occasionally check the sight lines from a suspiciously empty sniper tower and let your opponent fill in the blanks. Just as importantly, make sure you know exactly the area your HD troop is actually covering before play starts so you don’t have to check.
Don’t be hit
Here at last is where we finally talk about winning gunfights in reactive – and this is where they should be in your planning. Even a basic, unmodified, unenhanced heavy machine gun is an incredible active weapon and amazing at winning gunfights and the majority of army lists will lavish a huge chunk of their points on a platform for their HMGs. A simple sniper in a rooftop, even one with mimetism and a MSV, does not cut it for defense.
The first thing you need to do when setting up your defense is to check the range bands. Ensure that your ARO pieces cannot be engaged outside of their effective range. A common problem people discover with the HMG total reaction bot is that the HMG has a range of 32’ – after which point it drops from +3 to -3. That’s an immense swing that renders the piece outright ineffective outside of 32’, and 32’ can be a difficult thing to judge when vertical distances are involved. A simple sniper rifle has a dramatic advantage at that distance. Likewise, be aware that missile launchers drop off inside of 24’ – meaning that you want to have one as far back/high up as reasonably possible. Flashpulses are good out to 24’ so make sure they’re covering firelanes into midfield, not looking at the enemy DZ. Range bands are massive contributors to gunfight success or failure and you should always plan around them.
Some factions can do what I call Big Gun Overwatch. This is an ARO gunfighting piece that is so uniquely dangerous that it can be reasonably expected to engage in long range firefights with your opponent’s apex gunfighter in reactive and come out on top. These are things like the Kamau Sniper in a 5-man link, or a Hac Tao Missile Launcher – and if you’re feeling bold, a heavy TAG can sometimes fill this role too. Some combination of mimetism, MSV, high armour and a full link team can create a gunfighter that stands a real chance against even HMG attacks. Big Gun Overwatch defense is great and strong, but they are very vulnerable to skirmishers. A skirmisher can advance on your overwatch piece under camouflague, forcing you to choose between making a discover ARO and getting shot unapposed, or completely sacrifcing the advantage of your range bands and possibly even hitting you with a template weapon. To avoid this, as always, you want a layered defense – a sacrificial flashbot covering a similar area to your Big Gun who can make the sucide discover roll, or a mine that the camo token will have to dodge through and reveal itself, etc. In the case of the worst, remember most models have pistols and it’s always worth firing your pistol at +3 than your sniper rifle at -3. Even if you don’t penetrate their armour winning an ARO gunfight is a precious order you’ve wasted.
Suppressive fire is another form of defense, and potentially a very powerful roadblock, especially on turns 2-3 when the game has moved to midfield. Use a co-ordinated order with a command token to put up to 4 models in Suppressive Fire at the cost of a single order. You can also strategically use a command token at game start to begin one model in Suppressive fire, often ideal on models with Mimetism -6 – with -3 from suppressive fire and -3 from cover you can create a -12 gunfight that some armies straight can’t get through, though as always be aware this stops dead after 24. It’s generally preferable to use your command token to strip orders from the opponent instead but this calculus changes if your opponent lacks MSV troops and/or has Counterintelligence. Suppressive fire is very vulnerable to smoke and close combat attacks, though, so if you have a MSV troop try to have them cover the melee angles of the suppressive firing troop. Layered defense in all things.
So far I’ve made it seem like there’s a binary in long range gunfights – invest in Big Gun Overwatch, or not at all. This is not entirely the case – there exists an interesting place in all of this for a Discount ARO Piece. See, Warbands are an immense, existential threat to anything within 8-12’ and if your opponent is heavy on Warbands then you need to engage them outside of that. In addition, if you have zero long range ARO presence they can start those warbands right up on the deployment zone line and immediately take advantage of their Impetuous order, potentially letting them cross the table in 2-3 orders rather than 5. This is a valid punishment play against a player who has completely foregone any sort of ranged defense – so consider investing in the absolute barest minimum. A cheap 16 point sniper on a rooftop can completely shut down an entire warband offensive, and even if it instantly dies to your opponent’s HMG it’ll have cost one order to kill and negated a great deal of board position. It can also potentially cost more than one order to kill, if the enemy has to manouvre their HMG into position to deal with it, or if it makes a couple of clutch armour saves. 16 points isn’t much to pay if it saves you from getting wrecked by Achillies in turn one.
And finally, while you should never rely on winning a gunfight in reactive, the consequences of doing so can be immense. You get to take shots at your opponent’s high value assets without spending precious orders of your own and on that odd occasion where you land a direct hit with a missile launcher then the game can swing dramatically in your favour. Have a presence, but have a plan.
Don’t be penetrated
Even after all your layered defenses have been set up they can still be knocked down. There are a lot of terrifying threats in Infinity that can mess with the logic of movement or the mathematics of gunfights. Maybe you’re up against a Seraph that backflips across a section of the board you thought was impenetrable or Van Zant appears in your backfield with a grin on his face and suddenly it’s time to start taking damage. Your opponent will have a plan to get through your defenses and when the time comes you need to triage the response.
The simplest way to do this is bring disposable models. The humble warcor is 3 points, available to most factions, and can sometimes take two orders to chew through (and don’t underestimate that 360’ visor – it can let her cover a lot of angles against drop troops). A flash-remote is the same thing but with mimetism which makes it even better as a roadblock. Best of all, though, are template weapon troopers – people with chain rifles, nanopulsars flamethrowers or shotguns. They can turn a gunfight into an act of mutual suicide with their automatically-hitting non-face-to-face weapons, and they’re generally dirt cheap so you’ll be okay with sacrificing them. Having an outer layer of chaff that you’re just okay with losing can help protect your core assets.
A more advanced trick you can use is the dodge engagement. If an enemy stacked with mimetism comes at you then you might be shooting at -9 to hit it, a gunfight you might stand zero chance of winning. But if they’ve incautiously come within 2 inches (or more depending on if you have +dodge skills) of your troop you might be able to dodge into melee range with them on your full phys. Once locked in melee, two non-melee specialists are trapped in an ineffective slapfight that can burn multiple orders to get through and still have an uncertain outcome. You may also want to dodge if you’ve been put in a position where you’re hitting on 2’s-5’s but in general gunfighting is the better way to go if you’ve got a chance at all.
If you have models with smoke grenades a valid option is the suicide smoke throw. That’s where you ARO toss a smoke grenade to one side so that it doesn’t cover the smoke model but does cover some of your other valuable pieces – ideally things with MSVs. Since the model isn’t face to face you’ve got extremely good odds of landing the smoke and potentially shutting down an entire attack run. Don’t do this against threats that are good at CC on their own, you’ll just be helping them. Throwing smoke at your own feet in a face-to-face roll is often your best chance of surviving an an attack if you don’t want to trade with your chain rifle.
If you’re engaging something firing with a shotgun or other DTW, getting stuck dodging is not necessarily the ideal play, especially if they’ve got a lot of orders to burn. It may be worth accepting the mutual suicide and taking the shot, sacrificing the wound to end an attack before it can penetrate to your critical assets.
Don’t be killed
Eventually, though, stuff will die. Things will break. You’ll have bodies on your hands. That doesn’t have to be the end.
The humble Total Reaction HMG remote presents a powerful service beyond the grave – it has two levels of unconsciousness and can be repaired. If an engineer is nearby then your opponent may feel compelled to double-tap it to take it out of the game entirely, wasting another precious order (or two!) or else have to face the prospect of you simply getting it back on its feet as your first act next turn. A cheap doctor is often worth less for her healing power and more for causing your opponent to treat unconscious models differently.
Sometimes you’ll have a multi-wound model on overwatch and being engaged by an apex gunfighter it can’t realistically beat. In this case, after it loses a gunfight you can choose to voluntarily fail your Guts roll, dodge back, and go prone. This can preserve a valuable asset for the next turn. This is important because firepower overwatch increases in value as the game goes on. A humble fusilier sniper might have no chance against that Hac Tao HMG, but in your active turn you might kill the Hac Tao and then put the fusilier up on overwatch over a board that can’t effectively engage her at range. Sometimes you might really need to slow your opponent down another few orders and leave your ARO piece standing despite being in a losing situation – especially if your ARO piece is heavily armoured and capable of shrugging off multiple lost gunfights – but other times withdraw it and save the order for your own turn.
Models with regeneration, or Shasvastii as an entire army, are masters at controlling space beyond death. Shasvastii still count as being alive for the purposes of board control forcing your opponents to double-tap them, costing valuable orders. It’s often worth investing in Palbots for your doctors, meaning they can threaten a larger area of the board without exposing themselves to easy execution.
Some Examples
That’s a lot about defense, and a lot of different ways to go about it. A wide toolkit is superior to a narrow one in Infinity, and the best defenses make use of as many of these tools as possible. The reason I like Yu Jing so much is because it’s got one of the most complete defensive arsenals in the game, and a lot of my lists start with a core something like this:
Hac Tao Missile Launcher 60/1.5
4x Shaolin Monks DA CCW 24
Libertos Minelayer 10/1
Kanren MadTraps 25
HMG Remote 24/1
Mech Engineer 15
That immediately provides me with:
an extremely powerful long range ARO that fires out of hidden deployment
four disposable close-combat smoke guys who can die on demand
two camo tokens in midfield including a guy who dodges on 16s, is dogged and therefore able to take two points of damage before dying
a HMG remote who can either be placed near the Hac Tao to trick your opponent into taking two AROs when they expected to only take one or to cover a different fire lane
an engineer to force double tapping the HMG remote if it goes down, and will sync well if I want to bring a Su Jian (which I always do)
Three midfield holoecho tokens that can conceal a direct template weapon and two Madtraps for broad area denial
It’s a rock solid defense that only adds up to about half of my army’s points. I can engage at a variety of range bands in a variety of ways, conceal an enormous amount of information, and recover from a huge amount of damage. If I go first the Hac Tao can launch a surprise shot against an enemy overwatch piece that’s especially dangerous if they’ve clustered a fireteam close around it within template range, and the TR remote makes a very legit active gunfighter – I may even want to double down in that direction by pairing it with an EVO Hacker to give it marksmanship and adding a Ru Shi to the list to give me a fast moving MSV attack piece and add a Repeater to my defensive network, both things that synergize well with the engineer I’m already taking. This is the complete defensive package, able to present a complex interlocking threat to anything that might possibly come my way.
Other factions can pull off similar layered defenses albiet relying on different balances of assets. PanOceania, for example, can use Helots to fill a hybrid role of Shaolin Monk and HMG remote and have an even scarier big gun overwatch at the cost of losing access to smoke and MadTraps.
But Thanqol, what if I want to run a Heavy Infantry Link Team?
Some defenses rely on having bodies and a variety of threats, but some factions are more restricted – especially if you’re playing a sectoral with limited midfield presence. As it turns out, I have been experimenting with just such a Starmada list in the early days of N4 and I think this is the most elegant defensive list I’ve ever written.
- Hector Plasma Rifle
- Betatrooper Killer Hacking Device
- Tian Gao Jammer/Boarding Shotgun
- Bronze Red Fury
- Pavarti
- Bluecoat Adhesive Launcher
- Bluecoat Adhesive Launcher
- Bluecoat SMG
- Total Reaction Bot
- Varangian Guard SMG
This defense is hinged off the Bluecoats – they form a Haris Fireteam that orbits the HI link and prevents anything from getting too close with burst 2 Riotstoppers, while also perfectly countering Fidays or other impersonators. The TR bot goes up on a wall near enough to Pavarti for her to heal it in passing as the link decamps. The Varangian is an extra chain rifle and presents a light infantry counterpunch. Even if that outer layer of defense is penetrated the Tian Gao can drop a sudden Jam on a troop trying to take a point-blank gunfight with the link itself.
Notice especially you’ve got the link itself and then five models to protect the link; that’s basically the way to play it if you’re doing a 10-order superheavy link team. Other factions can do this in other ways – I have run a TAK Veteran Kazak core link in the past that is defended by a swath of camo tokens, for example.
Next Week: Planning Your Attack
Those are the basics of defense in Infinity! Next week we’ll be talking about the opposite: how to plan an attack run into these different kinds of defenses. In the meantime, if you have any questions or feedback, drop us a note in the comments below or email us at contact@goonhammer.com.
