Welcome back, Dear Reader, to my ongoing chronicle of hobby and competitive progress through 2023. Last time around I wrapped up my experiences at the GW US Open Tampa event, finishing 7-1 to win the Captain’s Bracket. It felt good to smash out my first x-1 finish and I’m pretty much done for the year with competitive play now.
Almost.
I’ve got one, maybe two more RTTs in me, one of which I’m planning to play this Saturday at Asgard in Houston. There’s not a ton of prep I need to do for this one because my plan is to just run the same list and play it the same way. Asgard’s got a pretty nasty competitive player set, so it’ll be far from easy, but I like my odds more than usual this time around. I wanted to get in a practice game against new marines, so I called up Andrew “Hero of Team Imperium” Corban to come over and get in a practice game. Let’s see how it went.
Practice Game: vs. Andrew’s Ironstorm Spearhead
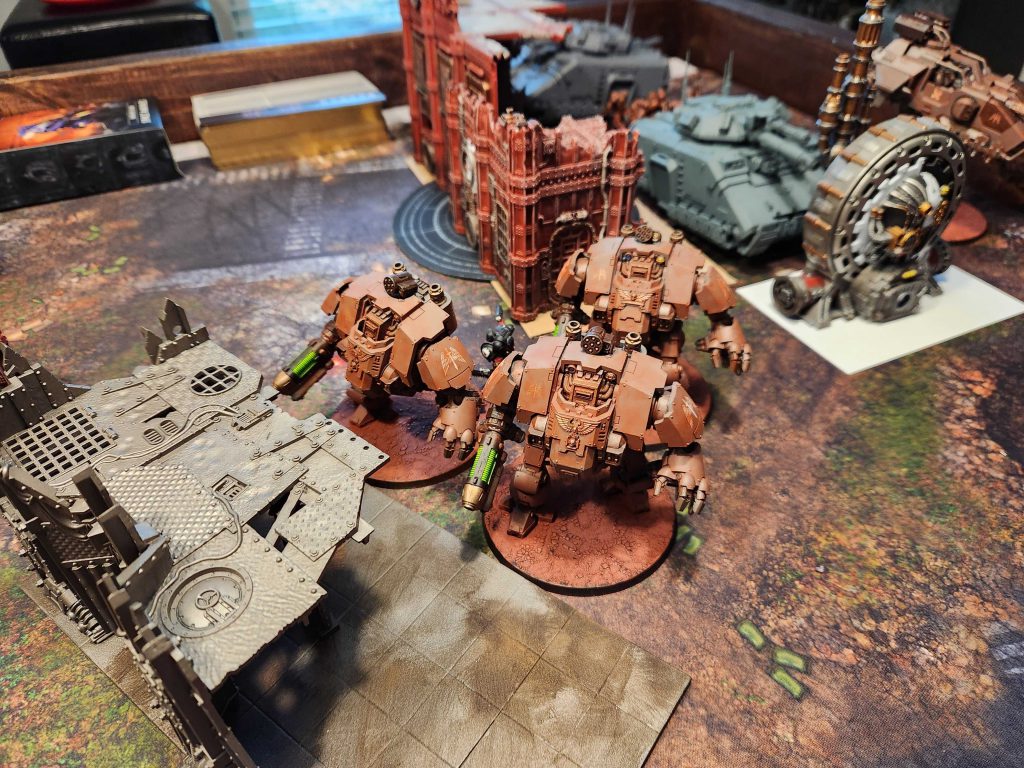
Andrew’s looking to mix things up with his list and instead of running 6 dreadnoughts he’s now only running 3 Redemptors, plus a Storm Speeder, two Repulsor Executioners (which might not suck now), some Assault Intercessors, Infiltrators with a Librarian, Inceptors, a Phobos Lieutenant, and two Techmarines. It’s a beefy list but I think I can handle it. We played with Mortarion ignoring the damage reduction, which won’t be true this weekend thanks to that decidedly mediocre GW FAQ, but I still think I can manage them already at Damage -1.
We ended up playing Servo Skulls, as Andrew mentioned that was a mission the Asgard TO, Dan “Swiftblade” Richardson, likes to run. Andrew pulled the first turn, which is normally very good on this mission, but he can’t afford to kick any objectives to me or I’ll sticky them on my turn. I had some extra help this game from my son, who I’m planning to bring to Atlanta. In the meantime I’m trying to get him more into the game but it’s been slow going – he doesn’t quite have the patience for waiting through a full turn of Warhammer.
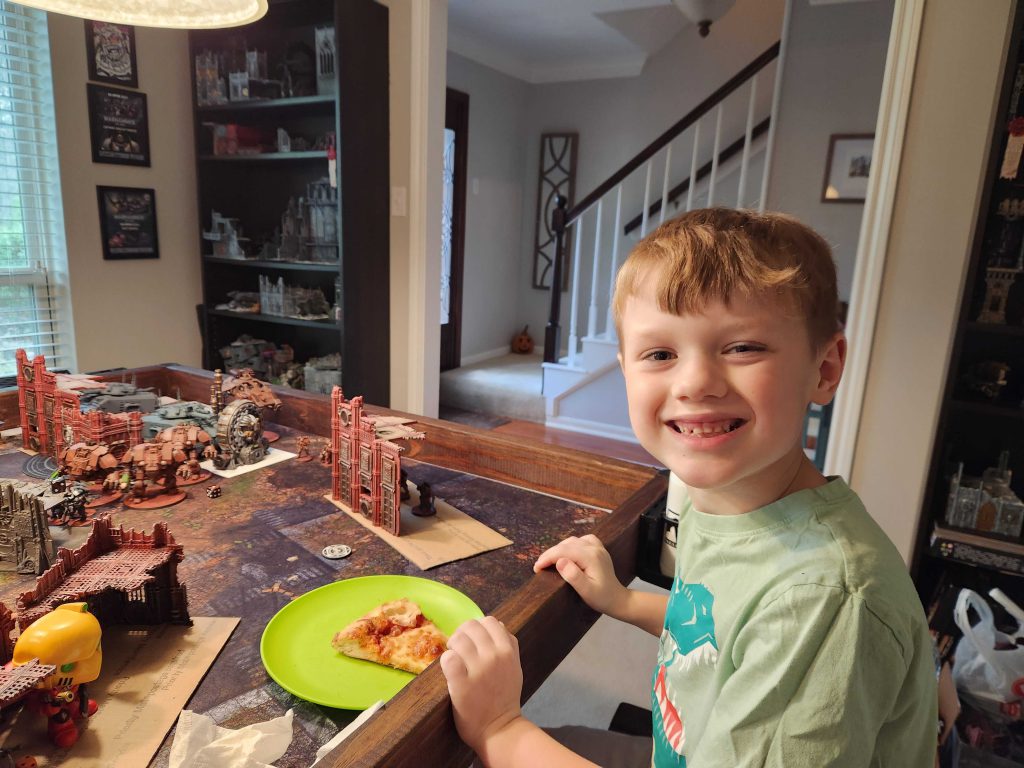
I let him control the unit of 7 plague marines with the Putrifier. He puts them in a position to die turn 1 but they’re at least out of line of sight from most of Andrew’s army and avoid getting shot.
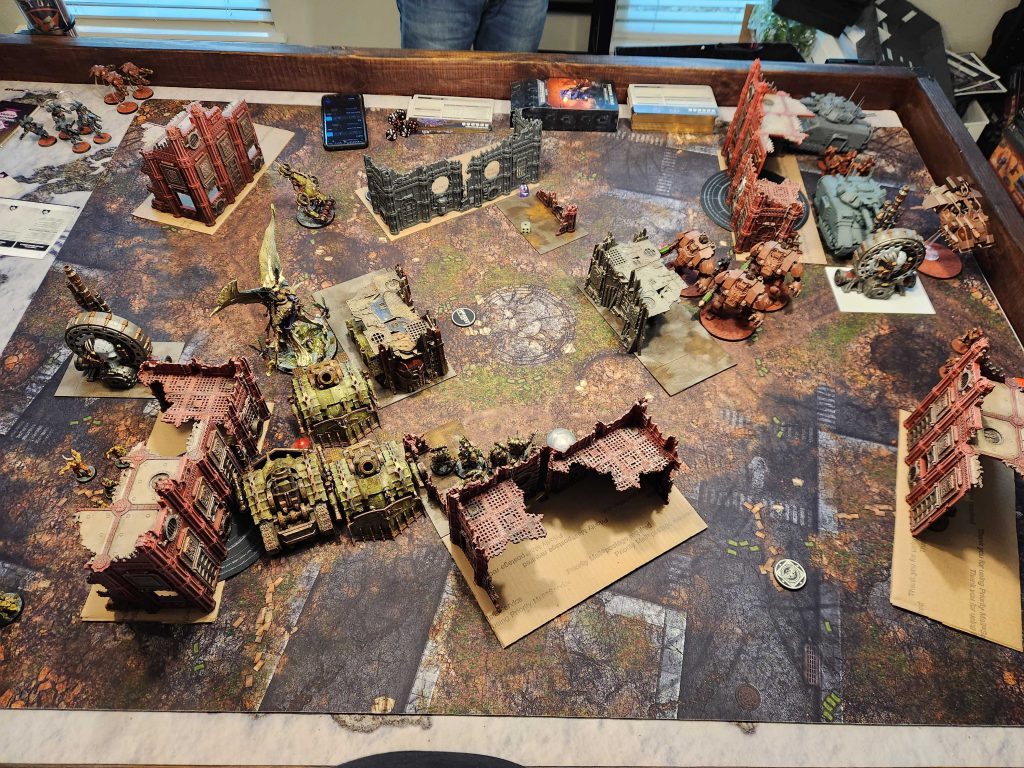
Anyways, here’s deployment:
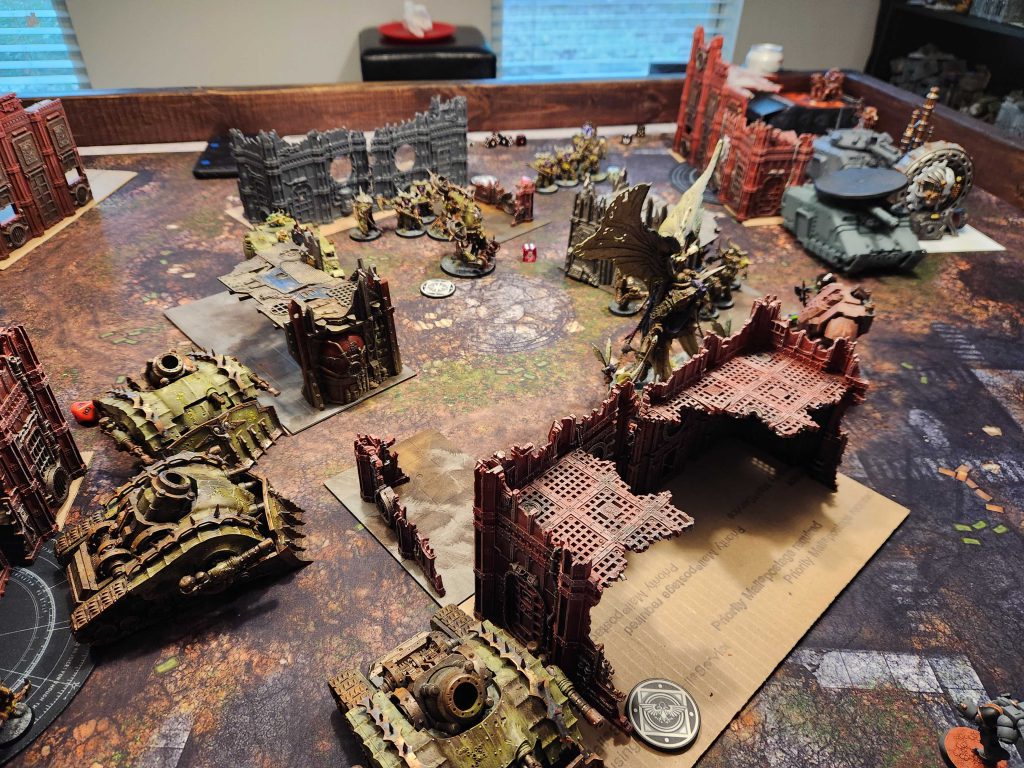
My plan is the same as always: Press to the middle and hold two of the three objectives. I’ll let Andrew kick the far one over with his Infiltrators until they hit my units, then make him work for it. Meanwhile I’ll sticky the top one early and have it shoot across the table while the middle one I can control with plague marines and mortarion. The Redemptors are a pain but I can work them down with my guys and Mortarion can melee them pretty hard. On my first turn I press forward and kill a unit of Andrew’s Assault Intercessors, then lose the unit to Redemptors on Andrew’s turn. He gets one PBC down to a single wound (it survives!), and I heal it back to 4 the following turn. Then I get to work, killing two of Andrew’s Redemptors between shooting and melee.
While this is happening I swing around the top with the Deathshroud. Typhus in particular drops in and kills the phobos Lieutenant to score me Assassination points and he’ll end up capturing enemy outpost for me despite one Repex nearly wiping out his squad in Overwatch – Andrew rolled boxcars to hit the unit with the RepEx’s big gun, but I managed to get off two saves to put an end to his bullshit. Andrew kills Mortarion by putting Oaths on him and dumping everything into him, scoring 15 damage when one repulsor connects and pushes through two wounds, and I end up taking 9 of them. When Mortarion dies he explodes and kills the final Redemptor.
I end up tabling Andrew by end of round 4, but we call it on 3. There wasn’t a ton Andrew could do and when he lost two Redemptors in one turn – and he lost them by a lot – the game was pretty much over. The Chaos Lord put in work in this game, dumping out something like 15 mortal wounds across 2 rounds.
Result: 100-39, Win
A fine practice game but I’m not sure I learned much. Oaths is much worse now, and it’s pretty rad to know it’s not an auto-death on a bigger unit. Anyways I’m happy with this list going into the weekend.
Hobby Prep for Atlanta
One reason I’m not changing up my list is that I don’t have time to learn new strategies or paint new Death Guard. I’ve got hobby work to do for Atlanta and the Big Narrative event. I really want to win Best Painted at this year’s event, and I like my odds more with three categories in the mix – I don’t think I’m liable to win best Technical (though it’s not impossible), but I do think I can win best theme. In order to do that, I’m going to need to touch up some models, build a display board, and paint a few models. Let’s start with the Display board.
Generally speaking, my biggest competition right now is from fellow Goonhammer staff. Specifically, Jack Hunter – who won Best Painted at Tacoma this year – and Craig “MasterSlowPoke” Sniffen – who won best Theme last year at the Albuquerque event. There’s also almost certainly going to be someone I don’t know who’s in the mix as well, but without knowing who that is, I already know my army from last year isn’t good enough.
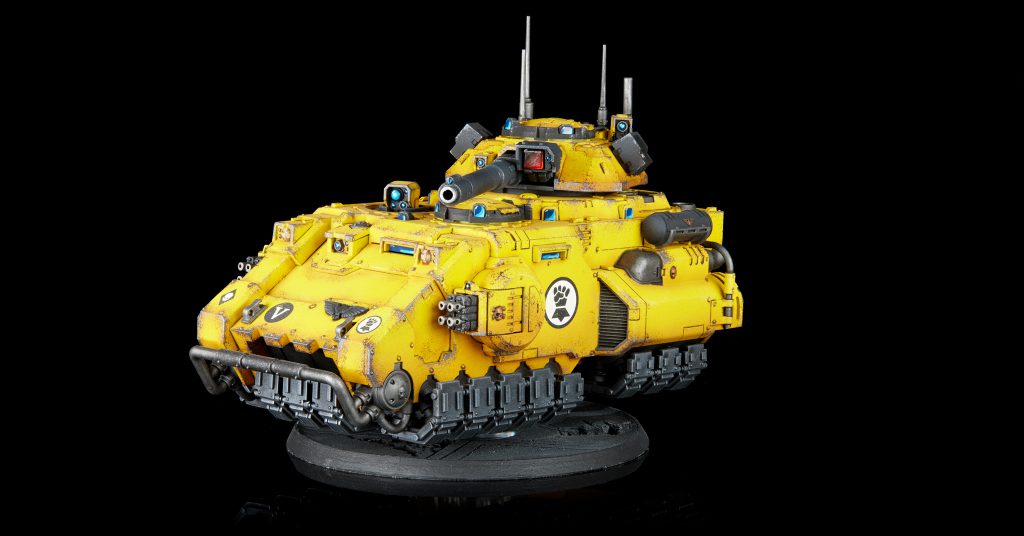
I suspect Jack can win Best Technical (fellow Goonhammer staff JD did last year), and my hope is that’s what happens for him, leaving me more able to win best theme. Jack’s models are generally technically superior to mine, but often lack character- Jack just doesn’t put in as much time on conversions and heraldry as he could. His yellows are super smooth and his weathering looks great, but I can beat him on character.
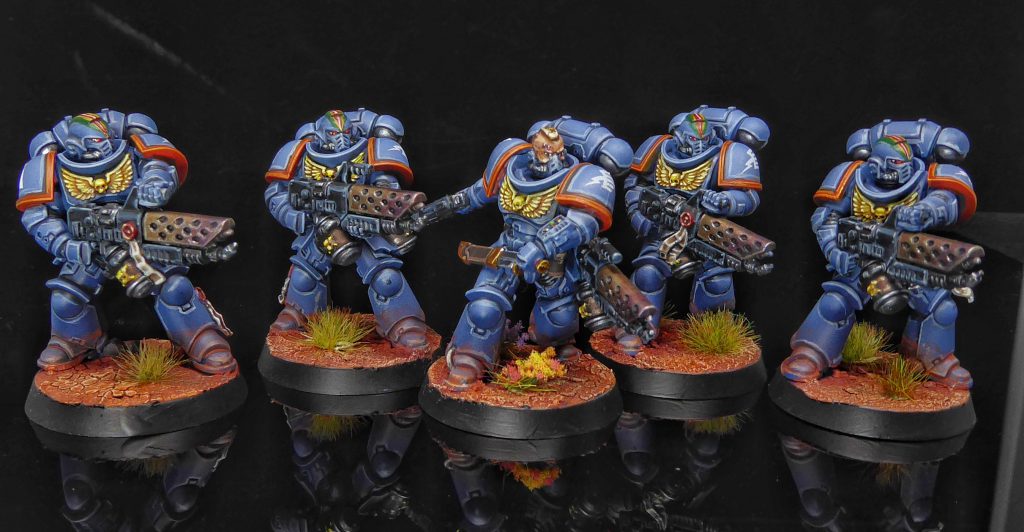
That’s where Craig’s Rainbow Warriors army does much better, with some really nice rainbow fades that really pop and make his army stand out. It’s hard to beat, but last year Campbell “SRM” McLaughlin almost did it, losing out only because his display board was pretty beat up. Campbell does a fantastic job giving each of his models a ton of character, giving them all a bunch of unique touches of livery and squad heraldry that really make them stand out.
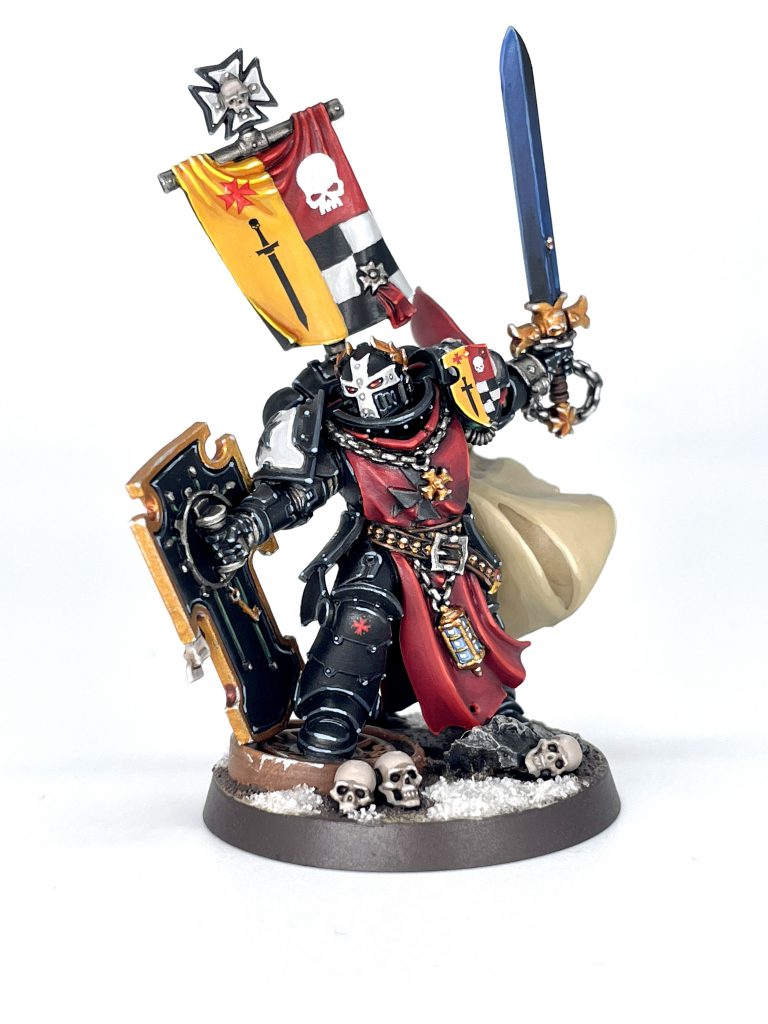
If I want to win best theme, I’ll need to do something similar. Generally my plan to win a Best Painted trophy this year involves doing three things:
- Building a new display board that matches the army. I didn’t have one at Albuquerque, and it’s important for two of the three categories.
- Adding character to my army. I have a few thoughts on how I can do this, which I’ll cover later.
- Touch up my existing models. I’m very proud of my Black Legion, but a lot of them are starting to show their age, and more than a few have clear signs of laziness – visible mould lines, only a single layer of highlights, shaky panel lining, etc. I can clean these up and remove their imperfections while adding touch-ups to other models which need it, such as adding OSL to models with plasma.
If I do those three things, I’ll be in very good shape. I only have a month to pull this off, and by the time you read this I’ll be down to two weeks. Let’s get cracking.
Building a Display Board (Again)
Longtime readers will know that I already built a display board for Kansas City, and took that board to Warzone Houston. Unfortunately, that board was too big to fit into a standard suitcase, even a checked bag. So that means I needed to make a smaller one. It also needed a bit more decoration, as while I like my board it doesn’t have enough cool stuff going on with it. It also needs to be something that can travel, so while I’m pretty much boned on best display, I can live with that if my life is made easier by having something modular.
The Board
This time around I’m working with an 18″x22″ picture frame, quite a bit smaller than the 20″x25.5″ I’d used last time, primarily because it didn’t occur to me that the sizes listed were for the interior of the frame and not the exterior.
This time around I want something with a more urban feel to it. My original plan here was to do a city block with a raised sidewalk area leading to another raised platform with steps, using the leftover part of an Age of Sigmar ruin I had already cut up to build the stairs to my massive cathedral for the Houston Vadinax finale event. The raised platform wouldn’t be glued down, making it all pretty modular.
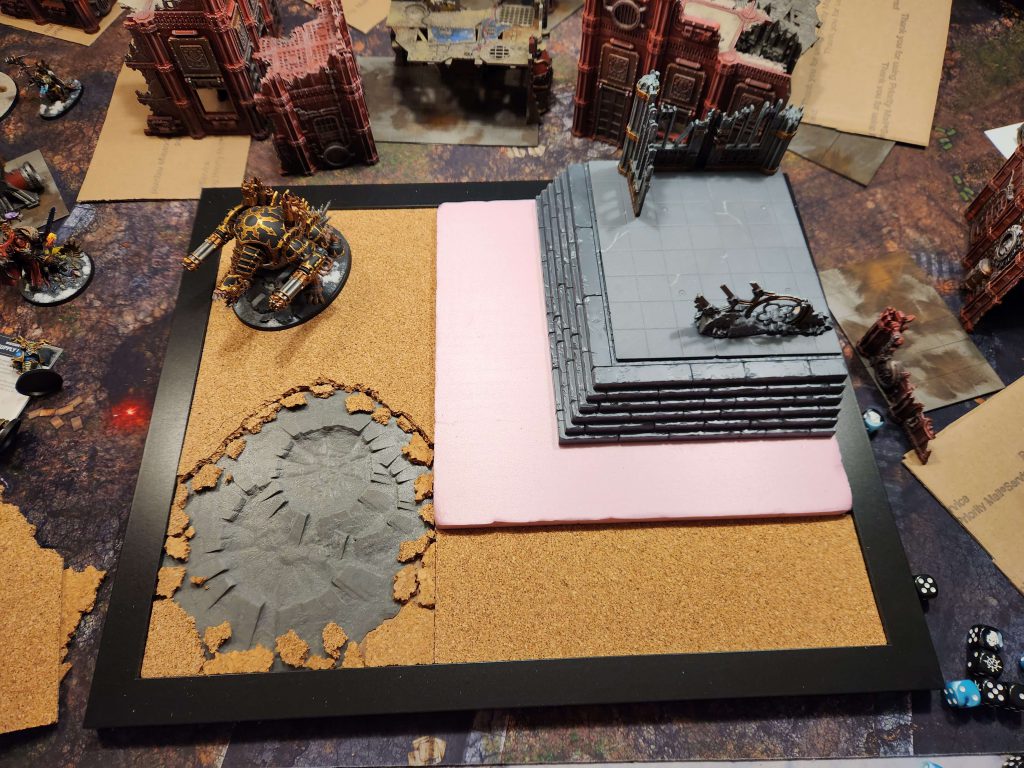
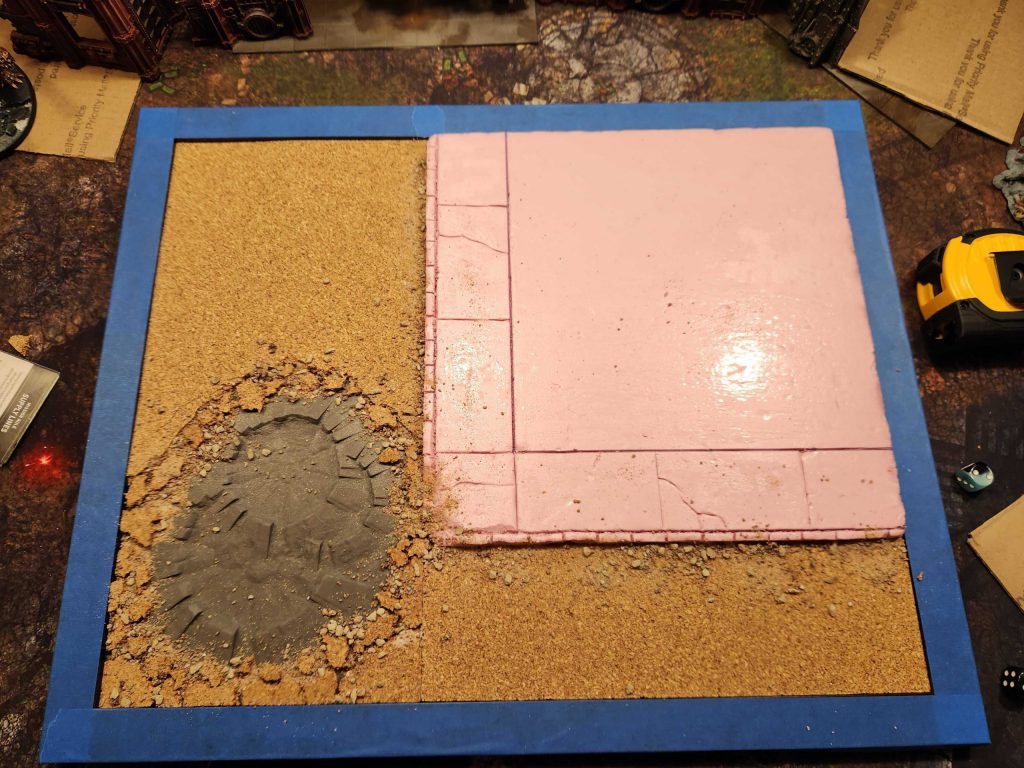
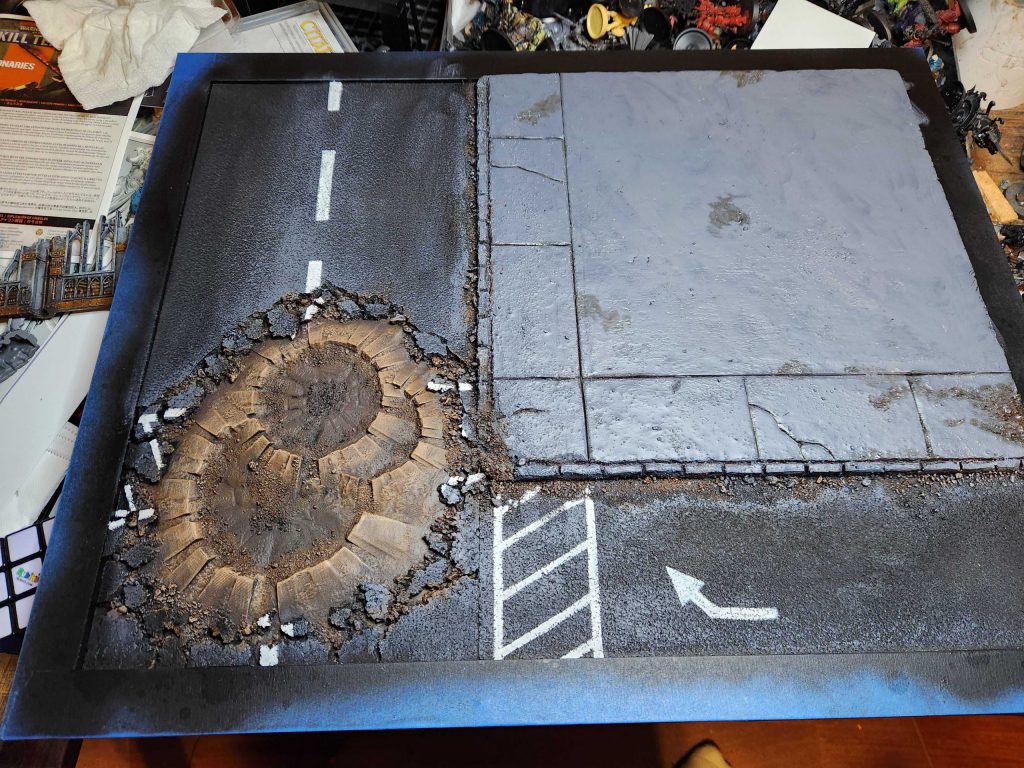
After some thought I decided I wanted corkboard for the road texture and ended up opting for something a little more raised, using corkboard for the roads, broken up around the crater, and a 12″x12″ insulation foam board for the sidewalk.
This was much more visually appealing and would better match some of the models’ bases in my army. I’d need to do some work on the foam to make it a bit more visually interesting, however.
This is where I have to give props to my son and one of his favorite (and now one of mine) YouTube channels, Studson Studio. This guy does a lot of hobby projects, mostly using old junk, and his videos are both really well done and funny but also just chock-full of great hobby advice for building terrain and doing basing. In particular, he’s where I got the idea to beat up the foam by placing it in a bag of rocks and shaking it around a bit after I’d carved some of the details into it. This gave it a nice, worn texture. After that I glued it and the corkboard down, then painted the whole thing with Elmer’s glue and textured it with sand and pebbles and coated it in Woodland Scenics’ scenic cement, aka watered-down PVA glue. This keeps all the sand in place when you start painting it.
Then I primed it Mechanicus Standard Grey. In retrospect I should have hand painted it with acryllic paint first, as parts of it weren’t well covered by the glue and ended up getting eaten a bit, but I made those work.
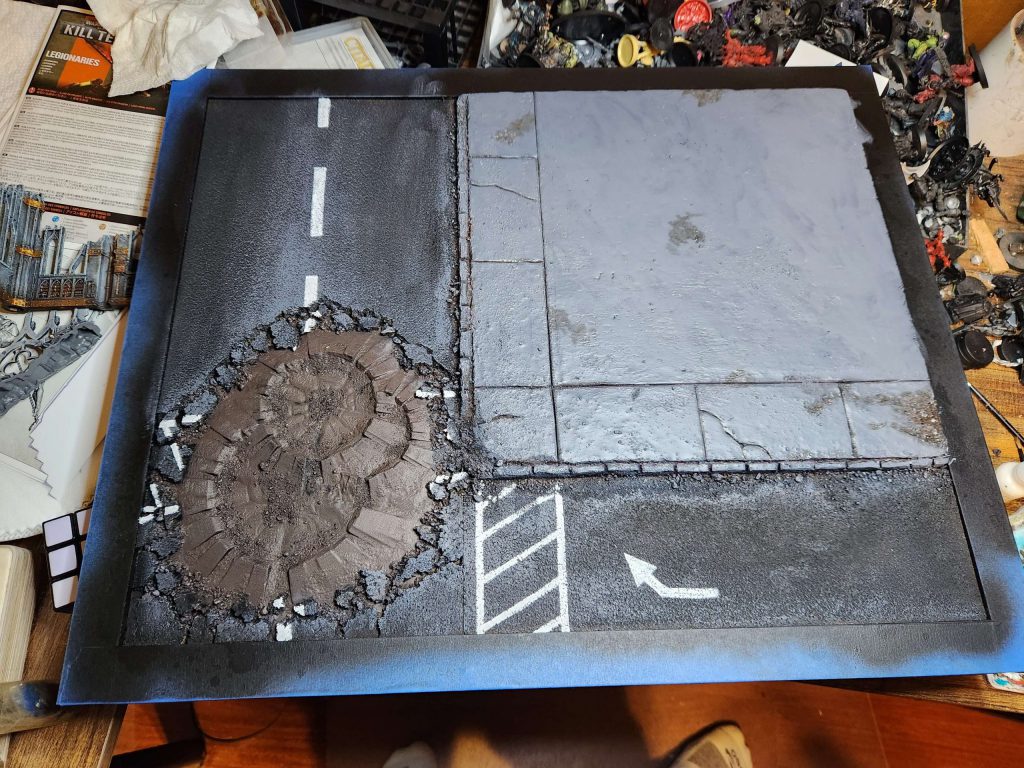
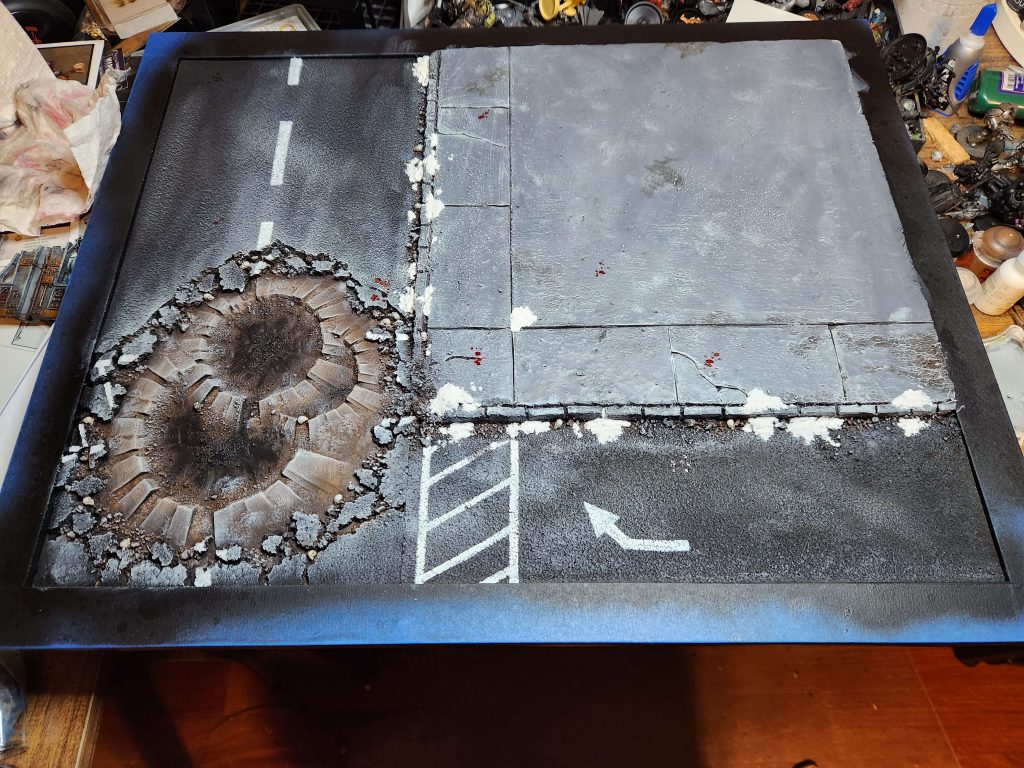
I painted the roads black, added some grey, and painted on some road markings. These go a long way toward giving the street a real feel and make the chunks of road more visible, I painted the crater with Dryad Bark for the base layer.
I added a bunch of brown around the sidewalk and generally added more dirt to the scene, then drybrushed the crater with some lighter shades – mournfang brown and tallarn desert, mostly. I came back and added black to the centers, and you end up with burnt dirt in teh middle of the craters.
One major important addition here was skulls. I noticed in Tampa one of the big display board guys with Death Guard sprinkling a bunch of skulls over his display board for flavor and while I think that was a bit psycho, I did think adding skulls to my board would both help add nice detail and color and make the board fit better aesthetically with the models. So I primed up a sprue of skulls with wraithbone and dropped about 8-9 on the board in different spots, painting them wraithbone and then washing them with Agrax Earthshade.
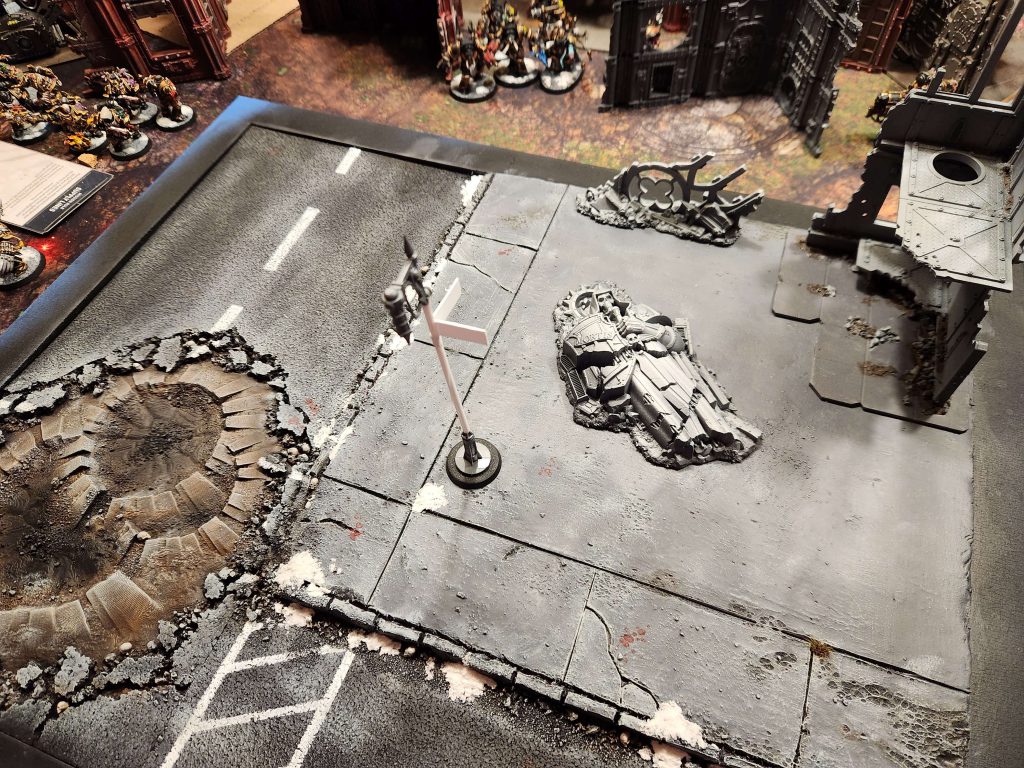
To help tie the thing together I hit it with a drybrush of Celestra Grey. My Black Legion have snow on their bases as well so I added some snow to key parts of the board to help tie the whole thing together visually.
The Ruins
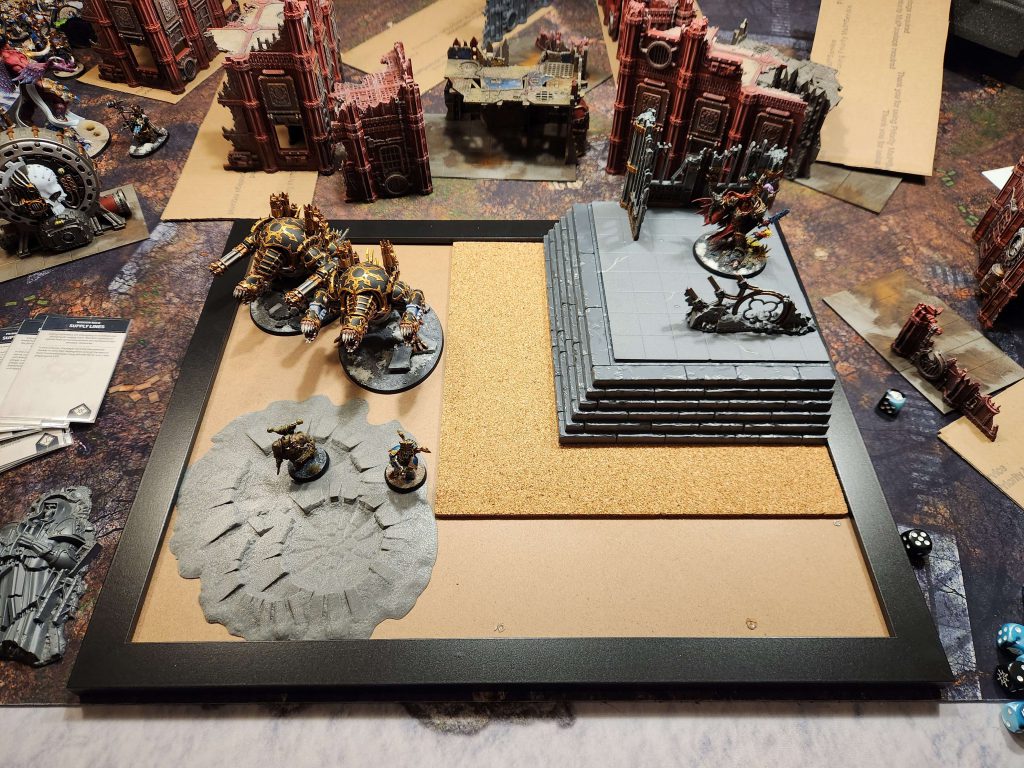
The raised platform was cool but it took up too much space and I didn’t want things to be so crowded you couldn’t see the board. So I decided to pull it in favor of a smaller ruin element. I went with a tiny corner built from parts of the Shrine of the Aquila, one of the best terrain kits GW ever made. I can pair this with a downed statue and a small piece of ruin (which matches the aquila) to add some interesting visual elements to my sidewalk block without eating up too much valuable space for the models.
That streetlight there is a bit of a custom job. I have a ton of the things from the old Cities of Death/Imperial Sector terrain kit (which is an absolute banger), but they’re all a little too small to do much with. So I extended one using a piece of polystyrene rod from a Gale Force Nine rods set. It’s mounted on a 25mm base and I glued a nickel under that inside the base to give it plenty of weight so it can stand on its own.
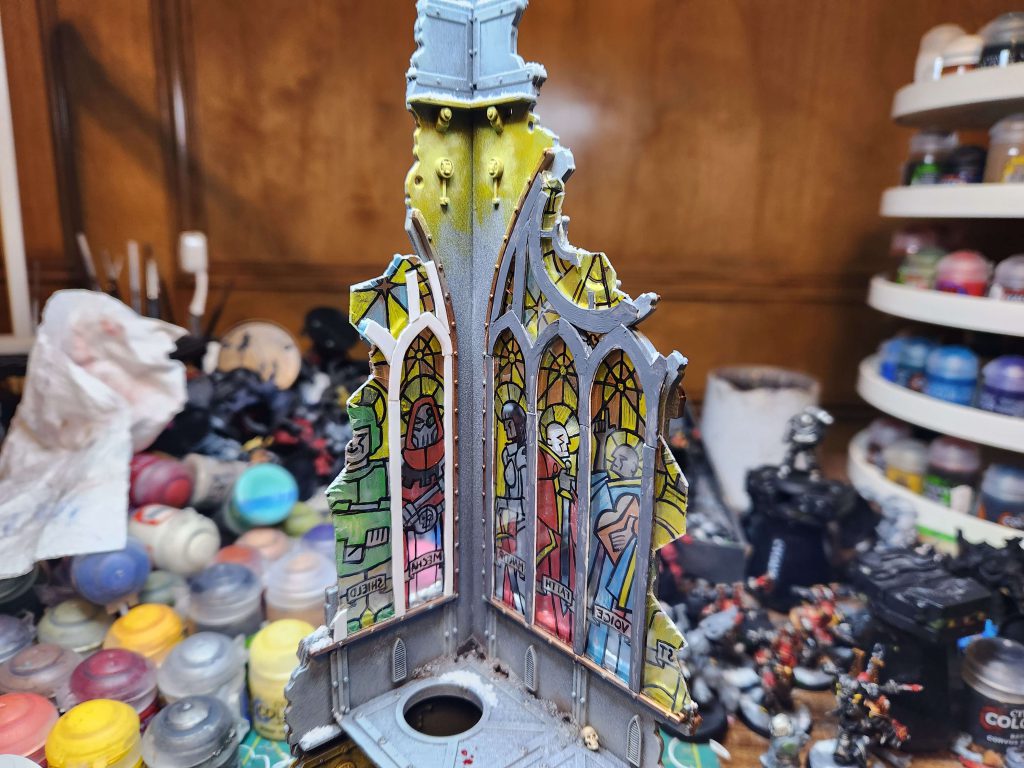
The other major part of this job was doing stained glass on the shrine windows. I’ve done this before using thick tracing paper but I wanted to do something more like glass this time around. I wanted to keep similar designs, however, and had a decent idea of how it would look based on the prior attempt, shown below.
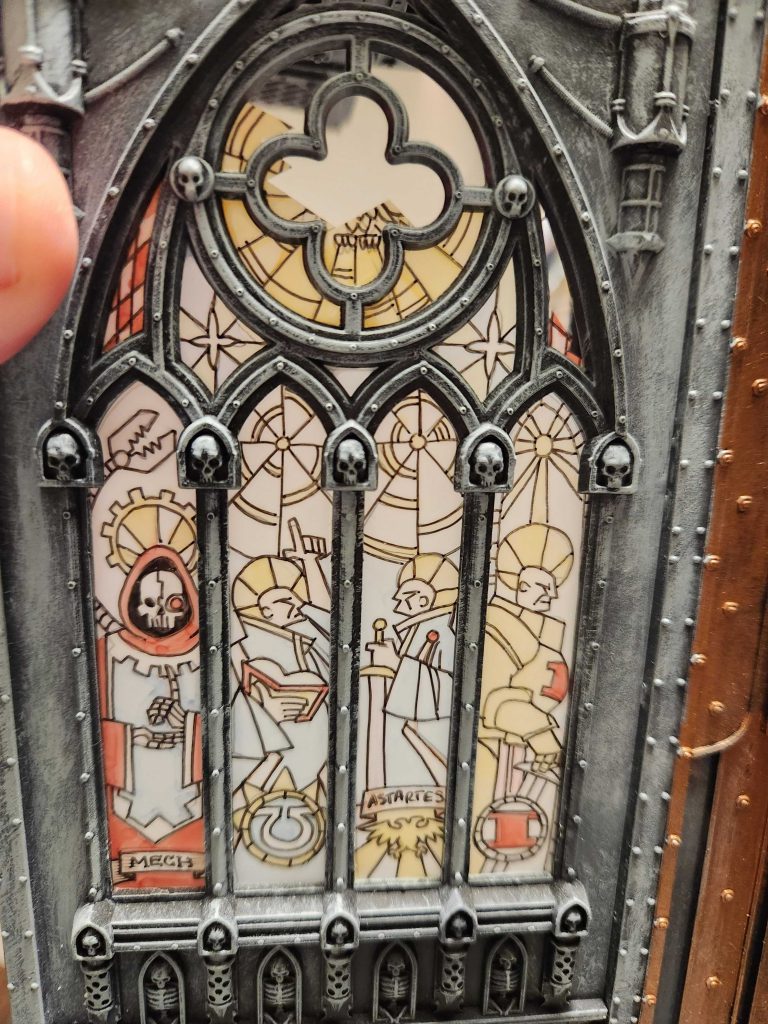
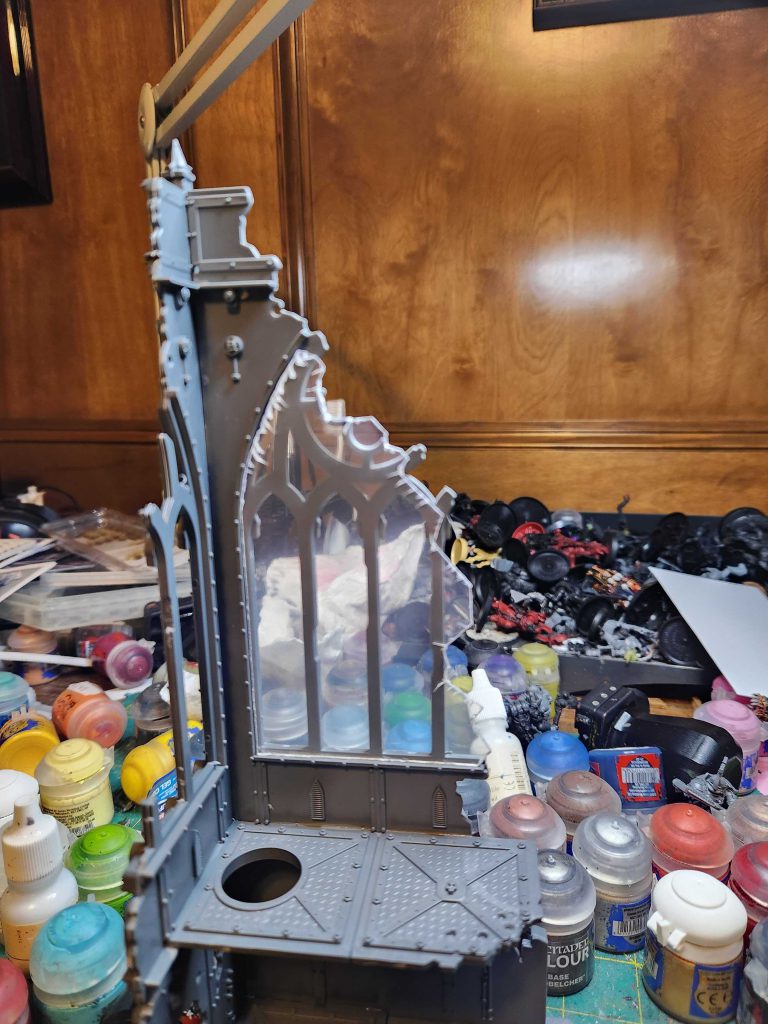
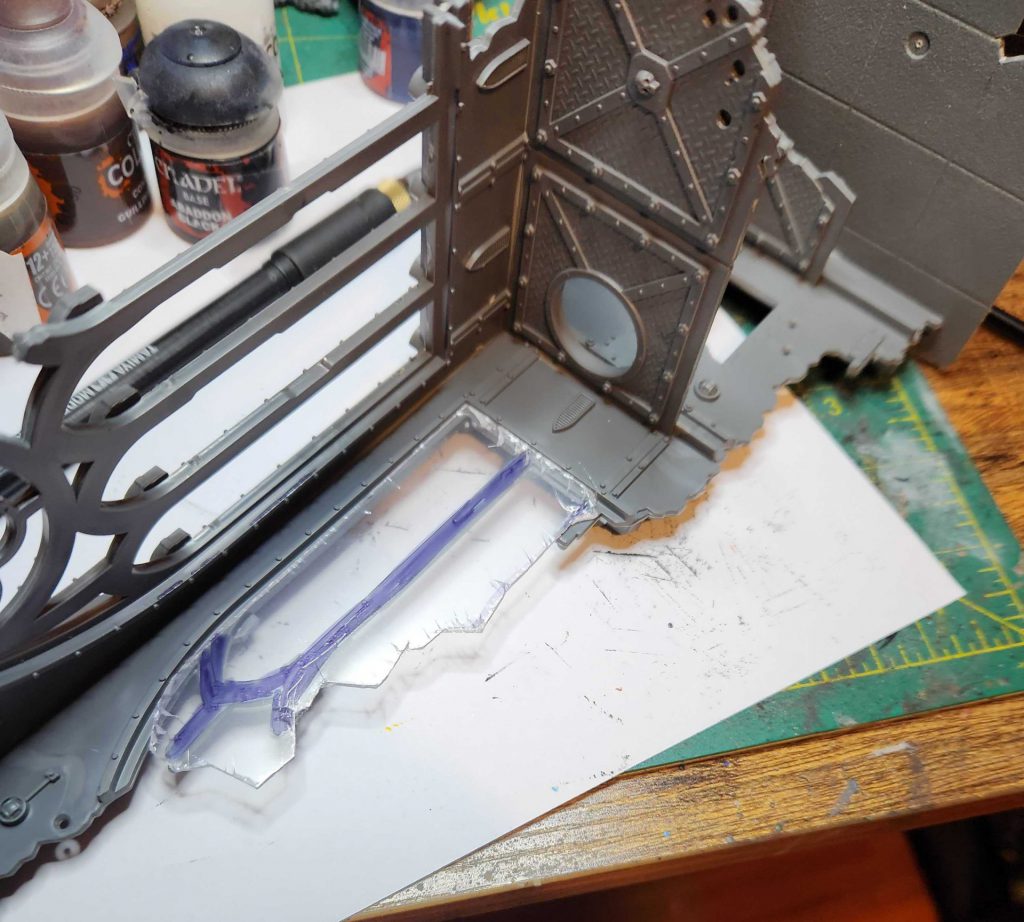
As it turns out, the clear plastic from the frame was perfect for this. I cut some smaller pieces of it to use as windows and fitted them to the ruins. I left the protective plastic film on both sides as I did this, as it would be super helpful to keep that on as long as possible. The plastic is pretty rigid and didn’t like being cut, but having cracks in it works for my aesthetic anyways.
The plan here was to sketch out with marker on one side and paint on the other, then peel off the plastic film with the marker on it. I did some test painting and decided that, while not perfect, using contrast paint would basically do exactly what I needed it to here.
So this starts by laying the piece of plastic down and using a sharpie marker to roughly sketch out where the window frames will be. I can mostly ignore then when painting but I need to create the illusion of separate windows and so they’re important for making the designs look good.
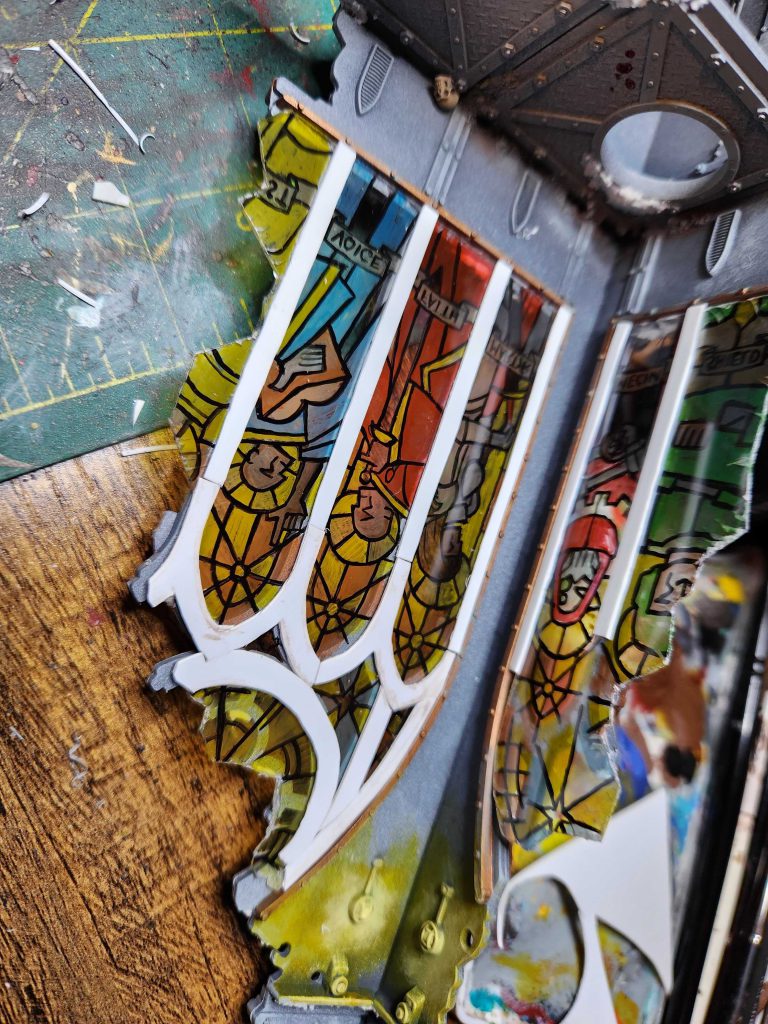
Painting the windows is a multi-step process. I started by roughly sketching what I wanted on the sharpie side using a micron pen. Then I peeled off the plastic on the other side, flipped it over and started painting. I used Abaddon Black to do the lines, making them dark and double-coating where needed. You want these to be opaque when light comes through. I traded the designs from the other side until the whole thing was done, then I colored it in with contrast paints, using very thin layers to avoid pooling. That needs to sit for a while to dry.
Once that was done the real hard part began: Creating the inner frame. See, you can trivially glue the window to the interior of the shrine of the aquila ruins. That’s what I did on my old terrain. But if you do that, it just looks like a big pane of glass with nothing around it. And that’s not good enough for best painted. So I painstakingly cut plasticard to fit around the window, then painted it to match the rest of the building.
This took as much time as the glass and was probably more annoying to do if I’m being honest. But it paid off in the end. I ended up putting some skulls on the walls as well, cutting off the faces of them and painting them bronze to give the shrine a bit more interior decoration.
The whole thing came together extremely well and it looks great with any kind of back lighting. I added some snow to the piece for consistency and some skulls on the base for extra detail.
After that, all that was left to do was the rest of the scatter terrain. I added a couple more stained glass pieces to the rubble, then painted up the broken statue and the street light.
I’m super happy with this and while it’s not going to win me best display, I think it will compliment the army very nicely while also being impressive enough to be a value-add for the army.
Next Time: Asgard Results and also Adding Character and Touching Up Models, Probably
I was planning to put all this in a single article, but then this ballooned out of control on the size and so I have decided to end things with the display board. Tune in next week when I’ll go over the results of the Asgard RTT from this weekend and also talk about retouching models. Probably – if the Asgard RTT is notable I may put off on touching up models another week, but either way I’ll hit it all before Atlanta.
Have any questions or feedback? Drop us a note in the comments below or email us at contact@goonhammer.com.
