
Welcome back, Dear Reader, to my ongoing story of competitive and hobby glory. Last time around I talked about practicing with World Eaters and I ended on a note talking about how my next episode would likely see me recapping a competitive event. Well, it turned out that happened sooner than I thought, as the day after that article published I was reminded that I’d already signed up for the February Asgard RTT.
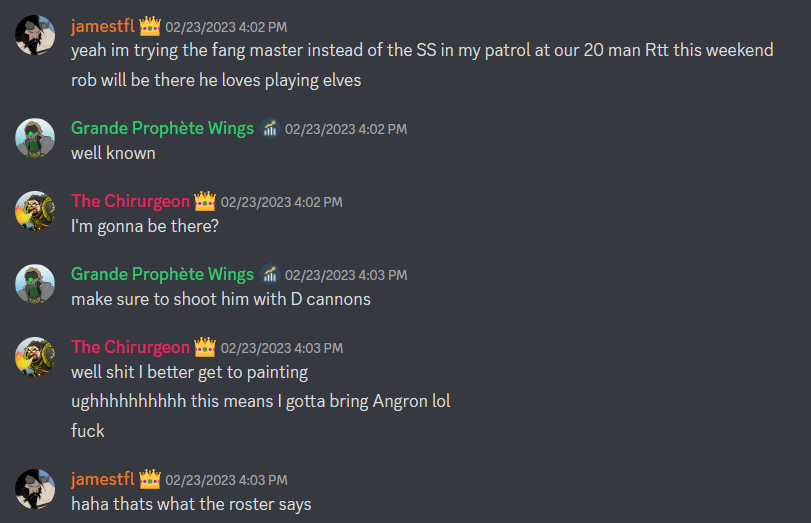
The reason I’m in that image saying “this means I gotta bring Angron” is because at that point, Angron was one of the only World Eaters models in the modern army I’d painted already – after him twas a pair of Rhinos, a Land Raider, Helbrute, 5 terminators, and a Heldrake, and most of those weren’t about to see use on the table. Ultimately I don’t think Angron is very good on the table, and so this means I’d have to make a decisions between an army that I could win best painted with vs. an army that I could win games with. I decided to opt for the latter, and that meant prepping a whole buttload of Eightbound.
The Army (and Hobby Progress)
Once I decided I wasn’t bringing Angron, the rest kind of fell into place. Invocatus would be my warlord, I’d need 3 units of Eightbound and 2-3 Exalted, 4-5 units of Berzerkers, and a couple of Rhinos. After talking with Anthony Vanella from the Stat Check crew, I decided to give his list a spin, since it was running a number of models I had.
My list - click to expand ++ Arks of Omen Detachment (Chaos – World Eaters) [112 PL, 4CP, 2,000pts] ++ Arks of Omen Compulsory Type: Elites + HQ [14 PL, -2CP, 285pts] + Lord Invocatus [8 PL, -1CP, 160pts]: Road of Eight Bloody Steps, Stratagem: Warlord Trait [-1CP], Warlord World Eaters Lord on Juggernaut [6 PL, -1CP, 125pts]: Berzerker Glaive, Stratagem: Relic [-1CP] + Troops [30 PL, 595pts] + Khorne Berserkers [6 PL, 120pts]: Berserker icon [5pts] Khorne Berserkers [6 PL, 120pts]: Berserker icon [5pts] Khorne Berserkers [6 PL, 120pts]: Berserker icon [5pts] Khorne Berserkers [6 PL, 120pts]: Berserker icon [5pts] Khorne Berserkers [6 PL, 115pts] + Elites [57 PL, 885pts] + Eightbound [12 PL, 160pts] Eightbound [12 PL, 160pts] Eightbound [12 PL, 160pts] Exalted Eightbound [7 PL, 135pts] Exalted Eightbound [7 PL, 135pts] Exalted Eightbound [7 PL, 135pts] + Fast Attack [3 PL, 75pts] + Chaos Spawn [1 PL, 25pts]: Chaos Spawn [1 PL, 25pts] + Dedicated Transport [8 PL, 160pts] + Chaos Rhino [4 PL, 80pts]
Subfaction: World Eaters
. Khorne Berserker Champion [22pts]: Bolt pistol
. 3x Khorne Berserker w/ chainblade [66pts]: 3x Berserker chainblade, 3x Bolt pistol
. Khorne Berserker w/ eviscerator [27pts]: Bolt pistol, Khornate eviscerator [5pts]
. Khorne Berserker Champion [22pts]: Bolt pistol
. 3x Khorne Berserker w/ chainblade [66pts]: 3x Berserker chainblade, 3x Bolt pistol
. Khorne Berserker w/ eviscerator [27pts]: Bolt pistol, Khornate eviscerator [5pts]
. Khorne Berserker Champion [22pts]: Bolt pistol
. 3x Khorne Berserker w/ chainblade [66pts]: 3x Berserker chainblade, 3x Bolt pistol
. Khorne Berserker w/ eviscerator [27pts]: Bolt pistol, Khornate eviscerator [5pts]
. Khorne Berserker Champion [22pts]: Bolt pistol
. 3x Khorne Berserker w/ chainblade [66pts]: 3x Berserker chainblade, 3x Bolt pistol
. Khorne Berserker w/ eviscerator [27pts]: Bolt pistol, Khornate eviscerator [5pts]
. Khorne Berserker Champion [22pts]: Bolt pistol
. 3x Khorne Berserker w/ chainblade [66pts]: 3x Berserker chainblade, 3x Bolt pistol
. Khorne Berserker w/ eviscerator [27pts]: Bolt pistol, Khornate eviscerator [5pts]
. 3x Eightbound [120pts]: 6x Eightbound eviscerator
. Eightbound Champion [40pts]: Lacerators
. 3x Eightbound [120pts]: 6x Eightbound eviscerator
. Eightbound Champion [40pts]: Lacerators
. 3x Eightbound [120pts]: 6x Eightbound eviscerator
. Eightbound Champion [40pts]: Lacerators
. 2x Exalted Eightbound: 2x Eightbound chainfist, 2x Eightbound eviscerator
. Exalted Eightbound Champion
. . Two eviscerator chainfists
. 2x Exalted Eightbound: 2x Eightbound chainfist, 2x Eightbound eviscerator
. Exalted Eightbound Champion
. . Two eviscerator chainfists
. 2x Exalted Eightbound: 2x Eightbound chainfist, 2x Eightbound eviscerator
. Exalted Eightbound Champion
. . Two eviscerator chainfists
Chaos Spawn [1 PL, 25pts]: Chaos Spawn [1 PL, 25pts]
Chaos Spawn [1 PL, 25pts]: Chaos Spawn [1 PL, 25pts]
Chaos Rhino [4 PL, 80pts]
The list has a trio of Spawn to be annoying and generate Blood Tithe points, five units of berzerkers who can handle themselves, three 4-model units of Eightbound and 3×3 Exalted (21 total Eightbound models, 2 shy of the number I actually have), and Invocatus and the Juggalord give it tons of movement. The plan is to have the bannerless Berzerkers babysit a backfield objective along with potentially a rhino while the eightbound and juggernaut characters range forward and take out anything in their paths, with the two pregame moving units rushing forward for a t1 charge that cripples the enemy. The Exalted potentially deep strike and act as a second wave to mop up.
I had picked up a bunch of boxes of Eightbound so the next step was just to get them assembled. Painting them in full wasn’t going to happen, but there was some minor work I could do to get them at least looking where they had some paint on them. It was a busy couple of days, but I managed to assemble 18 eightbound and get the army ready for play:

They won’t win any paint awards, but they’ll hopefully get me to 3-0.
The Asgard February RTT
With the army ready, it was time to tackle the tournament. My first game saw me paired into Dark Angels.
Round 1: vs. Diego Vilcahuaman’s Dark Angels
Edit: Had the wrong Diego
Diego’s running Dark Angels, with a good mix of beef and speed.
Diego's list - click to expand ++ Arks of Omen Detachment (Imperium – Adeptus Astartes – Dark Angels) [107 PL, 2CP, 2,000pts] ++ + Configuration + **Chapter Selector**: Dark Angels Arks of Omen Compulsory Type: Fast Attack Battle Size [6CP]: 3. Strike Force (101-200 Total PL / 1001-2000 Points) Detachment Command Cost Game Type: 5. Chapter Approved: Arks of Omen + HQ + Ravenwing Talonmaster [9 PL, -1CP, 160pts]: Power sword, Rites of War, Stratagem: Warlord Trait, Twin assault cannon, Twin heavy bolter, Warlord Ravenwing Talonmaster [9 PL, -1CP, 160pts]: Arbiter’s Gaze, Power sword, Stratagem: Relic, Twin assault cannon, Twin heavy bolter Sammael [8 PL, 135pts]: Bolt pistol, Frag & Krak grenades, Master-crafted plasma cannon, Raven Sword, Twin storm bolter + Troops + Infiltrator Squad [6 PL, 100pts]: Helix gauntlet Infiltrator Squad [6 PL, 100pts]: Helix gauntlet + Elites + Deathwing Ancient [7 PL, -1CP, 105pts]: Chapter Command: Chapter Ancient, Pennant of Remembrance, Stratagem: Relic of the Chapter Deathwing Command Squad [4 PL, 70pts]: Watcher in the Dark Deathwing Command Squad [4 PL, 70pts]: Watcher in the Dark Deathwing Terminator Squad [18 PL, 330pts]: Watcher in the Dark Ravenwing Apothecary [6 PL, -1CP, 120pts]: Bolt pistol, Chapter Command: Chief Apothecary, Frag & Krak grenades, Selfless Healer, Stratagem: Hero of the Chapter + Fast Attack + Attack Bike Squad [6 PL, 150pts] Attack Bike Squad [6 PL, 150pts] Attack Bike Squad [6 PL, 150pts] Ravenwing Land Speeder Vengeance [6 PL, 100pts]: Assault cannon, Plasma storm battery ++ Total: [107 PL, 2CP, 2,000pts] ++
. 4x Infiltrator: 4x Bolt pistol, 4x Frag & Krak grenades, 4x Marksman bolt carbine
. Infiltrator Sergeant: Bolt pistol, Frag & Krak grenades, Marksman bolt carbine
. 4x Infiltrator: 4x Bolt pistol, 4x Frag & Krak grenades, 4x Marksman bolt carbine
. Infiltrator Sergeant: Bolt pistol, Frag & Krak grenades, Marksman bolt carbine
. Thunder Hammer and Storm Shield: Storm shield, Thunder hammer
. Deathwing Sergeant
. . Thunder Hammer & Storm Shield: Storm shield, Thunder hammer
. Deathwing Terminator
. . Thunder Hammer & Storm Shield: Storm shield, Thunder hammer
. Deathwing Sergeant
. . Thunder Hammer & Storm Shield: Storm shield, Thunder hammer
. Deathwing Terminator
. . Thunder Hammer & Storm Shield: Storm shield, Thunder hammer
. Deathwing Sergeant
. . Thunder Hammer & Storm Shield: Storm shield, Thunder hammer
. Deathwing Terminator
. . Cyclone Missile Launcher, Thunder Hammer, Storm Shield: Cyclone missile launcher
. . . Thunder Hammer & Storm Shield: Storm shield, Thunder hammer
. Deathwing Terminator
. . Cyclone Missile Launcher, Thunder Hammer, Storm Shield: Cyclone missile launcher
. . . Thunder Hammer & Storm Shield: Storm shield, Thunder hammer
. Deathwing Terminator
. . Thunder Hammer & Storm Shield: Storm shield, Thunder hammer
. Deathwing Terminator
. . Thunder Hammer & Storm Shield: Storm shield, Thunder hammer
. Deathwing Terminator
. . Thunder Hammer & Storm Shield: Storm shield, Thunder hammer
. Deathwing Terminator
. . Thunder Hammer & Storm Shield: Storm shield, Thunder hammer
. Deathwing Terminator
. . Thunder Hammer & Storm Shield: Storm shield, Thunder hammer
. Deathwing Terminator
. . Thunder Hammer & Storm Shield: Storm shield, Thunder hammer
. Deathwing Terminator
. . Thunder Hammer & Storm Shield: Storm shield, Thunder hammer
. Black Knight Bike: Astartes grenade launcher
. Attack Bike: 2x Bolt pistol, 2x Frag & Krak grenades, Multi-melta, Twin boltgun
. Attack Bike: 2x Bolt pistol, 2x Frag & Krak grenades, Multi-melta, Twin boltgun
. Attack Bike: 2x Bolt pistol, 2x Frag & Krak grenades, Multi-melta, Twin boltgun
. Attack Bike: 2x Bolt pistol, 2x Frag & Krak grenades, Multi-melta, Twin boltgun
. Attack Bike: 2x Bolt pistol, 2x Frag & Krak grenades, Multi-melta, Twin boltgun
. Attack Bike: 2x Bolt pistol, 2x Frag & Krak grenades, Multi-melta, Twin boltgun
. Attack Bike: 2x Bolt pistol, 2x Frag & Krak grenades, Multi-melta, Twin boltgun
. Attack Bike: 2x Bolt pistol, 2x Frag & Krak grenades, Multi-melta, Twin boltgun
. Attack Bike: 2x Bolt pistol, 2x Frag & Krak grenades, Multi-melta, Twin boltgun
Ravenwing Land Speeder Vengeance [6 PL, 100pts]: Assault cannon, Plasma storm battery
Diego’s going heavier on Ravenwing than Deathwing here, and that gives him a ton of speed and a lot of multi-meltas. That’s the best-case scenario for my army, since being able to jam him in his DZ turn 1 if I win the roll-off will mean that speed amounts to a lot of nothing.
The Mission: Recover the Relics*
Ok so there’s a caveat here, which is that I left my Arks book at home and as a consequence, we ended up playing the wrong mission round 1. It was supposed to be The Scouring, but we set up for Recover the Relics and nobody noticed or corrected us until round 3. This actually works out much, much better for my Dark Angels opponent, who no longer has to come to the center of the table to fight me and can hold 3 home objectives fairly comfortably while engaging me from a distance and maxing out Codex Warfare, so although this mistake is ultimately on me it’s not one that helps me in any way.
My Secondaries:
- Pile the Skulls
- Blood for the Blood God
- No Prisoners
Diego’s Secondaries:
- Codex Warfare
- Behind Enemy Lines
- Raise the Banners
Showcasing GW’s excellent design acumen, I can go ahead and pencil in Diego for 15 on Codex Warfare, since every kill he nets from heavy bolters, plasma, multi-meltas, or assault cannons will net him points for Codex Warfare since he’s sitting in Devastator Doctrine until it’s maxxed out. Behind Enemy Lines is also a tough one here if I go second, since I need to jam Diego in his DZ early to stop him from scoring it and even then it’s likely he’ll still score 10+ on it. Banners is also a solid pick for Diego on this mission, since holding 2 banners up most of the game should be relatively easy and 3 on turn 1 is guaranteed if he goes first.
For my part, No Prisoners is the only real thinker here, and Diego’s not sitting on a full 15 but could get to 12-13 easily if he revives some units with the Apothecary. My plan is to get across the table early and fast, take out the terminators as quickly as possible, and then mop up the rest. Diego combat squads his Terminators into two groups of five and puts his command squads into reserves. I put two exalted eightbound into reserves. With so many free secondary points for Diego my plan has to be to win on primary and that means killing ObSec units fast.
I’m Going First.
That’s huge for me – Diego deployed way too close on the bottom half of the table and so I slam two units of Eightbound into his face turn 1, killing the Terminators and sweeping into the Infiltrators and Talonmaster. Diego’s got some fall back and shoot shenanigans and takes out a few Eightbound, but this puts him on the back foot and now he’s down one objective marker and struggling to hold on to the two he has left, plus he has to put up banners. I follow up my turn 1 assault by slamming into him again on turn 2 and with the infiltrators pushed deep I can get my exalted eightbound onto objectives and move my spawn forward to help hold them.

Ultimately that early game push is what gets me over – I’m able to clean off the objective in Diego’s deployment zone and hold him to 4 VP on primary the first three turns of the game, and that’s what makes the difference. Diego puts Sammael and a unit of teleporting Command Squad Deathwing into my DZ and pulls 13 on Behind Enemy lines while trivially maxxing Codex Warfare. But I keep him off objectives early and that stunts his points on both primary and Banners. We’ll end up going 45-40 on primary scoring while he pulls 38 on secondary to my 40 for a 95-88 win.
Ultimately, Diego needed to deploy more conservatively to prevent the T1 charge. Had he done that, I need a second turn to get across the table, giving him time to space out and pick apart my units.
Result: Win
Round 2: vs. David Miracle’s Necrons
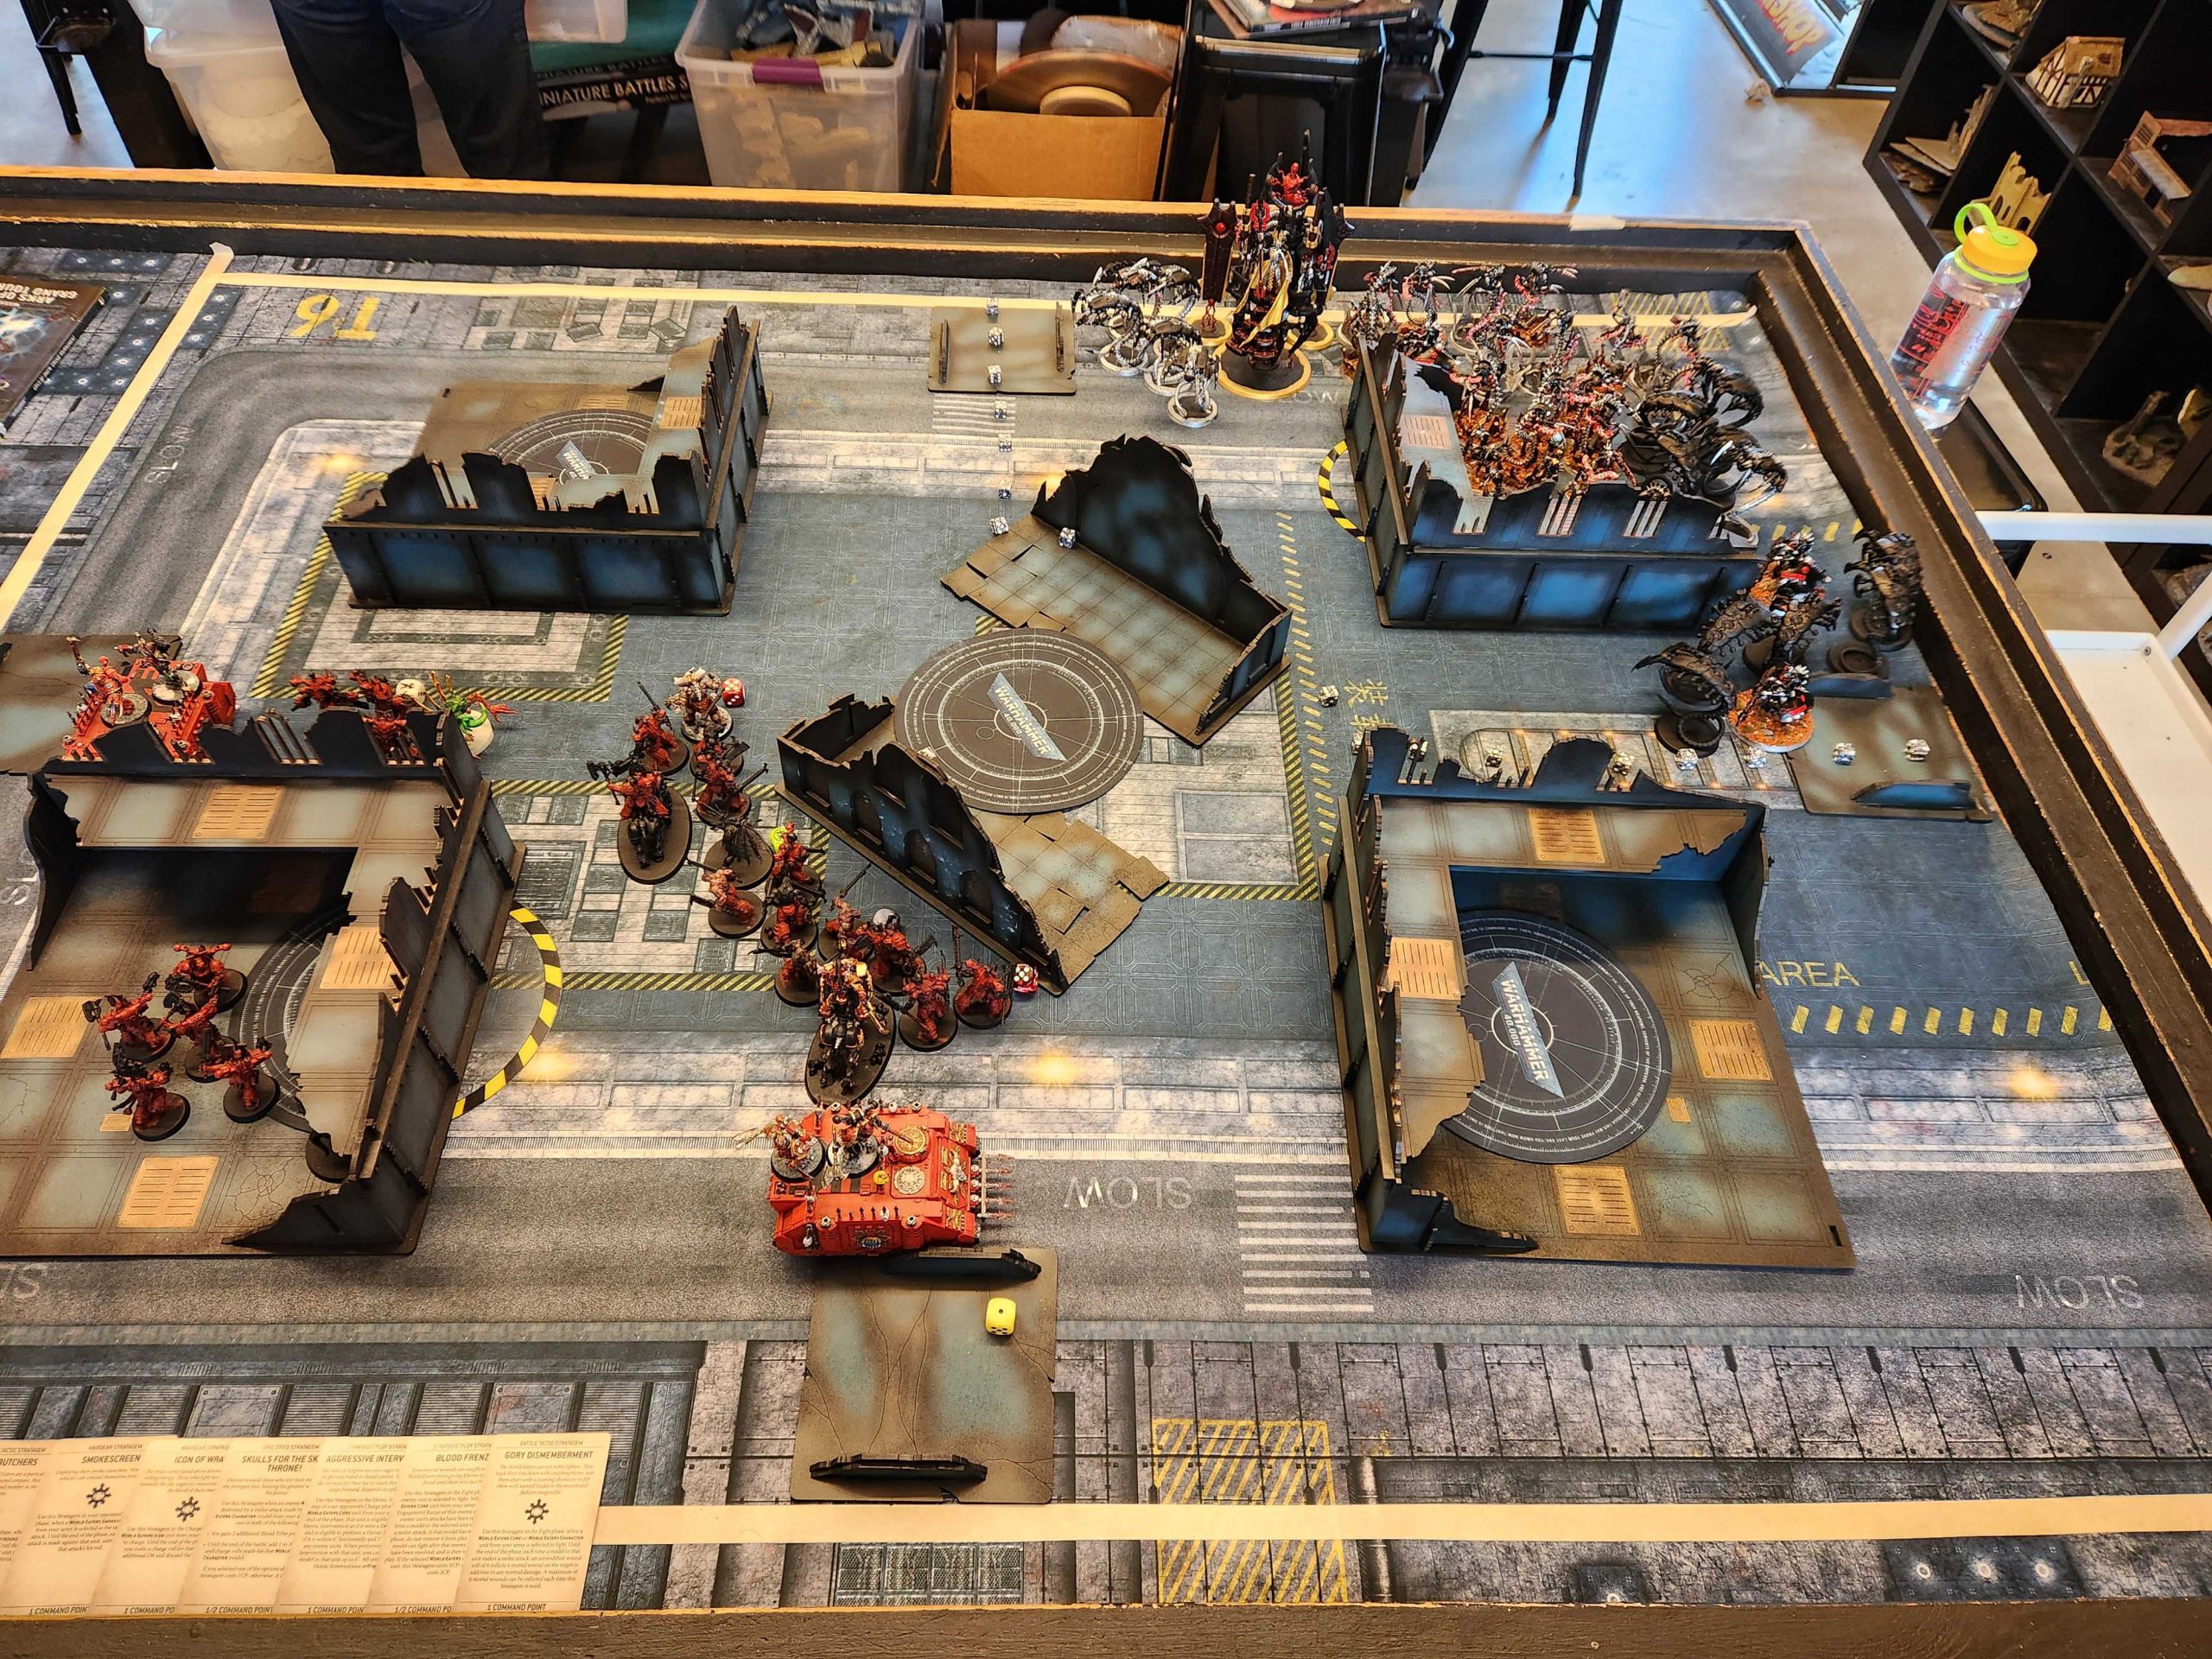
I played David for the first time back at an RTT back when I was forced to play with Carmine’s Ultramarines and while he was still getting his footing then, he’s vastly improved as a player since. He’s running melee-focused Necrons and while I think this is a good matchup for me at first, in retrospect it’s actually a nightmare for my army, thanks to David having a number of units well-tuned for causing me problems.
David's list - click to expand ++ Arks of Omen Detachment (Necrons) [115 PL, 2,000pts, 6CP] ++ + Configuration + Arks of Omen Compulsory Type: Fast Attack Battle Size [6CP]: 3. Strike Force (101-200 Total PL / 1001-2000 Points) Detachment Command Cost Dynasty Choice: Dynasty: Nihilakh Game Type: 5. Chapter Approved: Arks of Omen + HQ + Chronomancer [5 PL, 75pts, -2CP]: Aeonstave, Rarefied Nobility, Relic: Veil of Darkness, Stratagem: Relic, Warlord Trait (Codex 5): Implacable Conqueror (Aura) + Troops + Necron Warriors [12 PL, 220pts] + Elites + Skorpekh Destroyers [8 PL, 180pts] + Fast Attack + Canoptek Wraiths [12 PL, 175pts] Canoptek Wraiths [12 PL, 175pts] Canoptek Wraiths [12 PL, 175pts] Ophydian Destroyers [8 PL, 150pts]: Ophydian Destroyer (Reap-Blade) Ophydian Destroyers [8 PL, 150pts]: Ophydian Destroyer (Reap-Blade) Ophydian Destroyers [8 PL, 150pts]: Ophydian Destroyer (Reap-Blade) + Heavy Support + Lokhust Heavy Destroyers [3 PL, 50pts] Lokhust Heavy Destroyers [3 PL, 50pts] Lokhust Heavy Destroyers [3 PL, 50pts] + Lord of War + The Silent King [21 PL, 400pts, 2CP]: Stratagem: Warlord Trait, Warlord Trait (Szarekhan): The Triarch’s Will ++ Total: [115 PL, 6CP, 2,000pts] ++
. 20x Necron Warrior (Gauss Reaper): 20x Gauss Reaper
. 2x Skorpekh Destroyer (Reap-Blade): 2x Hyperphase Reap-Blade
. 4x Skorpekh Destroyer (Thresher): 4x Hyperphase Threshers
. 5x Canoptek Wraith (Claws): 5x Vicious Claws
. 5x Canoptek Wraith (Claws): 5x Vicious Claws
. 5x Canoptek Wraith (Claws): 5x Vicious Claws
. 4x Ophydian Destroyer (Thresher): 4x Hyperphase Threshers, 4x Ophydian Claws
. 4x Ophydian Destroyer (Thresher): 4x Hyperphase Threshers, 4x Ophydian Claws
. 4x Ophydian Destroyer (Thresher): 4x Hyperphase Threshers, 4x Ophydian Claws
. Lokhust Heavy Destroyer (Gauss Destructor)
. Lokhust Heavy Destroyer (Gauss Destructor)
. Lokhust Heavy Destroyer (Gauss Destructor)
. 2x Triarchal Menhir: 2x Annihilator Beam
The biggest problem here is the Silent King; if David plays coy with his Menhirs I won’t have a lot of ability to handle the king’s fight last aura; my only real recourse will be to overload him with threats and hope to take him down. The Wraiths are also a big problem, since they’ve got 3W each and a 4+ save to help them tank my army’s prevalent 2-damage attacks, and they can also just disengage and re-engage however they feel like.
The Mission: Conversion
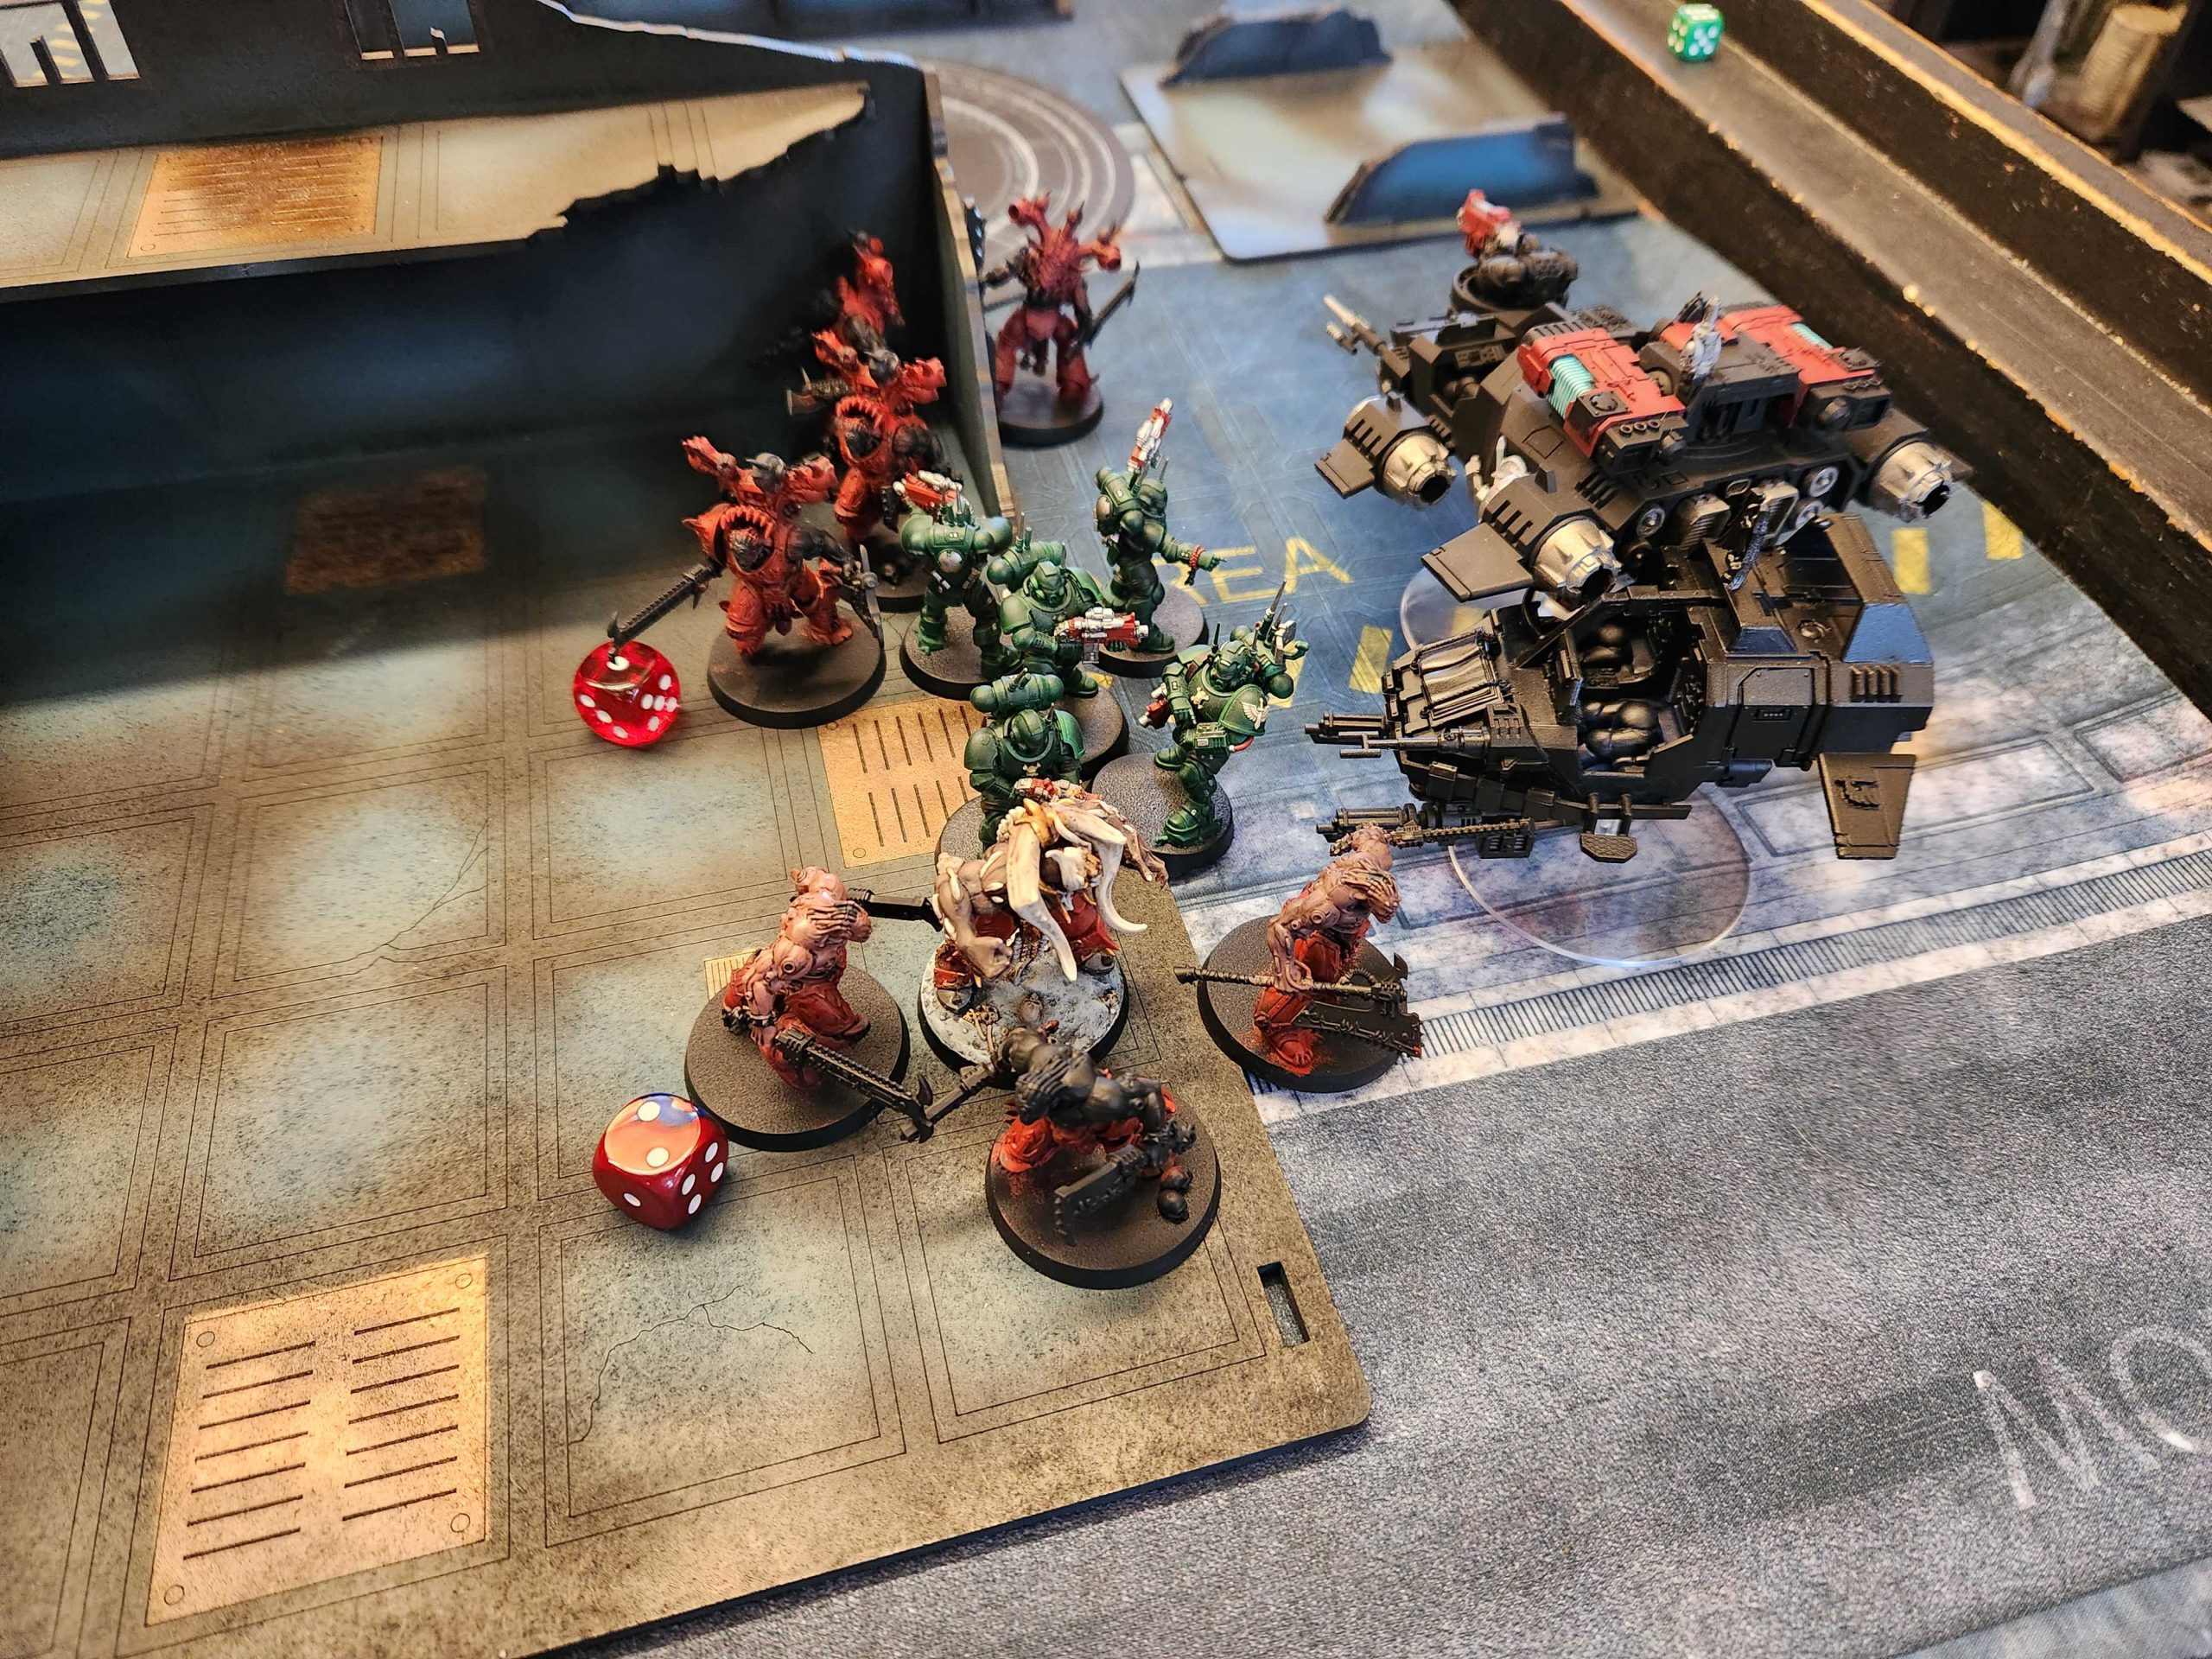
![]()
![]()
This is a good mission for me in theory, since I want to get in close and fight in melee, but there’s just as much melee power on David’s side and if I overextend he’ll pick me apart piecemeal with counter-charges. My early game goals are to take out the wraiths and the lokhust heavy destroyers, since the shooting they put out is a problem for my eightbound.
My Secondaries:
- No Prisoners
- Pile the Skulls
- Blood for the Blood God
David’s Secondaries:
- Treasures of Aeons
- Behind Enemy Lines
- Ancient Machiners
- David’s got some good board control scoring but I may be able to keep him off the middle of the table for a bit. This mission has some weird additional tertiary scoring to keep in mind as well, and that’ll come into play later.
I’m Going First
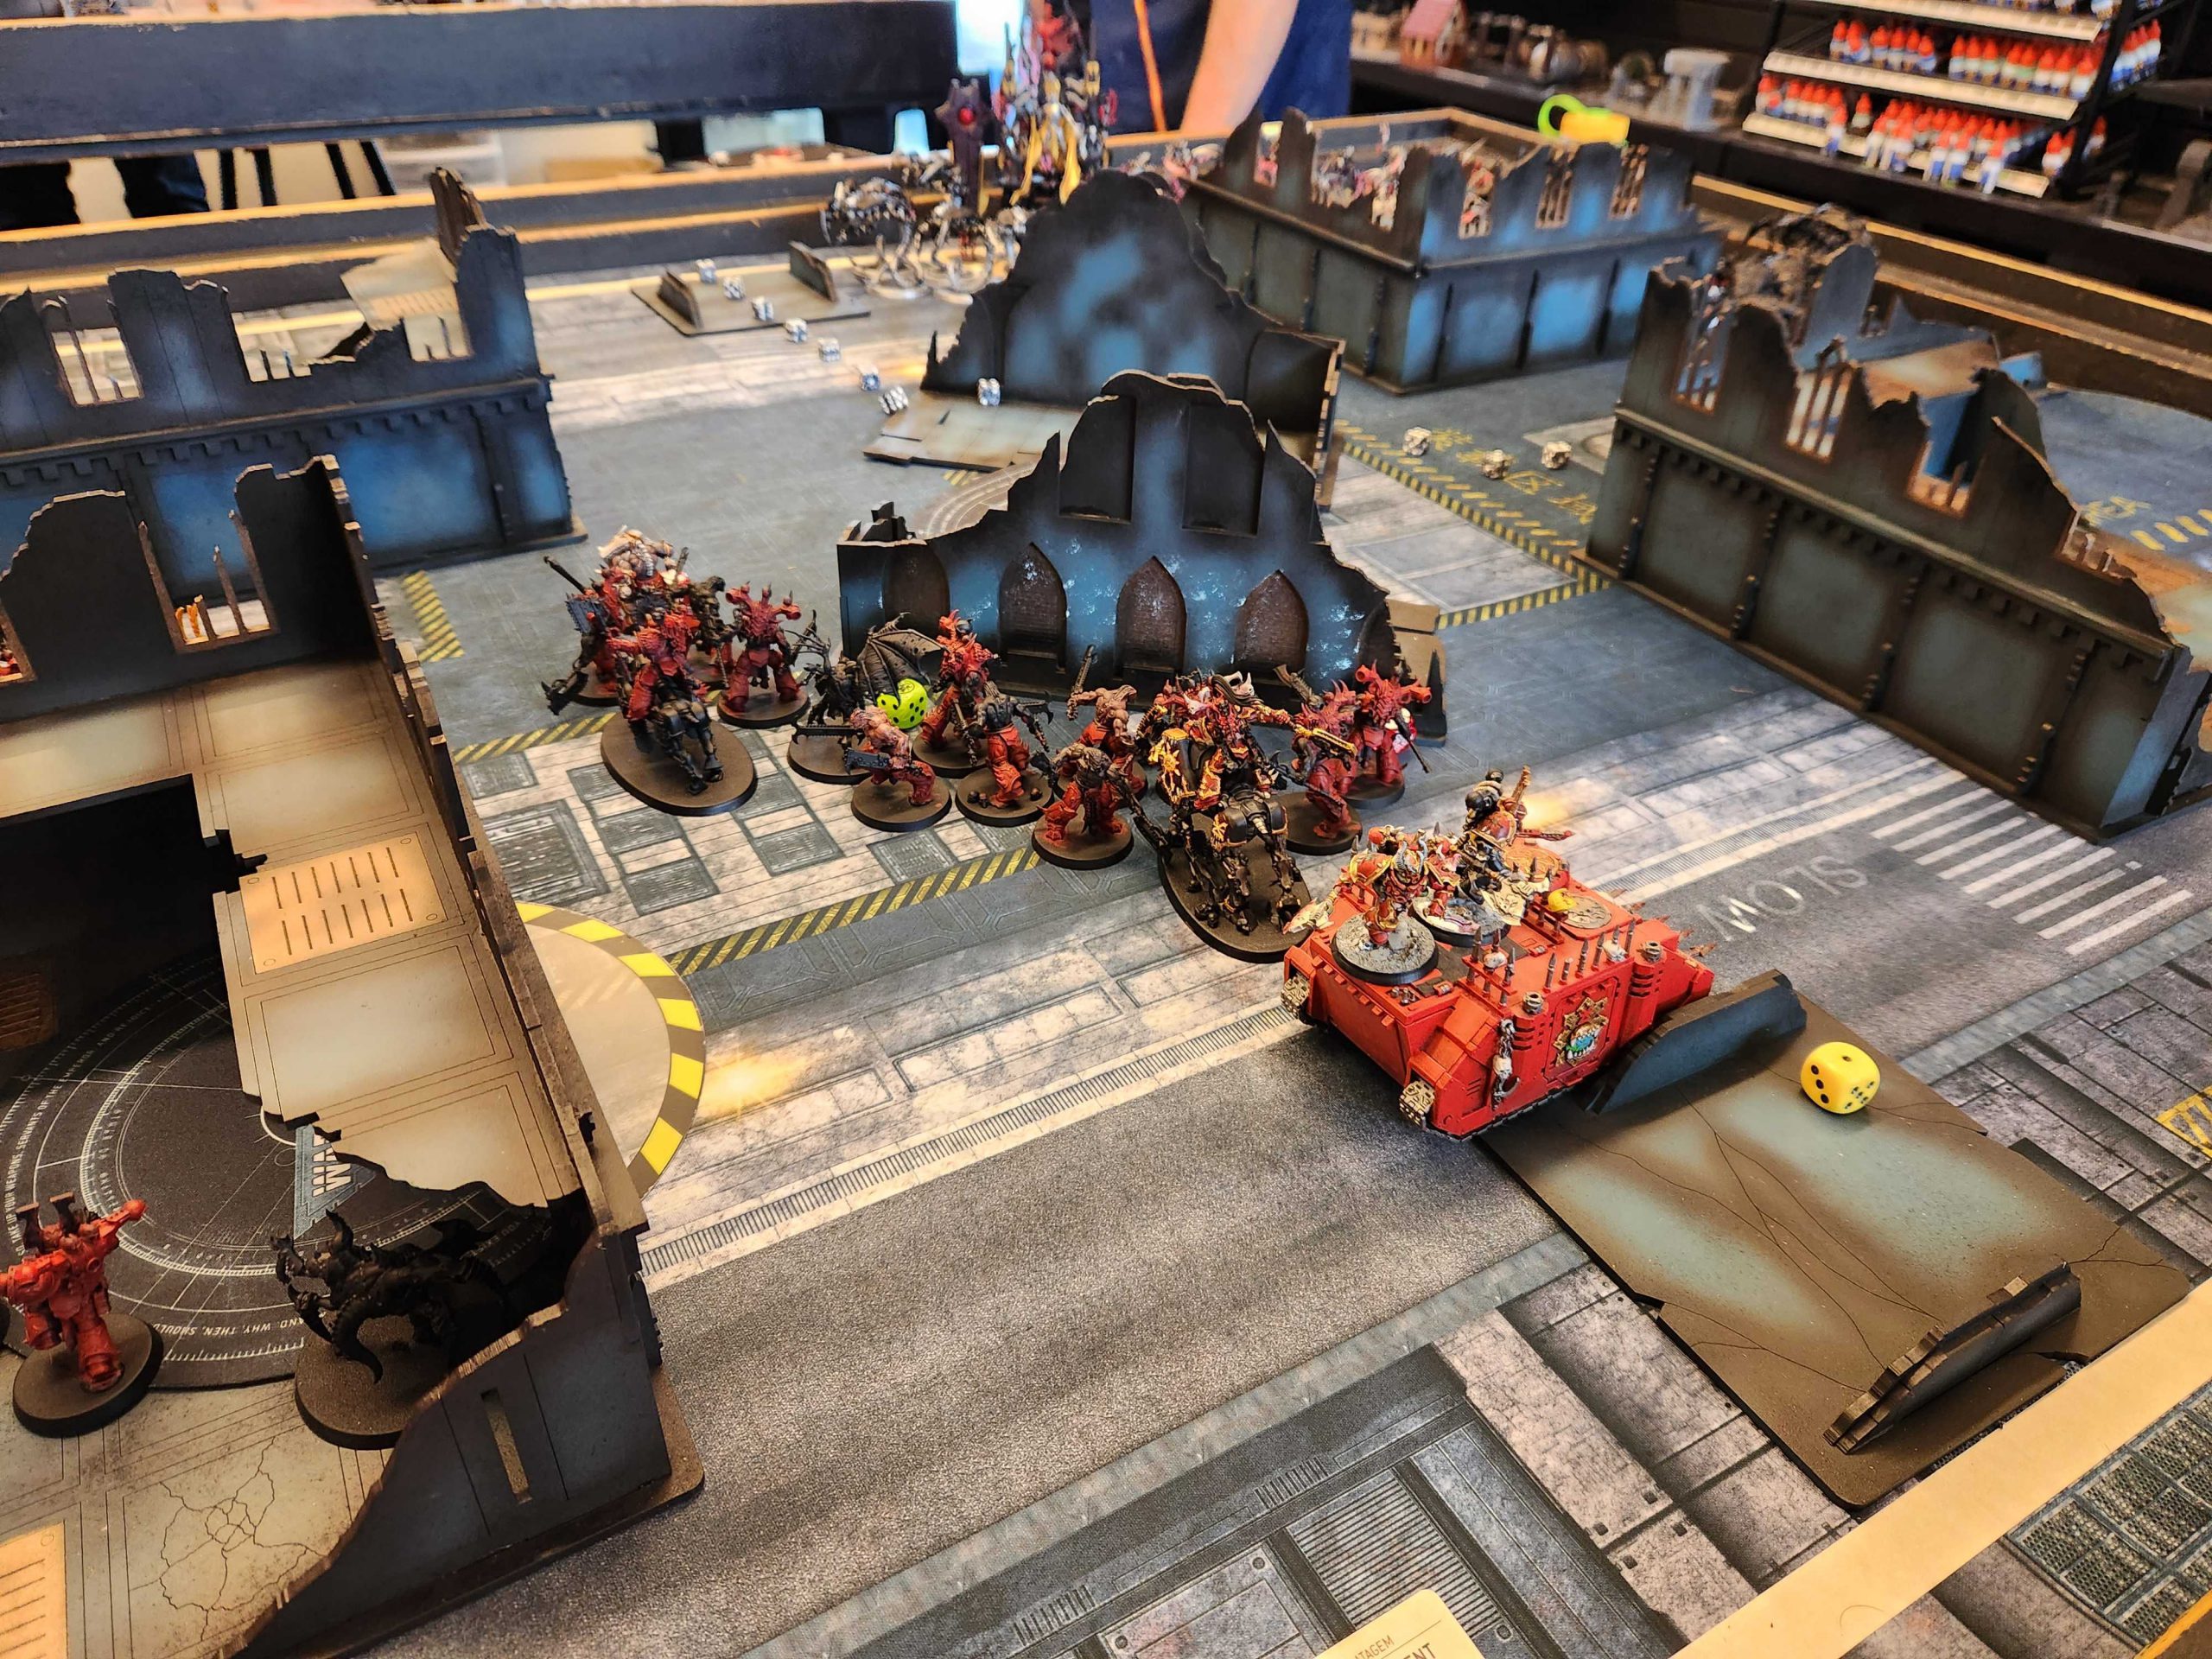
Hell yeah… I think? My plan with World Eaters going first so far has been to charge two units of eightbound forward, wipe out key high-value enemy units, and cripple the opponent in the process, stuffing them in their DZ and forcing them to respond while the rest of my army can move up. But there just isn’t that much which trades profitably here – trading a unit of eightbound for a unit of wraiths is basically an even proposition – if I can even do it. Turns out I can’t – my turn 1 charges clear out a Lokhust heavy destroyer and 3 wraiths in each squad, but one comes back for each. That’s a really bad start, and David punishes me by killing one unit of Eightbound with the Silent King and then pushes into the other with his Skorpekhs. He presses forward with the big guy toward mid-table and I attempt to make my stand, attempting charges on the silent king with Lord Invocatus, two units of Exalted Eightbound (one on a 6″ charge, the other on 8″), and a unit of Berzerkers. Hopefully this will be enough, but the berzerkers and 8″ eightbound whiff their charges and I’m left watching as Invocatus fails 6/7 4++ saves to die to the Silent King while the Exalted Eightbound kill 1.5 Menhirs.
That’s pretty much the game but I hold on for a bit and sweep up the side and we end up trading home objectives, which leads to some very wonky scoring for primary, where I’ll end up with 43 VP thanks to some turns where we’re each holding a no man’s land objective plus the one in the other player’s deployment zone, so we each get 6 bonus VP and then lose 1. David more or less tables me but I pull 14 each on N o Prisoners and Pile the Skulls while getting 8 on Blood for the Blood God. The final result is that David wins, 95-89.
Result: Loss
David’s a great guy and I’m glad he’s improved. Looking back on the game, I needed to play more coy turn 1 and overcommit on the right side to a turn 1 charge to kill wraiths and skorpekhs away from the Silent King, being a bit more careful to lure the Silent King out. I probably should have put my exalted all on the table to start instead of deep striking two units to help get them into a big charge on TSK, since the level of commitment I needed there was huge. Not being able to take out the silent king ultimately killed me.
Round 3: vs. Erik’s Craftworlds

Ah, my old friend/nemesis, Erik. I have yet to beat Erik at an event, and he wallops me most of the time we do practice games.
Erik's List - Click to Expand ++ Arks of Omen Detachment (Aeldari – Craftworlds) [84 PL, -2CP, 1,605pts] ++ + Configuration + Craftworld Selection: Ulthwe: Foresight of the Damned Detachment Command Cost Game Type: 5. Chapter Approved: Arks of Omen + No Force Org Slot + Seer Council (Unit) [3 PL, 65pts] Seer Council (Unit) [3 PL, 50pts] + HQ + Baharroth [7 PL, 160pts] Eldrad Ulthran [8 PL, -1CP, 145pts]: 1. Fateful Divergence, 1. Guide, 5. Will of Asuryan, Stratagem: Warlord Trait, Ulthwe: Fate Reader, Warlord Farseer Skyrunner [6 PL, -1CP, 135pts]: 2. Doom, 4. Executioner, Stratagem: Treasures of the Aeldari, Witchblade + Elites + Howling Banshees [5 PL, 110pts] Striking Scorpions [5 PL, 110pts] + Fast Attack + Shroud Runners [5 PL, 90pts] Shroud Runners [5 PL, 90pts] Shroud Runners [5 PL, 90pts] Vypers [3 PL, 40pts] Warp Spiders [6 PL, 125pts] + Heavy Support + Falcon [9 PL, 145pts]: Scatter Laser, Twin Shuriken Catapult Support Weapons [9 PL, 195pts]: 3x Support Weapon w/ D-Cannon War Walkers [5 PL, 55pts] ++ Patrol Detachment 0CP (Aeldari – Harlequins) [17 PL, 4CP, 395pts] ++ + Configuration + Battle Size [6CP]: 3. Strike Force (101-200 Total PL / 1001-2000 Points) Detachment Command Cost Game Type: 5. Chapter Approved: Arks of Omen Saedath Characterisation: Twilight: Twilight Falls + HQ + Troupe Master [5 PL, -1CP, 100pts]: Aeldari Power Sword, Shuriken Pistol, Stratagem: Relic, Veiled King + Troops + Troupe [4 PL, 90pts] + Elites + Death Jester [4 PL, -1CP, 110pts]: 1: Favour of Cegorach, Harvester of Torment, Stratagem: Champion of the Aeldari + Dedicated Transport + Starweaver [4 PL, 95pts] ++ Total: [101 PL, 2CP, 2,000pts] ++
. Warlock Skyrunners: 4. Protect/Jinx
. . Warlock Skyrunner: Witchblade
. Warlocks: 5. Quicken/Restrain
. . Warlock: Witchblade
. . Warlock: Witchblade
. The Ghosthelm of Alishazier
. 4x Howling Banshee: 4x Banshee Blade, 4x Shuriken Pistol
. Howling Banshee Exarch: Mirrorswords, Piercing Strikes
. 4x Striking Scorpion: 4x Mandiblasters, 4x Scorpion Chainsword, 4x Shuriken Pistol
. Striking Scorpion Exarch: Biting Blade, Crushing Blows
. 3x Shroud Runner: 3x Ranger Long Rifle, 3x Scatter Laser, 3x Shuriken Pistol
. 3x Shroud Runner: 3x Ranger Long Rifle, 3x Scatter Laser, 3x Shuriken Pistol
. 3x Shroud Runner: 3x Ranger Long Rifle, 3x Scatter Laser, 3x Shuriken Pistol
. Vyper w/ Scatter Laser
. 4x Warp Spider: 4x Death Spinner
. Warp Spider Exarch: Death Spinner, Web of Deceit
. War Walker: 2x Scatter Laser
. The Twilight Fang
. Lead Player: Harlequin’s Embrace, Shuriken Pistol
. Player: Harlequin’s Embrace, Shuriken Pistol
. Player: Harlequin’s Embrace, Shuriken Pistol
. Player: Harlequin’s Caress, Shuriken Pistol
. Player: Harlequin’s Kiss, Shuriken Pistol
This is what he’s been running for a while and last time it pantsed my Death Guard. This time around my melee threats are even more punishing and I’ve got way more speed so I’m hoping it’ll be a much more even matchup.
The Mission: Tear Down Their Icons

One of the reasons I really like playing Erik in round 3 is because we’re both on that dadlife and usually angling to go home sooner. Unfortunately for Erik, he’s been paired down into me as one of the 2-0 players, so he needs to win big to have a chance of winning the event or placing and I’m not about to give this one up easy.
My Secondaries:
- Blood for the Blood God
- Pile the Skulls
- Blood God’s Due
Erik’s Secondaries:
- Warp Ritual
- No Prisoners
- Behind Enemy Lines
I’ve seen this play before. Erik’s plan is to put a bike psyker on the middle objective to Warp Ritual, then pull it back with Quickening every turn. Meanwhile he’ll forward deploy his Scorpions and then pull them back if he doesn’t like the way things look, and attempt to score BEL late with his warp spiders and Baharroth. My plan is to screen him out as long as possible and use both the long movement and 6″ intervention stratagems to punish him for getting close, and avoid his D-cannons as long as possible.
I’m going second.
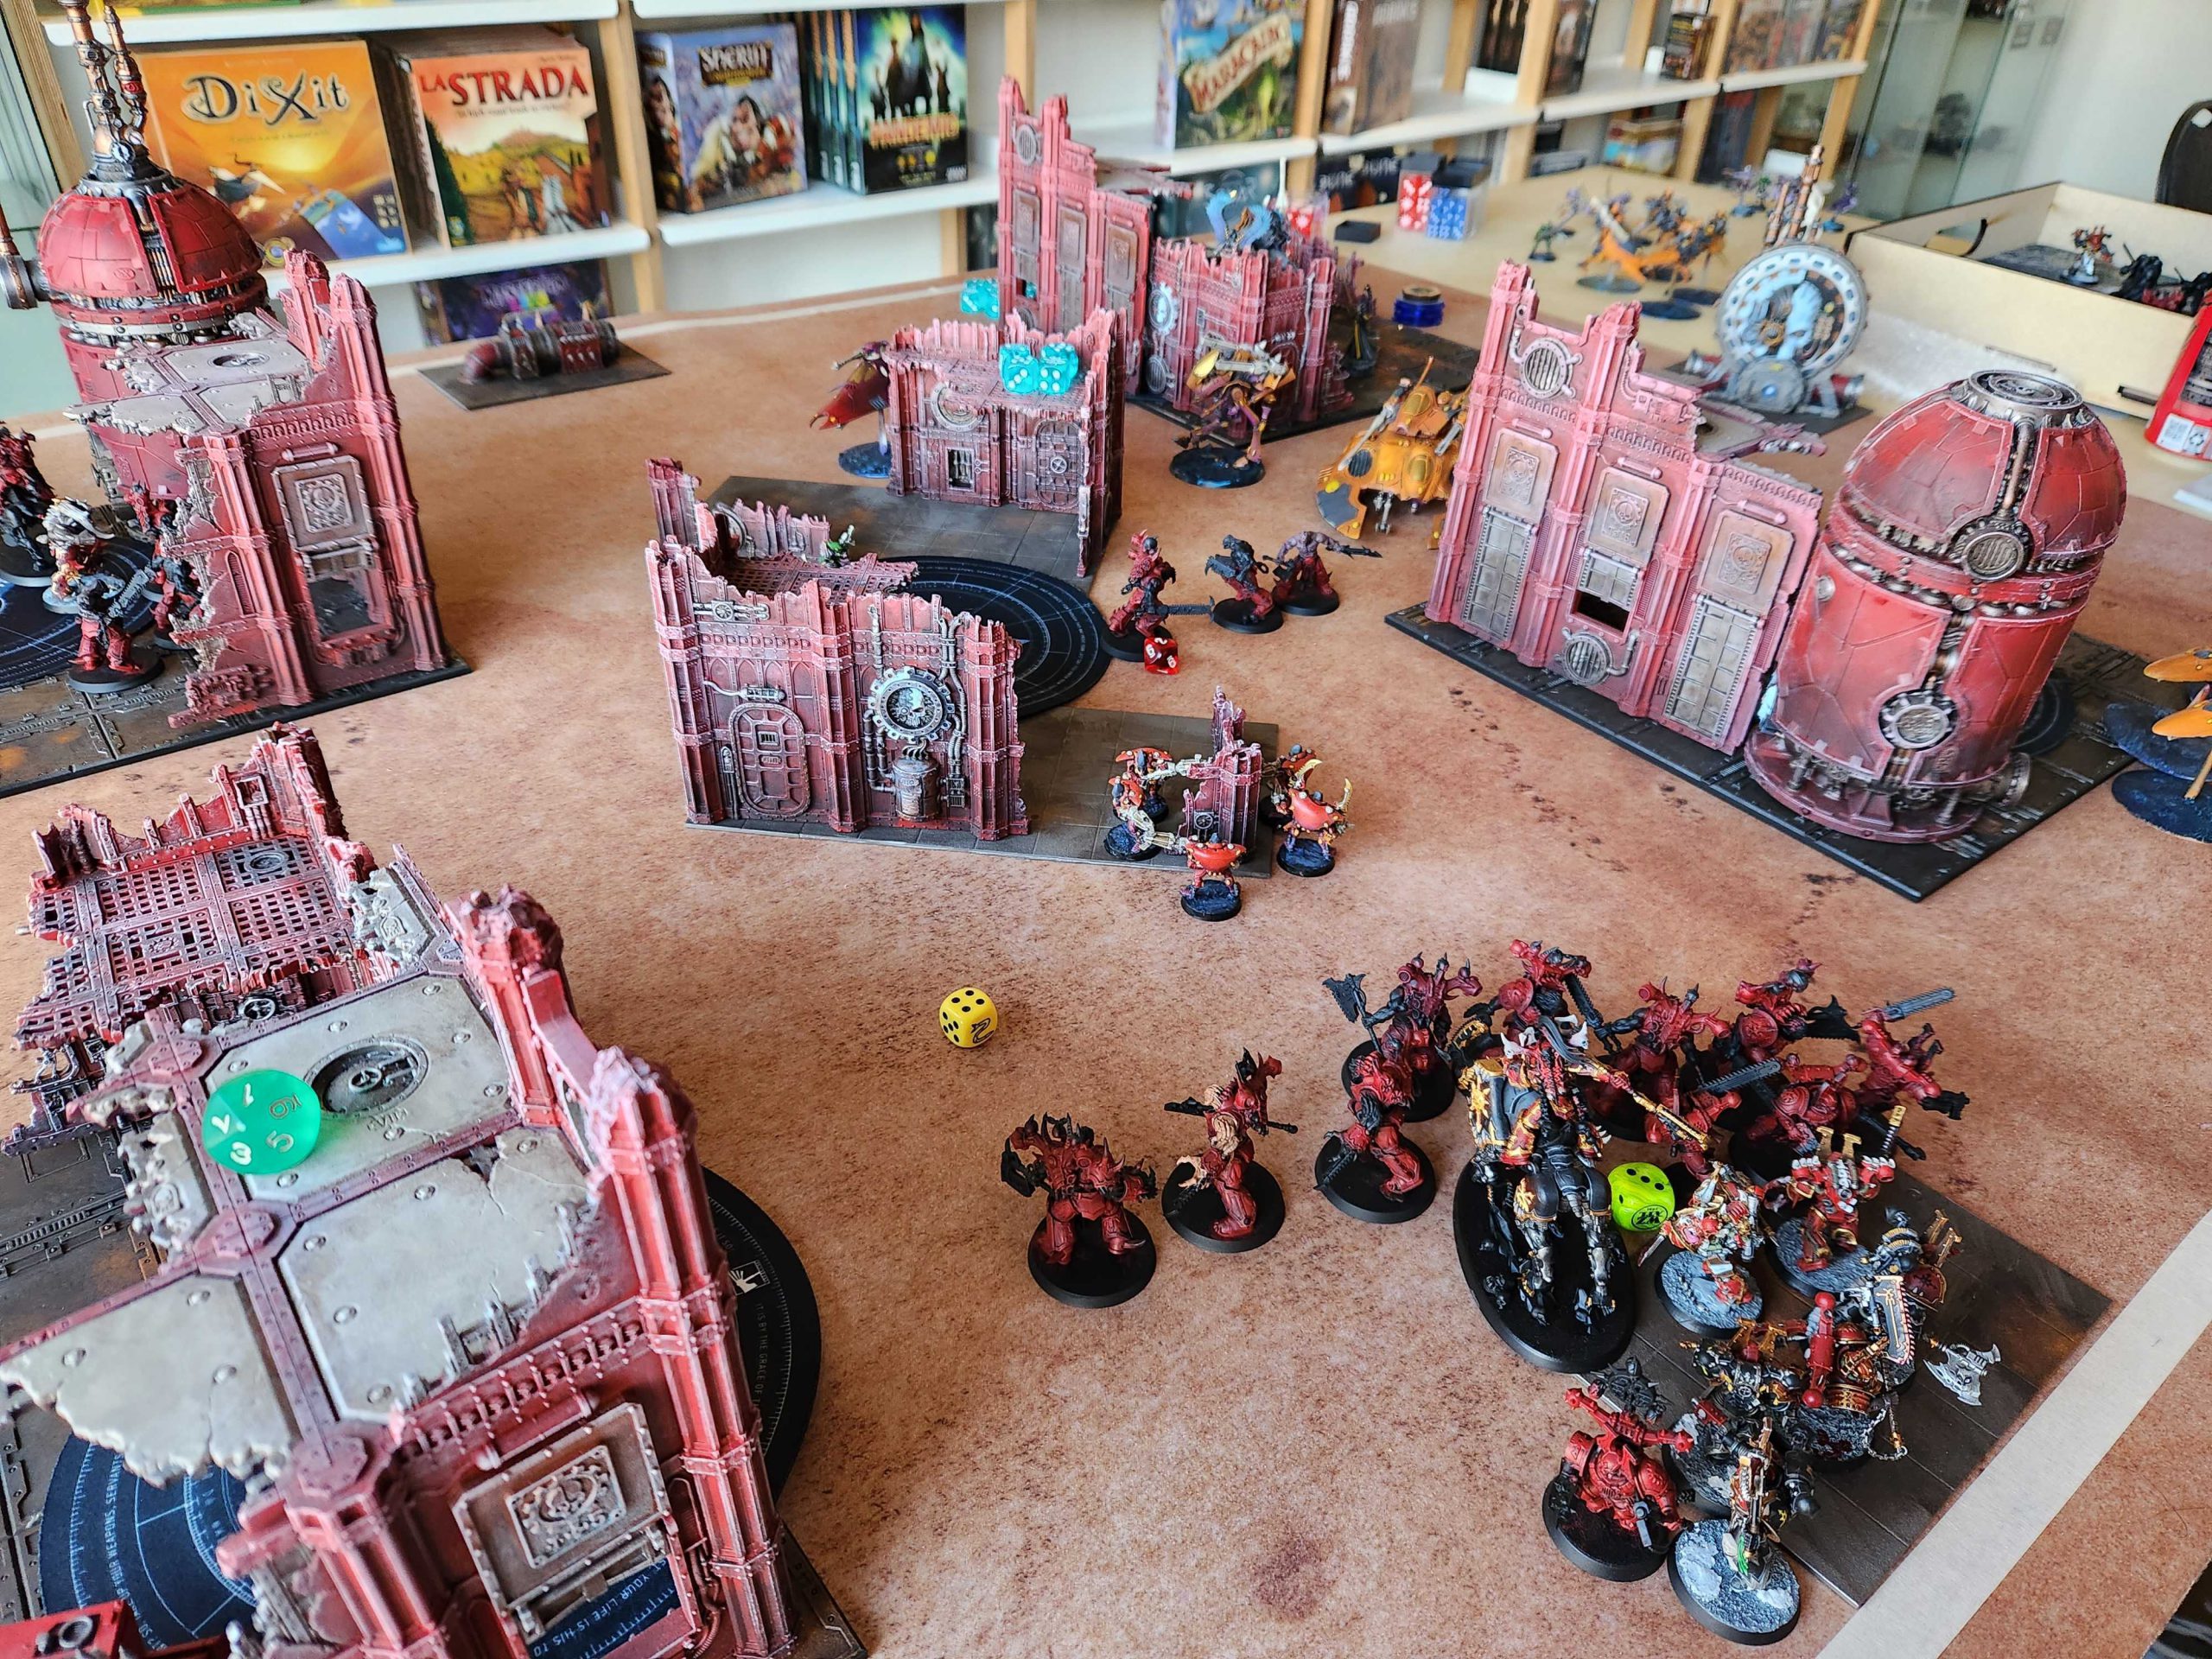
Not ideal, but not horrible, either – Erik wasn’t likely to leave me any turn 1 charges but I could have done without getting jammed in my DZ turn 1, which is a favorite move of his. He does so with his bikes as usual, and I’m able to kill them pretty easily and get some slingshot movement out of it around the bottom edge of the table – his D-cannons are in the corner of his upper ruin.
I get an early deny off on Erik’s Warp Ritual, which is always a plus – even if I don’t stop him from scoring 12 (nearly impossible), denying him on turns 1/2 puts him behind on his casting bullshit because he has to commit to doing the ritual for all five turns, and things look OK but then Erik’s dice get mad hot – he pulls his Death Jester up onto his upper ruin and rolls boxcars on three of his shots (plus turns the third into a 6) to completely one-shot my Lord Invocatus, trapping a big chunk of my army in a bad place and slogging through difficult terrain. That one hurts a lot. He also gets some solid rolls on saves to keep units around and it looks like he might walk away with this one.
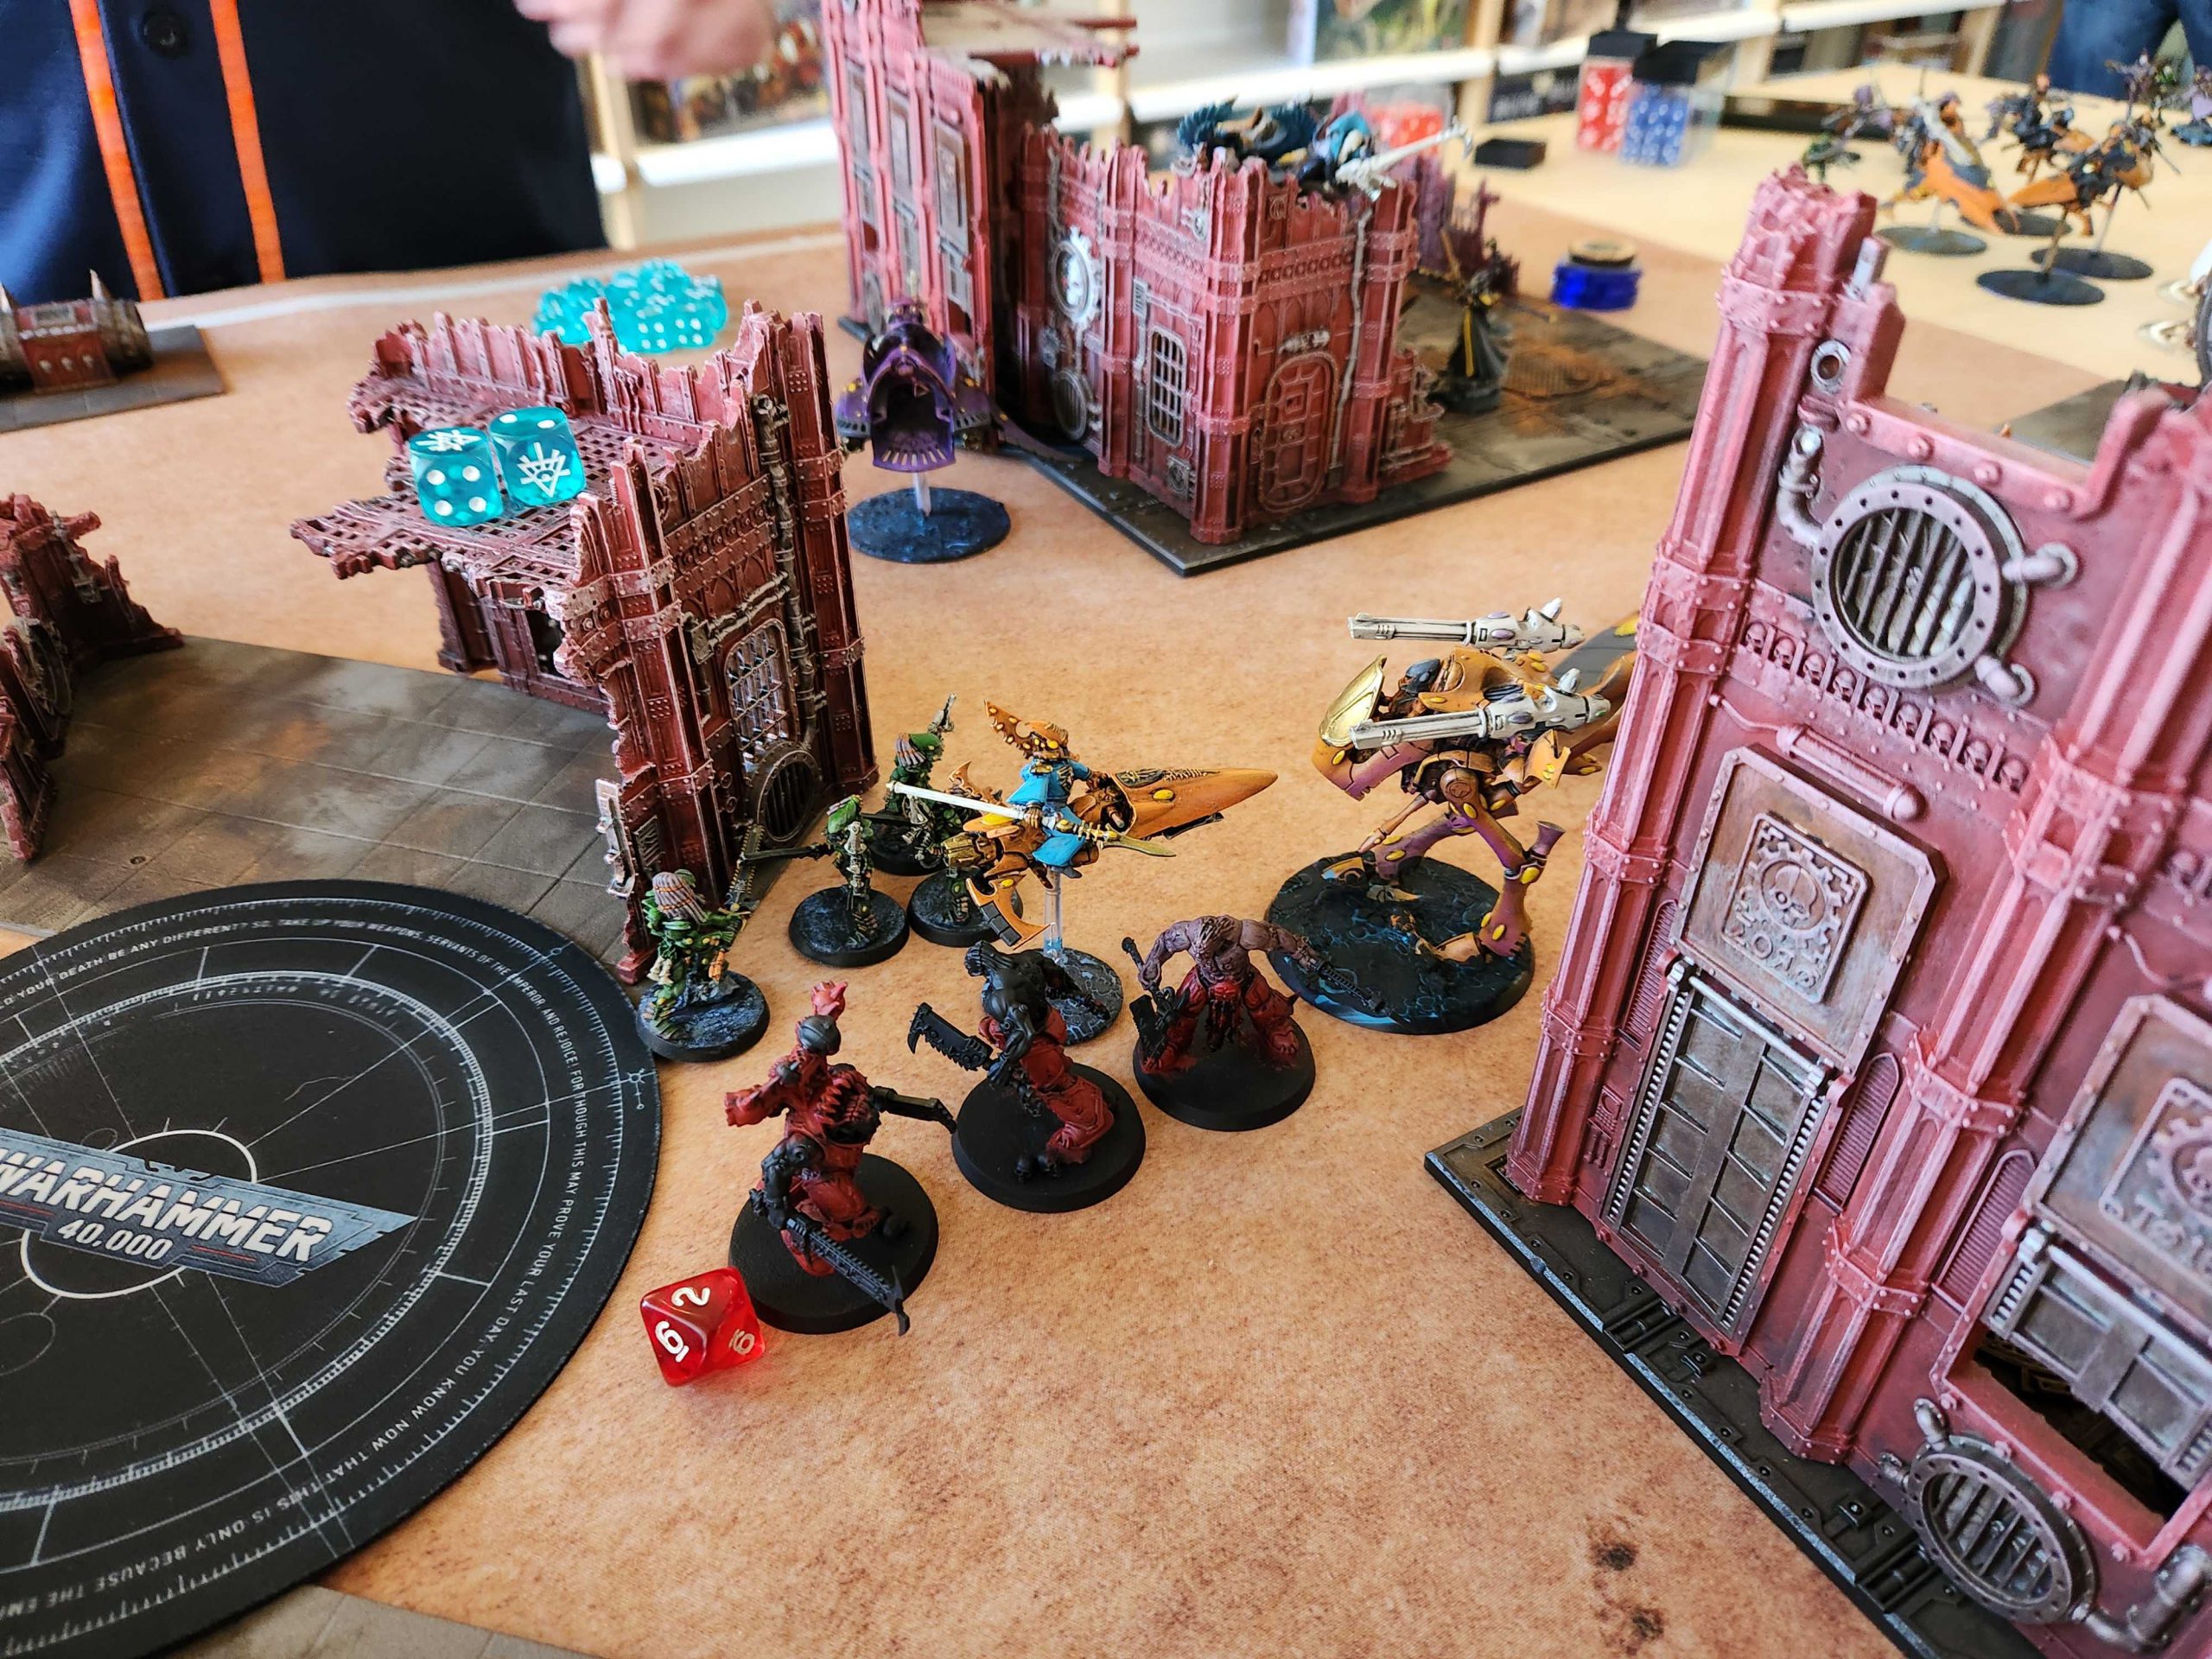
I bring all of this up to note that, while things went about as well as they could have gone for Erik early on from a dice perspective, ultimately he didn’t have the gas he needed – my berzerkers were able to make a 3D6 charge into his D-cannons to silence them for two turns as the Exalted Eightbound hit the scene and I wiped out his bikes. I was able to surround his Starweaver and kill it, which killed three harlequins on the Emergency disembark while a berzerker unit killed Baharroth in my DZ. The Harlequins made a push to my objective, but couldn’t get far enough from the berzerkers, who intervened into them and killed them off. Almost everything went Erik’s way on turns 1-3, but I still had threats left and could keep sending new things into Erik’s DZ while the backfield stuff I had was much more deadly than poxwalkers and able to remove the units Erik shot cross-table. In the end, I think Erik’s current list just doesn’t have enough answers for this World Eaters list, and I was able to pull out the win as I flipped the script on primary scoring late in the game.
Result: 84-75, Win
That’s a big win for me but ultimately I’m still 2-1, the score I get at all of these things. I really like how the army plays, and I think they’ve got some real power, but I need to shore up my game with them and really think about how I approach those turn 1 charges when there aren’t easy, profitable trades to be had or big targets I need to worry about. I’m fine with going up against knights, but the Silent King or primarch-sized threats are going to cause me problems and I have yet to really deal with a big shooting army like T’au.
Well, one day I’ll string three together at an RTT. Maybe the Tempest of War one we keep talking about running in March. In the meantime, I have a ton of Eightbound and Berzerkers to paint and more practice games to get in.
Have any questions or feedback? Drop us a note in the comments below or email us at contact@goonhammer.com.
