This article is part of a larger series on how to paint Dark Angels space marines. For more on painting Dark Angels, you can return to that series by clicking this link.

I’ve been in love with Dark Angels since 4th Edition, though that love clearly doesn’t come across in most of my posts because it’s funnier when I focus on how bad they suck, which they very much up until 9th edition.
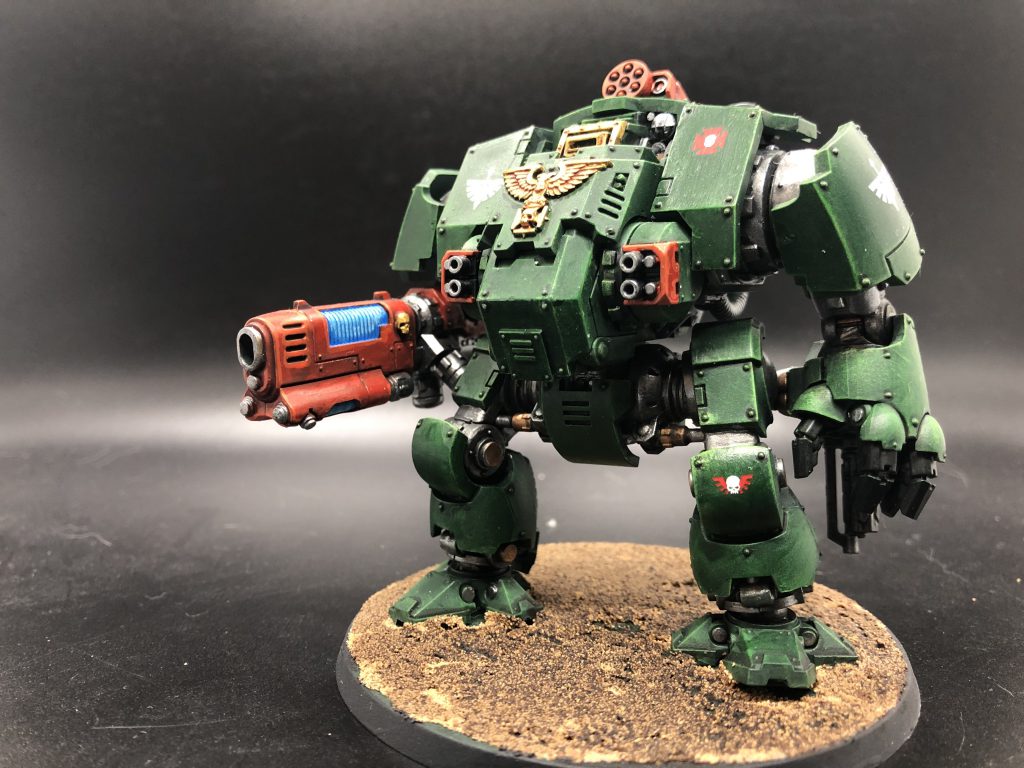
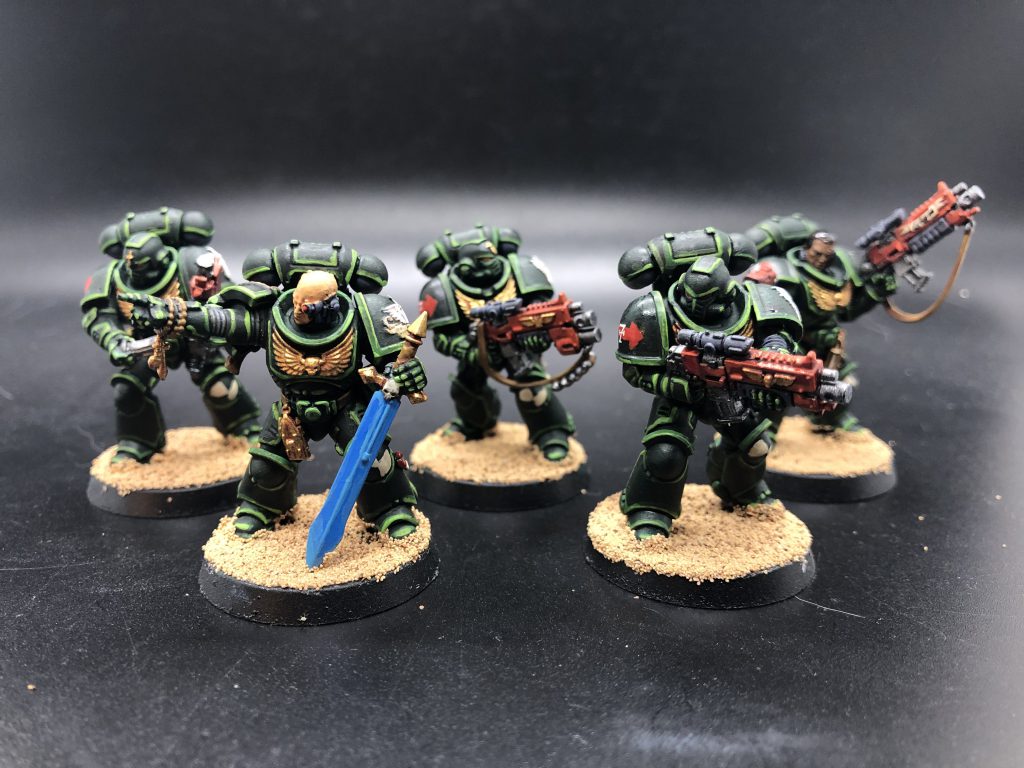
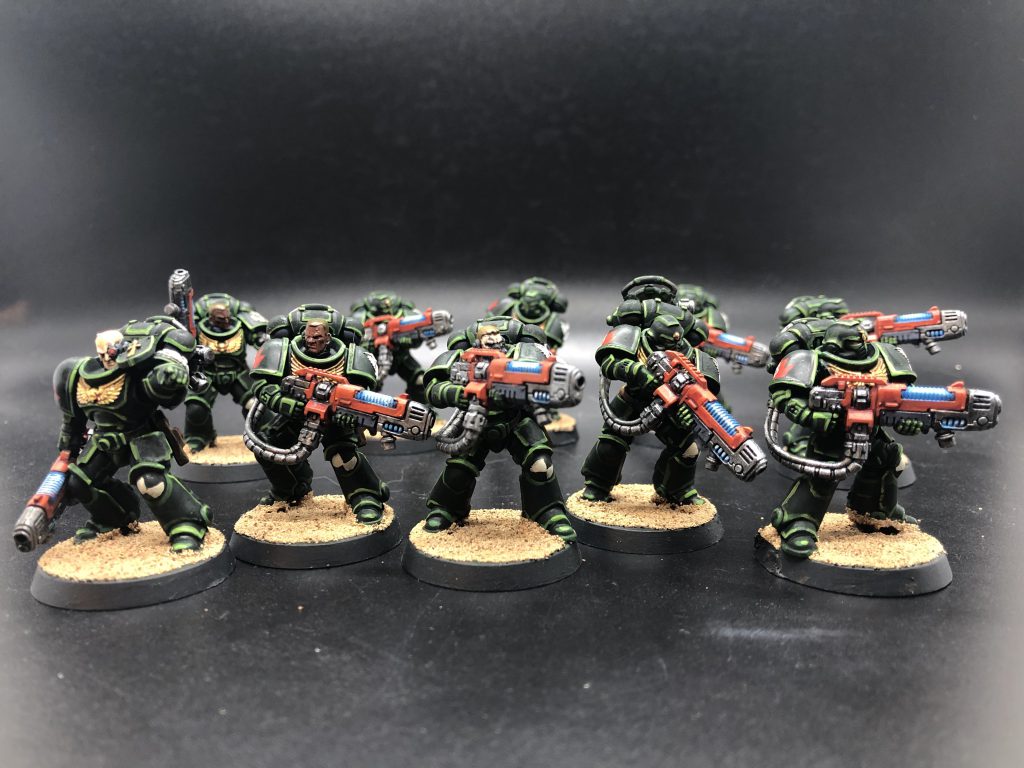
Initially, I started with a pure Deathwing army (which you can find my painting method for here), but I did end up with most of a battle company worth of green ones, and a decent Ravenwing detachment eventually. I have two methods of painting them, with some overlap. The first is all using Vallejo Game Color paints, and the second, which doesn’t look as good but is much faster, uses GW Contrast paints for the armor and weapons.

Greg’s Traditional Method
- Prime black, always black.
- Basecoat the armor in VGC Dark Green, the gun casing and eyes in VGC Scarlet Red, and the metals (mechanical bits on the gun, swords, etc) and golds (chest eagles, sword hilts, etc) in whatever gets you there, it’s not really something I care about a lot. The joints in the armor, like the insides of elbows or the backs of knees, I like to basecoat in VGC Sombre Grey – previously I’d done these in metal, but I think I like the black-grey look better.
- Washes. I use two, mainly: Nuln Oil on the metal, grey, and green, and Agrax Earthshade on the gold and red. At this point the greys are done – the two-step of Sombre Grey and a heavy black wash gives a nice rubberized kind of look and I’m honestly not aiming for Golden Daemons here, so it’s Good Enough.
- Go back over the basecoats on the greens and reds, to bring those back up a bit. The green I use the same VCG Dark Green, which I don’t think is quite dark enough without the wash on it, but on the red i switch to VGC Bloody Red. Leave a bit of shade in the recesses, but cover over most of the raised or flat bits.
- Highlights! Your call what you use on the golds and metals, but typically one shade brighter than whatever you did for the basecoats. Highlight the armor with VGC Scurvy Green, and a second highlight in VGC Scorpy Green if you’re a more ambitious painter than I am.
- Last step, which is more washes, which I usually do after the highlights because I tend to over-apply them, and this helps pull everything together – Carroburg Crimson on the gun, and Athonian Camoshade on the armor.

Greg’s Contrast Method
This is really a hybrid approach, because I initially didn’t want to buy too many shades of Contrast until I had a chance to try it out. The metals, golds, and armor joints are actually exactly the same as above, and I don’t usually highlight the Contrast armor, though I really should and I think it would help a lot.
The fact is, I’ve never been happy with my highlights, and I’m not confident in my ability to get them right, so a lot of times I just don’t do them, because it seems like a dicey proposition to put in more work to make my models look worse.
- Prime white, always white. Technically you’re supposed to use the Contrast primers for this, but it turns out Corax White works basically fine.
- Paint the armor Dark Angels Green Contrast. I like to do one thick coat, with a second thinner one in spots to even things out – two coats tends to clobber all the variations out and look like just straight Caliban Green again, and one seems to have thin spots and pooling.
- Paint the gun in Flesh Tearers Red Contrast.
- Paint the metal/gold, wash it black/brown, then highlight with a slightly-brighter metal/gold. Paint the joints in the armor grey, then wash them black.

This article is part of a larger series on how to paint Dark Angels space marines. For more on painting Dark Angels, you can return to that series by clicking this link.

