This article is part of a larger series on how to paint the Death Guard. To return to the parent article, click this link.
The Death Guard are one of the notable Chaos Space Marine factions known for changing their color scheme pretty dramatically between the Horus Heresy and the 41st millennium. Specifically, while they still incorporated green in their scheme, their armor was primarily white or cream-colored – though notably often stained and grungy with the dirt of their brutal battles.
In this article we’ll look at a method for painting Heresy-era Death Guard. It’s worth noting that this scheme still works very well and can be very striking on 40k Death Guard, and it’s pretty common to see white Death Guard on 40k tables. This scheme is pretty easy to paint, and similar to my 40k Death Guard method follows a process of “lay down all your basecoats, then go nuts with washes and weathering.”
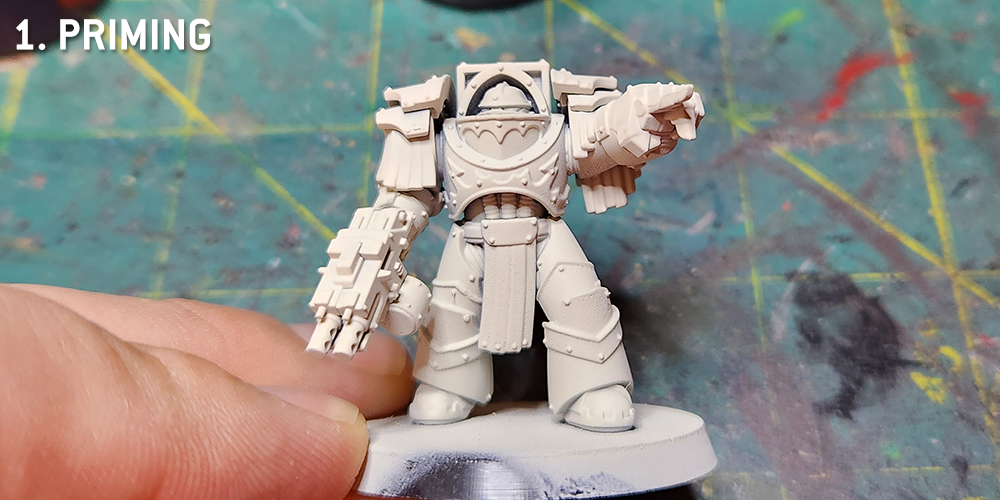
Step 1: Priming
While I normally prime things back it doesn’t make a ton of sense to do that for white armor. I’ve primed this mini with GW’s Wraithbone primer, which is basically the perfect color for these minis – I don’t actually want pure white here as I think “light cream” is a much better color to work with.
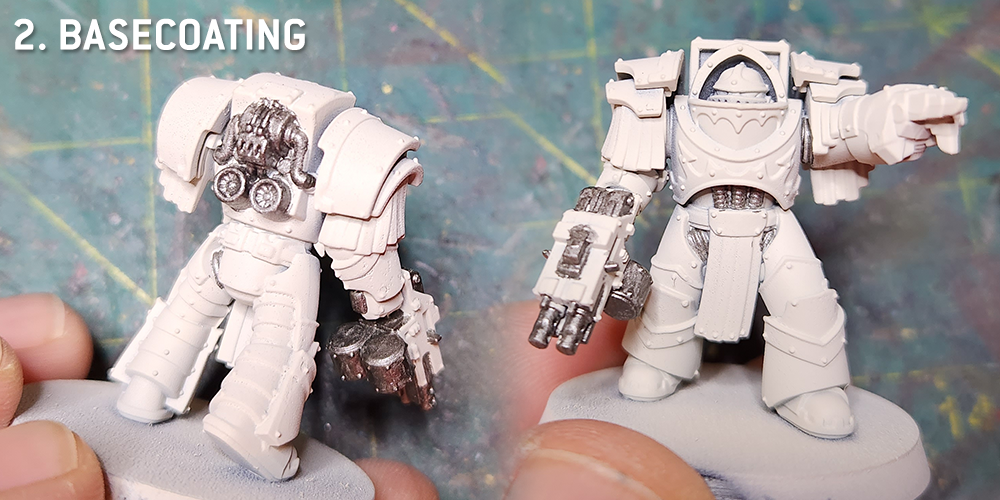
Step 2: Basecoating
Next comes adding more basecoats, and there’s really only two things in this step. The first is laying down Leadbelcher on the metal bits, and the second is doing any cover-ups/fixes on the armor using GW’s Wraithbone paint – though in my case I used Reaper Polished Bone and that did just fine. This is also probably the stage where I’d do some highlights if I were so inclined, using Reaper Pure White to edge highlight the cream-colored plates. I decided not to however, as my plan was to just sludge the model up later and those would give off the wrong vibe.
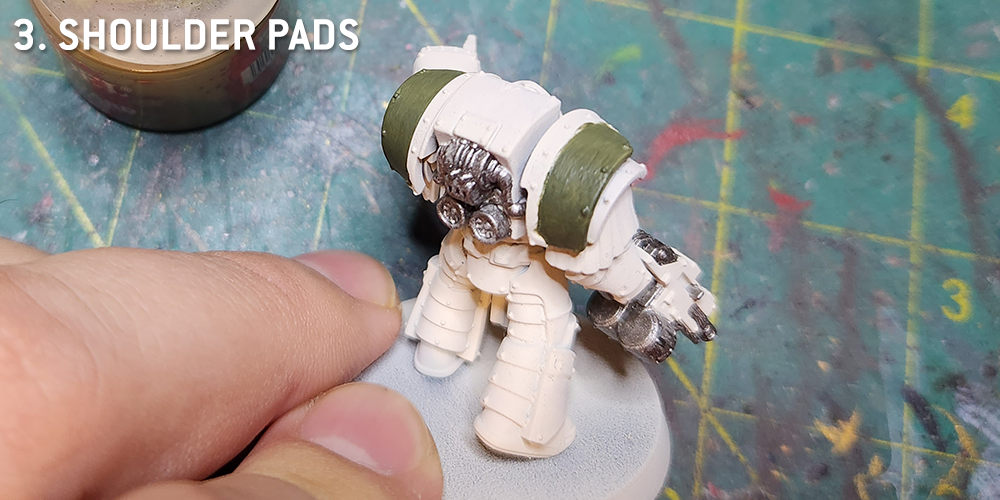
Step 3: The Shoulder pads
The Heresy Death Guard guys had green shoulder pads. This is a quick process that mirrors how I paint the green on my 40k Death Guard – I lay down a layer of Castellan Green, then blend that up to Death Guard Green. I’ll edge highlight this later with Ogryn Camo.
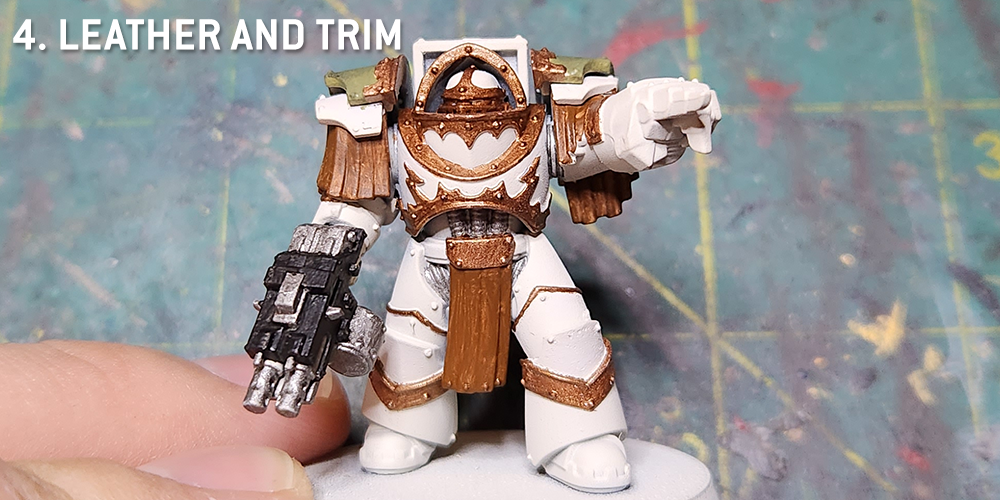
Step 4: Leather and Trim
It’s time for the rest of the basecoating to go down here. I paint the trim Balthasar Gold – This is to give it a more bronze look. Then I painted the leather strips with Mournfang Brown. I also painted the casing on the bolter at this point, starting with Abaddon Black and highlighting that with Corvus Black. I’ll later come back and edge highlight that with Mechanicus Standard Grey.
Step 5: Washes
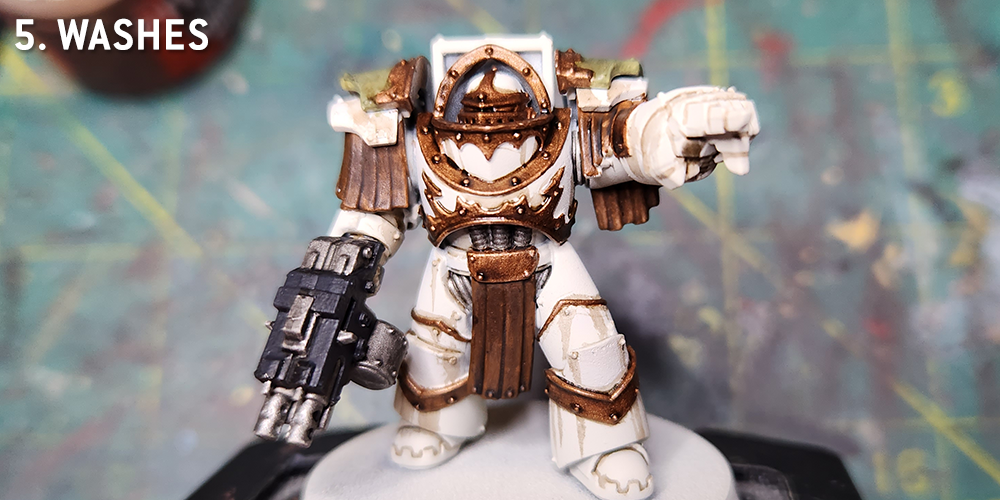
I use two washes on this model, but this is the first step. Using a small brush I paint Agrax Earthshade into the cracks and recesses of the model to give the panels some definition – you can see this most easily on the feet in the photo of the model above. Then I liberally shade the leather and trim parts with Agrax and add some drips and weathering from the model’s rivets, fouling up the white armor a bit. At this stage I also wash the metal/Leadbelcher bits with Nuln Oil.
Step 6: Weathering and Final Details
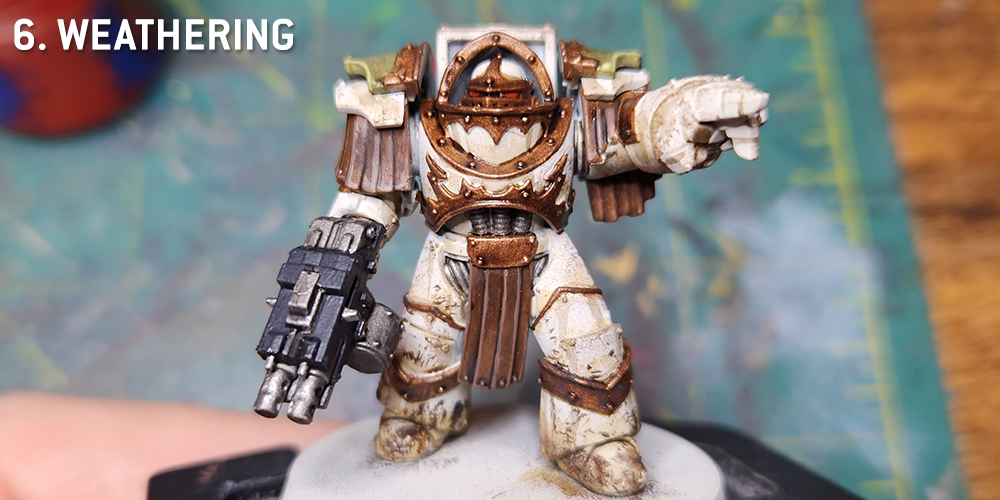
The bulk of the remaining work is weathering. Before I do this I’ll pick out some details – I paint the eye lenses with Mephiston Red and highlight that with Evil Sunz Scarlet – and I edge highlight the shoulder pads with Ogryn Camo and the trim with Retributor Armour. And I pick out the rivets with Runefang Steel.
But after that it’s weathering. I start by dabbing/sponging the bottom parts of the model with Typhus Corrosion, then do a very light drybrushing of Typhus Corrosion over other parts of the model. This is definitely light touch, as I don’t want to go too crazy but I do want lots of stained edges. After that’s done I’ll add some additional washes with Seraphim Sepia, which isn’t nearly as harsh on the bone color and works well for larger panel parts like the lower parts of the model’s legs.
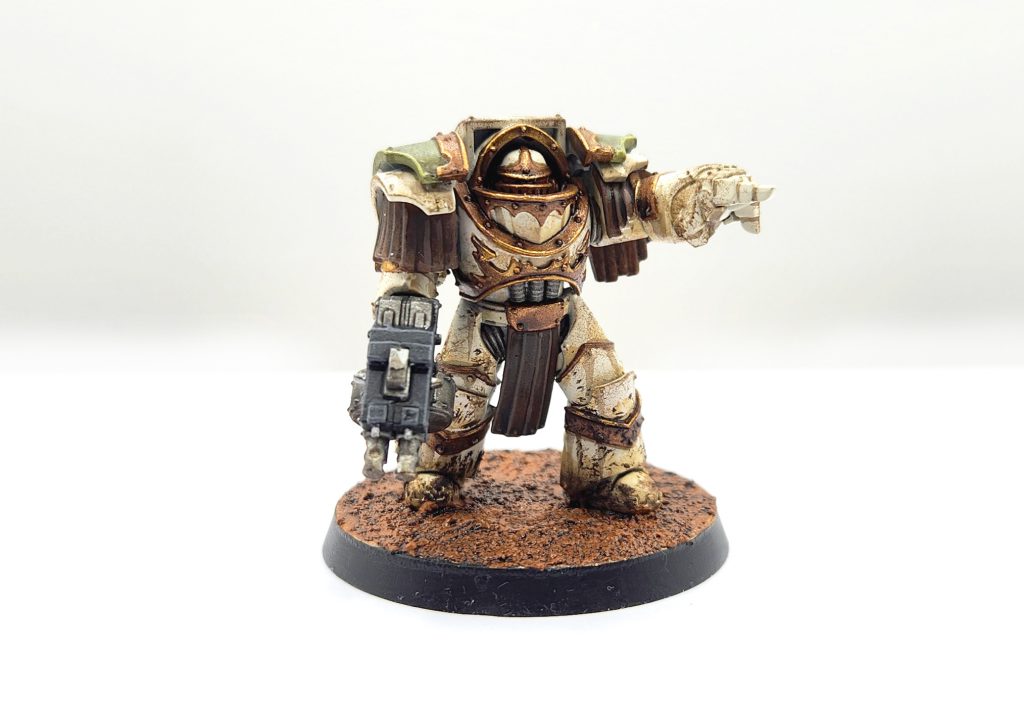
I ended up basing the model with some Blackfire Earth texture paint washed with Agrax Earthshade. It’s not as dark as I’d have liked but I had it on hand and it conveys the notion of “muddy battlefield” well enough. This scheme came out very well and was pretty easy to paint, marking it right in that sweet spot for me of “good results that don’t require too much work to be something you could do for an entire army.”
This article is part of a larger series on how to paint the Death Guard. To return to the parent article, click this link.

