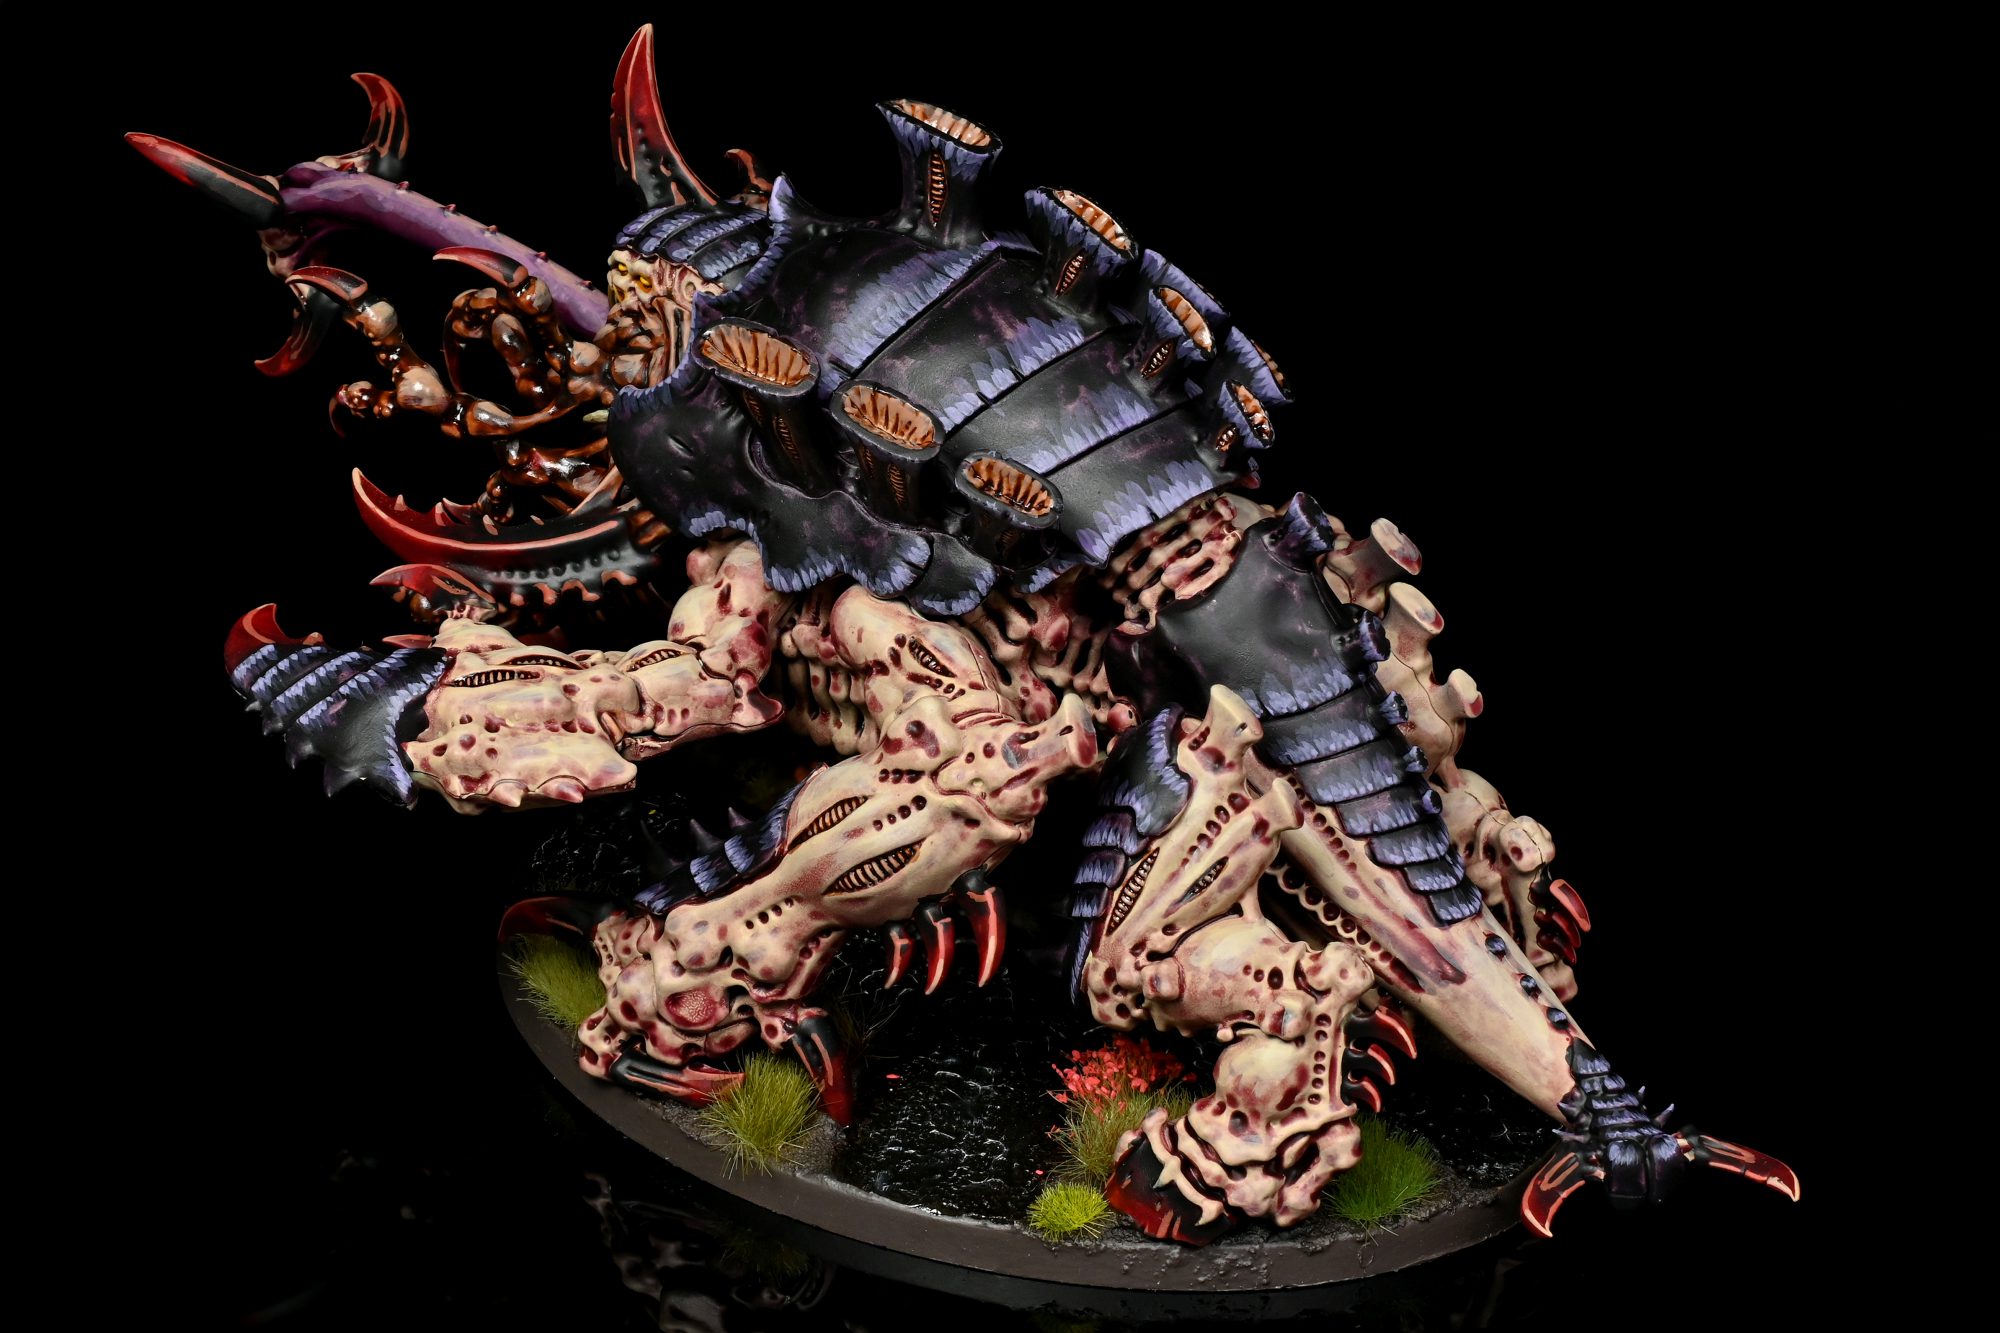
How to Paint Everything: Tyranids

In our How to Paint Everything series, we take a look at different armies of the Warhammer universe, examine their history and heraldry, and look at several different methods for painting them. In this article, we’re looking at the dreaded hive fleets of the Great Devourer – the Tyranids. 

Who Are the Tyranids?

Hailing from the dark intergalactic void beyond the galaxy, Tyranids are (relatively) recent arrivals to the grim darkness of the far future from an in-game timeline standpoint, having only really arrived in the 41st millennium when the Imperium made its first official contact with Hive Fleet Behemoth. Following that contact, the forces of the Great Devourer have spread across the galaxy, razing entire worlds and scouring them of live, devouring their biomass and consuming their natural resources. Tyranids are a composite species that devour and recombine the genetic material of their prey to evolve and produce new organisms. Tyranid creatures are linked by a single, shared hive mind whose instructions are communicated through its larger organisms, each of which acts as a synapse for its shared will. Tyranid technology is primarily made of bio-constructs and symbiotic organisms that act as weapons. Tyranid ships are massive, living organisms capable of traversing the interstellar void. The Tyranid hive mind is a powerful psychic entity, causing disruptions and disturbances referred to as “the shadow in the warp” wherever it goes. As the hive fleets have been snaking their tendrils through the galaxy, they appear to be homing in on Terra, drawn to the beacon of psychic might known as the Astronomicon. It has been theorized that the existing hive fleets are only a vanguard acting as scouts for a greater fleet. If that’s the case then there may be little the galaxy can do to stave off destruction at the hungry maw of the Great Devourer.

Where to Read More

Tyranids don’t have any speaking characters and so as a result tend to make much better faceless, nameless antagonists in 40k lore. That said, they’re still fun to read about as an ineffable horror from beyond the stars.
  • Ravenor: The Omnibus – Inquisitor Ravenor’s journeys at one point take him into contact with the Tyranids. Specifically the third book in the Omnibus, Ravenor Rogue.
  • Warriors of Ultramar – The second book in the Uriel Ventris saga details a Tyranid attack on Tarsis Ultra. The Ultramarines are no strangers to warfare against the Great Devourer and this one is an entertaining read.

Painting Tyranids

The bug-like nature and segmented carapace of Tyranids lends itself to a number of different techniques and approaches. They take well to washes and Contrast paints as well as drybrushing. If you’re looking for further inspiration, we recommend looking at photos of bugs, particularly beetles and caterpillars, or shellfish.

Hive Fleet Leviathan – Rockfish’s Method

You might have seen this scheme recently in either my Dimachaeron HTPE or my army showcase a few months ago, either way as a quick intro this was one of the two armies I was initially considering picking up back when I started in 2017 and then got sucked into when their 8th ed codex dropped. Since then its gone through a few rounds of expansion and is one of my largest armies!
Haruspex. Credit: Rockfish

Part 1 – Base coats and washes

I start with a base coat of Ushabti Bone through my airbrush before a wash in Carroburg that roughly covers the whole model but is intended for the pale flesh. Then its just running around to do all the other base coats and washes:
  • The many claws and talons are Flesh Tearers
  • The carapace is just Shyish
  • The odd fleshy recesses start with Fyre Slayer and then get another coat of Carroburg.
  • Steel Legion and Skeleton Horde for the teeth
  • Screamer and Druchii for the tongue
  • Yriel and Casandora for the eyes
Its helpful to start with the talons so you can later glaze them with heavily thinned Black Templar in parallels with the rest of the base coats. You can often get away with one or two thin coats for the majority of the small claws but for the main claws I would do maybe 3-4 really thin coats to get a somewhat less extreme transition.

Part 2 – Initial work on the base

While this could wait till later on, I was going to go to bed at this point and I could leave the paste to dry overnight so I did it a little ahead of schedule. The earth is done with a couple of texture paints, Stirland Mud and Battlemire with the thinner Mud being applied in a weaving path as the river bed and then the thicker Battlemire as the river banks, the next morning I washed the banks with Agrax and the bed with Wyldwood.

Part 3 – Highlights

I prefer to work inside out with the smallest details first because its easier to hide errors a later highlight, the detail highlights are often done in a few thin coats of the following colours:
  • Teeth get Zandri and Ushabti for highlights
  • The eyes are highlighted Yriel and Flash Gitz, I usually skip pupils on the head eyes but I like them on guns and for that you can use either Black Templar or your choice of straight black
  • Cadian and Kislev on the fleshy bits
  • Emperors Children on the tongue followed by Kislev
  • Squig Orange then Kislev for the claws and talons
  • I drybrush the river banks with Steel Legion Drab
With all the smaller highlights out of the way we can turn to the large area ones, the skin is just Ushabti and Screaming Skull in large soft almost glaze area highlights, the largest areas might get a couple of coats of each highlight in successively smaller areas but that’s optional really. The carapace is highlighted in Genestealer and Dechala, in rough little strokes starting a bit into the panel and moving to the edge.

Part 4 – Water effects and finishing off the base

The river bed gets filled with Vallejo Still Water, then I apply Transparent Water paste as little ripples in the river once that dries. I also take this opportunity to make the little fleshy recesses and maw a bit shiny with some gloss varnish. Once the ripples are dry I add a bit of white water/froth by drybrushing White, then I paint the rim Dryad Bark and cover the river banks with a assortment of Gamers Grass tufts:
  • 6mm Burned Grass
  • 6mm Dry Green
  • 2mm Dry Green
  • 2mm Moss
  • 4mm Green
  • 6mm Mixed Green
  • 6mm Strong Green
  • Spiky Green
  • Dark Green Shrubs
  • A big pile of assorted flowers

Gallery

Here is the final model along with the Dimachaeron I did recently.

Hive Fleet Kraken – PierretheMime’s Method

When I first took up the hobby somewhere around 2004, one of the first things I did after identifying what faction spoke to me most was what colors I was going to use. Flipping through the Tyranids 3rd edition I landed on Hive Fleet Kraken as the most “natural”-looking of the main fleets. While I’ve certainly expanded my collection in the almost two decades of playing with these space barbies, Tyranids remain my primary faction.
Credit: PierreTheMime
I take a pretty traditional approach to my bug-painting, using mostly layered Citadel acrylics and a wash, which is why you’ll find my instructions for both areas are fairly similar. All models begin primered black. Here’s my current recipe for Hive Fleet Kraken friends: Skin Basecoat of Balor Brown, raise most areas with a mix of 50/50 Balor Brown/Ushabti Bone, further raising larger areas with 25/75 BB/UB. Using heavily watered-down Evil Sunz Scarlet, line the “vents” and connective tissues between segments, staining them red (careful not to let this run or get too dark). Hit the entire thing with a wash of Agrax Earthshade and allow to dry after ensuring no pooling. Go back over raised areas with slightly watered-down Ushabti Bone, gently applying some layers of brighter skintone but take care not to over do it. Repeat this process a few times, reducing the area each time bring out bulges such as at the thighs and arm muscles/sockets. Highlight the edges/small bulges (like the “finger” joints) with a 50/50 mix of Ushabti Bone and Wraithbone. Finally, give any prominent edges one last go-over with a slightly watered down Wraithbone. Chitin Basecoat of Wazdakka Red, raise most areas with a mix of 50/50 Wazdakka Red and Evil Sunz Scarlet, further raising larger areas with 25/75 WR/ESS. Hit the entire thing with a wash of Agrax Earthshade and allow to dry after ensuring no pooling. Go back over raised areas with Evil Sunz Scarlet, repeating a few times in smaller, higher areas to raise up the color. Edge highlight the plates with a 50/50 mix of ESS/Fire Dragon Bright, possibly going over larger plates in raised areas a few times to make them pop. Finally, go over the recesses in the plates with your wash very delicately with a fine brush, ensuring you have a nice solid line delineating the two. While you’re at it, go spot-check the model and see if there’s any other places where a detailed application of wash might fix errors/deepen the look. For eyes/toxin sacs, etc., I use a basecoat of Warpstone Glow and a dot or two of 50/50 WG/Wraithbone. There’s usually very little to these spots. Wash the edges around the eyes if you can, but the area is tiny so take care not to swamp it. Here’s a quick example of the layering process. While I described the skin and chitin separately above, you’ll see that I do both at once which allows me to clean up errors more quickly. The following was probably done a little quicker than usual, just to take the photos in one go, but you’ll get the idea: Here’s a few more examples of the same process on different Tyranid models:
Credit: PierreTheMime

Hive Fleet Behemoth – Bair’s Method

This is a very simple scheme that I’d put together on the basis that I’d be painting a LOT of Tyranids and didn’t want it to take long while looking decent on the table.
Credit: Zach Bair
Primer: Mephiston Red

Paints

  • Mephiston Red
  • Evil Sunz Scarlet
  • Abaddon Black
  • Lothern Blue
  • Baharroth Blue
  • Morghast Bone
  • Screaming Skull
  • Warpstone Glow
  • Waystone Green
  • Xereus Purple
  • Agrax Earthshade
  • Nuln Oil
Credit: Zach Bair

Steps

Skin:
  1. Spray Mephiston Red
  2. Drybrush over in Evil Sunz Scarlet
  3. The cord-like parts in Xereus Purple
  4. All-over shade of Nuln Oil
Bone Weapons/Teeth:
  1. Morghast Bone as a base
  2. Edge highlight with screaming skull
  3. Agrax Earthshade applied lightly
Carapace:
  1. Paint over in Abaddon Black
  2. Using a thin but preferably long brush lightly paint on Lothern Blue in single strokes starting from the edge of the armour section and ending where you want it to. Do this over and over so that the edges of the armour are more blue and the further up the carapace the lines get thinner. This is called feathering.
  3. Similarly, feather in some Bahharoth Blue sporadically to add depth to the effect.
  4. Repeat 2 and 3 for each armour section, it feels tedious but you’ll get quicker at it and the look pays off!
Tongue and eyes (and guts if applicable):
  1. Paint in Warpstone Glow
  2. Ping over in Waystone Green

Hive Fleet Jormungandr – Skails’ Method

This scheme is based on the color and pattern of a black and yellow garden spider (argiope aurantia). It’s been pointed out that there is a close resemblance to the bugs in Starship Troopers as well! It’s also pretty close to the Jormungandr theme in Codex: Tyranids. I’ve done this as a test model for a potential kill team.
Tyranid Warrior. Credit: Skails

Method

Carapace Plates (and blades): Pattern was drawn in with black. (Left) Vallejo Bronze Fleshtone was used to fill in pattern. This paint is kind of thin so it took three or so layers to get decent coverage. It was still a little splotchy but that texture will be nice.  (Middle) My burnt umber ink mix (1:1 ink to matte medium + drop of flow improver) was watered down a bit and stippled on the lower edges of the yellow segments (any medium brown or contrast wyldewood could sub). Scale 75 Hyek Yellow was used to highlight the top edges of the yellow segments. (Right) The blades had thinned black paint painted on the ends, then a second smaller layer on the very ends. Finally a stipple of black into the yellow part. Black Skin: Black was painted on the torso and outer arm segments. (Left) Vallejo Model Color Basalt Grey was mixed with a bit of Model Color Prussian Blue for a chunky highlight on the black. (Middle) Vallejo Game Color Stonewall Grey with a bit of the previous mix was used for brighter spot highlights. (Right) Black washed into cracks and recesses. I used diluted black ink, but any watered down black would work. (This same process was done to the edges of the carapace plates and teeth too). If you want something closer to the Codex Jormungandr look, then skip the next part and just go with black skin. Grey Skin: Stonewall Grey was painted on the inner arm segments, tail, and face. (Left) This was highlighted with Vallejo Game Color Dead White. (Middle) Citadel Druchii Violet thinned with Citadel Lahmian Medium was washed into the lower facing recesses, then straight Druchii was stippled on ends of the grey segments. (Right) Gun: Citadel Screamer pink was used for the basecoat, and Bronze Fleshtone for the rounded bits. (Top) Druchii Violet was washed all over. (Second) Citadel Pink Horror as a broad highlight on upward facing angles. (Third) Citadel Emperors Children used for spot highlights. (Bottom) (Same process for tongue.) The tube on side of gun was painted with Pink Horror, then short lines of Emperors Children across top angles.

Hive Fleet Snagglepuss – PantsOptional’s Method

After spending most of 2017 painting Iron Warriors for Horus Heresy, I had a desperate need for colors other than dirty gunmetal, black, and hazard stripe yellow. The teasers for the 8e Tyranid Codex had just started coming out around the time that I was looking for something else to paint, so clearly this was destiny and not simply that I was easily swayed by marketing. Careful consideration bore out Hive Fleet Snagglepuss, which was designed both to be easily painted and to help identify homophobes at my local store. 
A Tyranid Broodlord model
Broodlord of Hive Fleet Snagglepuss
Skin The entire model starts with a white primer and a thin layer of white over that. The skin is an incredibly simple two coats of Seraphim Sepia over the white. I don’t know what you call those weird ribbed bits that seem like they’re opened up under the skin layer, but I call them “Screamer Pink with a Druchii Violet wash.” That same pink-purple also applies to any other odd fleshy/membrane bits such as spore cysts, adrenal glands, or wing membranes as well as tongues. Teeth are a pretty standard Ushabti Bone and usually get covered in Blood for the Blood God, while eyes are Moot Green with the larger eyes getting a slight hint of Lamenters Yellow around their edges and a cat-style pupil done in black Micron pen.
Carnifex of Hive Fleet Snagglepuss
Carapace This is what I wanted to shine. After comparing various options I settled on a couple of layers of Emperor’s Children with Carroburg Crimson lining the joins between carapace plates and other recesses or nicks. The edges and ridges of the plates get a line of Fulgrim Pink and I use a reasonably fine brush to start making thin triangular lines leading to the plate edge much like Rockfish described above. After this, Synapse creatures get a line of White Scar running down their spine ridges to serve as a quick visual guide. Weapons I didn’t want the weapons to distract from the main colors so any claws, guns, hooves, and other fighty bits are a base of Skavenblight Dinge with a highlight of Stormvermin Fur and recess shading of Agrax Earthshade. Any carapace pieces like on fleshborers get the pink carapace treatment, tendon-y areas get the pink-purple, and Moot Green for any eyes. Basing Like everything else, the bases are pretty simple. There’s a layer of Abbadon Black thrown down over the primed base and around the rim, then that gets covered by Astrogranite Debris. After that dries, I put down a layer of Agrax Earthshade all over the base, and follow it up with a drybrush of Tyrant Skull applied lightly enough that the raised areas pop but not so much that it makes the whole thing look like dirty bone. Contrast?! If I had to do it all over again (and with the advent of the 9e Codex I may just have to add some new bugdolls) I would probably start with a Wraithbone spray, Skeleton Horde on the skin, and Volupus Pink in the tendon bits. It probably wouldn’t save too much time but frankly I blew through a truly stupid amount of Seraphim Sepia making these and I’d love to avoid that again. I haven’t really experimented with the Contrast pinks outside of my beloved Volupus but I don’t think any of them would really work to provide the same shock pink. In summary, Contrast is a land of contrasts.

Hive Fleet Dendrobatidae – Primaris Kevin’s Method

After my laborious but fun scheme with my Regal Skulls Space Marine army, I wanted to dive into the realm of Tyranids and make some bugs. My logic for this was twofold. First, I like big bugs and I cannot lie. Second, it should be easy to come up with a quick scheme that looks good but doesn’t take much time. After extensive exploration, tweaking, and getting really helpful feedback from my friends I came up with a highly colorful and saturated scheme reminiscent of a poison dart frog. Hence the name Hive Fleet Dendrobatidae. This scheme was first featured with Rippy the Ripper, and while it looks nuts the core concepts are fairly easy to execute. They would also likely translate pretty easily to another scheme if you wanted to, such as creating a Kraken scheme with GW Blood Angel Red.
This was supposed to be simple and fast. Credit: Kevin Genson
Preparation The first thing I do is assemble the model into components, remove any mold lines I find, and apply Green Stuff to fill in gaps as well as the eyes. The entire model is undercoated with GW Wraithbone spray and then a full wash of Army Painter Soft Tone is applied. The model is then drybrushed with Vallejo Game Air Bonewhite (I specifically use the air paint because it’s thinned and produces a nice glazing effect) followed by a regular white paint.
Work in progress Exocrine showing the washed and drybrushed Wraithbone undercoat as well as the base after painting.
Body The blue bits are two coats of GW Talassar Blue thinned to a 50/50 consistency with GW Contrast Medium. The combination of the washed and drybrush undercoat with the thinned Contrast paint produces a lot of depth and variation. Try to be neat if you can as you’ll want to clean up any overages with Bonewhite before you move on to the rest of the model. Carapace The yellow carapace pieces are a single layer of Liquitex Professional Yellow Orange Azo over the washed and drybrushed Wraithbone undercoat. I use this product a lot thanks to its extensive pigment content, and because it’s my favorite color. I line the recesses with AP Strong Tone if I want more of a contrast, but it depends on the model and circumstances. Be careful with the ink pooling in the crevices as it will turn orange if it gets too thick. The dot patterns on the carapace are made using LP Carbon Black. I start by depositing a few drops in a random pattern and then drawing the drops together while the ink is still wet. I am relying on surface tension to get the pattern and keep things tight. Pink Bits The fleshy bits like the tongue, gums, and those weird organic vent things start with a white undercoat and then a single layer of LP Magenta. I then tone things down with Army Painter Purple wash. I may add some blended magenta and white if I want to emphasize a particular feature or provide a bit more contrast. Talons The claws start with an undercoat of GW Blood Angel Red contrast. I then apply a layer of LP Carbon Black ink to the base, and use a mixture of LP Pyrrole Red and Carbon Black to slowly wet blend a transition. The LP ink products are very good for wet blending, as they can reactivate the layers underneath and come together nicely when you apply several successive thin coats.
I’m also completely incapable of leaving well enough alone when it comes to the models themselves. Credit: Kevin Genson
Base I use GW Agrellan Earth to provide some texture and then undercoat with Wraithbone. The base color is two coats of GW Snakebite Leather. I then wash it with AP Strong Tone and then drybrush it with Vallejo Model Color Hull Red. The rocks are pieces of oyster shells. I started with a layer of Contrast Baslicanum Grey and drybrushed with VMC Gloss White. Different techniques are applied for different plants, mostly consisting of Contrast paints. The green leaves are from a GW kit and are painted with GW Warp Lighting with the stem painted in a line of GW Ork Flesh. The blue fungal pods are printed on a resin printer and start with a base of GW Aethermatic Blue with some AP Soft Tone on the base and some green contrast tones for detail. The whole base is finally rimmed in Badger Stynylrez Black.

Lenoon’s Gross Bruised Method

Genestealers were the first bit of 40k lore that I really dived into as a young ‘un which probably did me more harm than good. Since then I’ve built up various snatches of hive fleet with a distinctly vanguard organism feel. The strictly Tyranid part of the force is allied to my GSC, and examines what happens to a hive fleet when it fails in taking over, languishing in the literal doldrums as it gets sickly and weird in the underhive. These guys are Age of Sigmar Bladegiests and Ghouls with various Genestealer, Hormagaunt and GSC acolyte bits crudely welded on with big messy blobs of greenstuff. Everything is given a spray of wraithbone to start, and then a heavy wash of druchii violet. Before that dries, take a sponge and randomly dab bits off – not just off the top, but getting the corner of the sponge into the crevices as well, letting it go where it will to really pull the wash unevenly.
I now realise I should have made one with two heads
The “normal” bits of skin then get a very watery layer of 1:1 Druchii violet and Pallid Wych flesh, and an extreme highlight of Pallid Wych flesh. Any mass of scar tissue or area I want to be a bit more disgusting will get a 1:1 mix of Kislev flesh and Ratskin, then pure Kislev and roughly applied lines and blobs of 1:1 Wych and Kislev.
I mean a *Heavy* Purple wash
After that comes the fun part. On the colour wheel Green/Pink and Yellow/Purple more or less form complementary pairs, and the flesh wash over Pallid Wych ties it together to give a very “natural” look of shifting tones where your brain fills in a lot of textures and details that you’re not picking out deliberately. So take your mankiest, oldest, stickiest washes in flesh, yellow, red and green. Add the green to the deeper crevices, then water down until it’s barely there and add a glaze over any large areas of skin. Before that dries, blob on some of the yellow, red and flesh (I used Biel-Tan Green, Flesh Wash, Baal red and Lamenters yellow glaze). The watered down green should spread this unevenly, giving you a sickly, bruised look. It’ll mix in places and pool in others and generally look disgusting. Once that’s dry, carefully pick out highlights if you fancy – I looked again at faces, head ridges and fingertips. Hitting tongues and interior ribbing with a strong red tone (Dark Flesh then Khorne Red), a violet wash and blood effects and the occasional talon with sepia and flesh tones finishes them off. You can scale this up well to the big tyranids, but watch out for pooling washes on large chitin panels. For the bases, the rusted, corroded and shitty underhive look is a simple boltgun metal base layer with watered down layer of typhus corrosion is finished with stippled Ryza rust and liberally dolloped on nihilakh oxide. Ta daaa! Some disgusting Tyranids spawned from a polluted gene pool.

Hive Fleet Drybrush – Pendulin’s Method

Why waste time layer lot paint when few drybrush do trick?
Hive Fleet Kill Team
Hive Fleet Kill Team. Credit: Pendulin
This is going to be a fast, rapid fire painting guide – perfect for batch painting a million little bugs. It’s also easy to tweak, and hard to screw up. Good stuff. I also don’t have any in-progress pictures because I have forgotten the face of my father.
Tyranid Hormagaunts
Tyranid Hormagaunts Credit: Pendulin

Prime

  • Black – Rattlecan, airbrush, whatever.

Tan/Green Areas

First off you need to figure out which areas will be tan/green, and which areas will be red. For myself, I paint the claws and swords to be red, but it’s up to you. For all the non-red area (i.e. the tan and green parts) do this:
  • Drybrush Stormvermin Fur – Drybrush this relatively heavy all over the model.
  • Drybrush Steel Legion Drab – Go a little bit lighter with this drybrush, but it’s still all over the model.
  • Drybrush Karak Stone – Drybrush all over, but really hold back on this paint, and don’t get a ton on the model.
  • Drybrush Ushabti Bone – A very light drybrush, even lighter than before, focusing on sharp edges and corners. You still want to hit the rest of the model, but be very, very gentle with it.

Red Areas

I like to paint claws and swords to be red. At this point, they should still be black. If you got any drybrush flecks of paint on them, do a quick cleanup with some black paint. Once that’s taken care of do the same lighter-and-lighter-drybrushing technique as before, but this timewith the following colors:
  • Korne Red
  • Mephiston Red
  • Evil Sunz Scarlet
  • Wild Rider Red
Once again, by the last color you want to be doing the faintest and lightest drybrushing you can. If you really want to make it pop, finish it off with either a razor-thin edge-drybrush of Fire Dragon Bright.

Cleanup and Tan Areas

Going back to the tan areas, if there are any red flecks of paint, do your best to cover them up now. Once that’s taken care of, give the tan areas a wash with Agrax Earthshade.

Green Areas

For me, I like painting the armor plates (including the head, back, and wherever else they appear on the model) green. For those was them with Biel-tan Green. Do a test spot first. If you find the color too bright, then try putting a bit of Agrax Earthshade on it before and/or after. This part is really a matter of preference, so adjust until you’re happy.

Fleshy Bits

Areas you want to be flesh colored, like sacs, goiters, or flesh tubes, give them a drybrush of Kislev Flesh and a wash with Reikland Fleshshade.

Eyes and Tongues

Same way of painting both of these: Mephiston Red followed up with some light highlights of Evil Sunz Scarlet. That does it! And while there are a good number of steps, most are just drybrushing with different colors. One technique to rule them all!
Genestealers
Genestealers. Credit: Pendulin

The Wrap-Up (with Tendrils)

That wraps up our look at how to paint Tyranids but there are a ton of ways to skin this particular hyper-evolved cat – Tyranids are great because they’re one of the most colorful and varied armies in the game, and let you work with all kinds of bright colors and “out there” combinations. As always, if you have any questions or feedback, drop us a note in the comments below or email us at contact@goonhammer.com.